
Click here to sign up for reminders when new blogs are posted.
Today we’ll be discussing RV winterization. If you have never winterized an RV, we’ll cover the main points to be aware of. This doesn’t replace watching the step-by-step winterization video on the channel (link at bottom of page), but instead should serve as an overview to winterizing.
The main goal of winterizing your trailer is to protect its plumbing system over the colder sub-freezing winter months. Generally, there are three parts to doing this. First, getting all of the water out of every place in the trailer so nothing in your plumbing breaks. Second, filling plumbing lines with RV antifreeze (or have zero water remaining should you choose the compressed air method). Third, removing any items that should not be left in the trailer off-season.
PART 1 – GET WATER OUT
Here are a few things to consider for the first part – getting all water out:
Get water out of your holding tanks. This includes the fresh tank, black tank and gray tank. Remember water expands when frozen, so it can break its containment if confined. You really don’t want water sitting on your black and gray tank exhaust valves over the winter.
Remove water from your low point drains. These are the lowest point of plumbing lines on the trailer and should be used to remove the water and either be fully empty or have RV antifreeze in the lines.
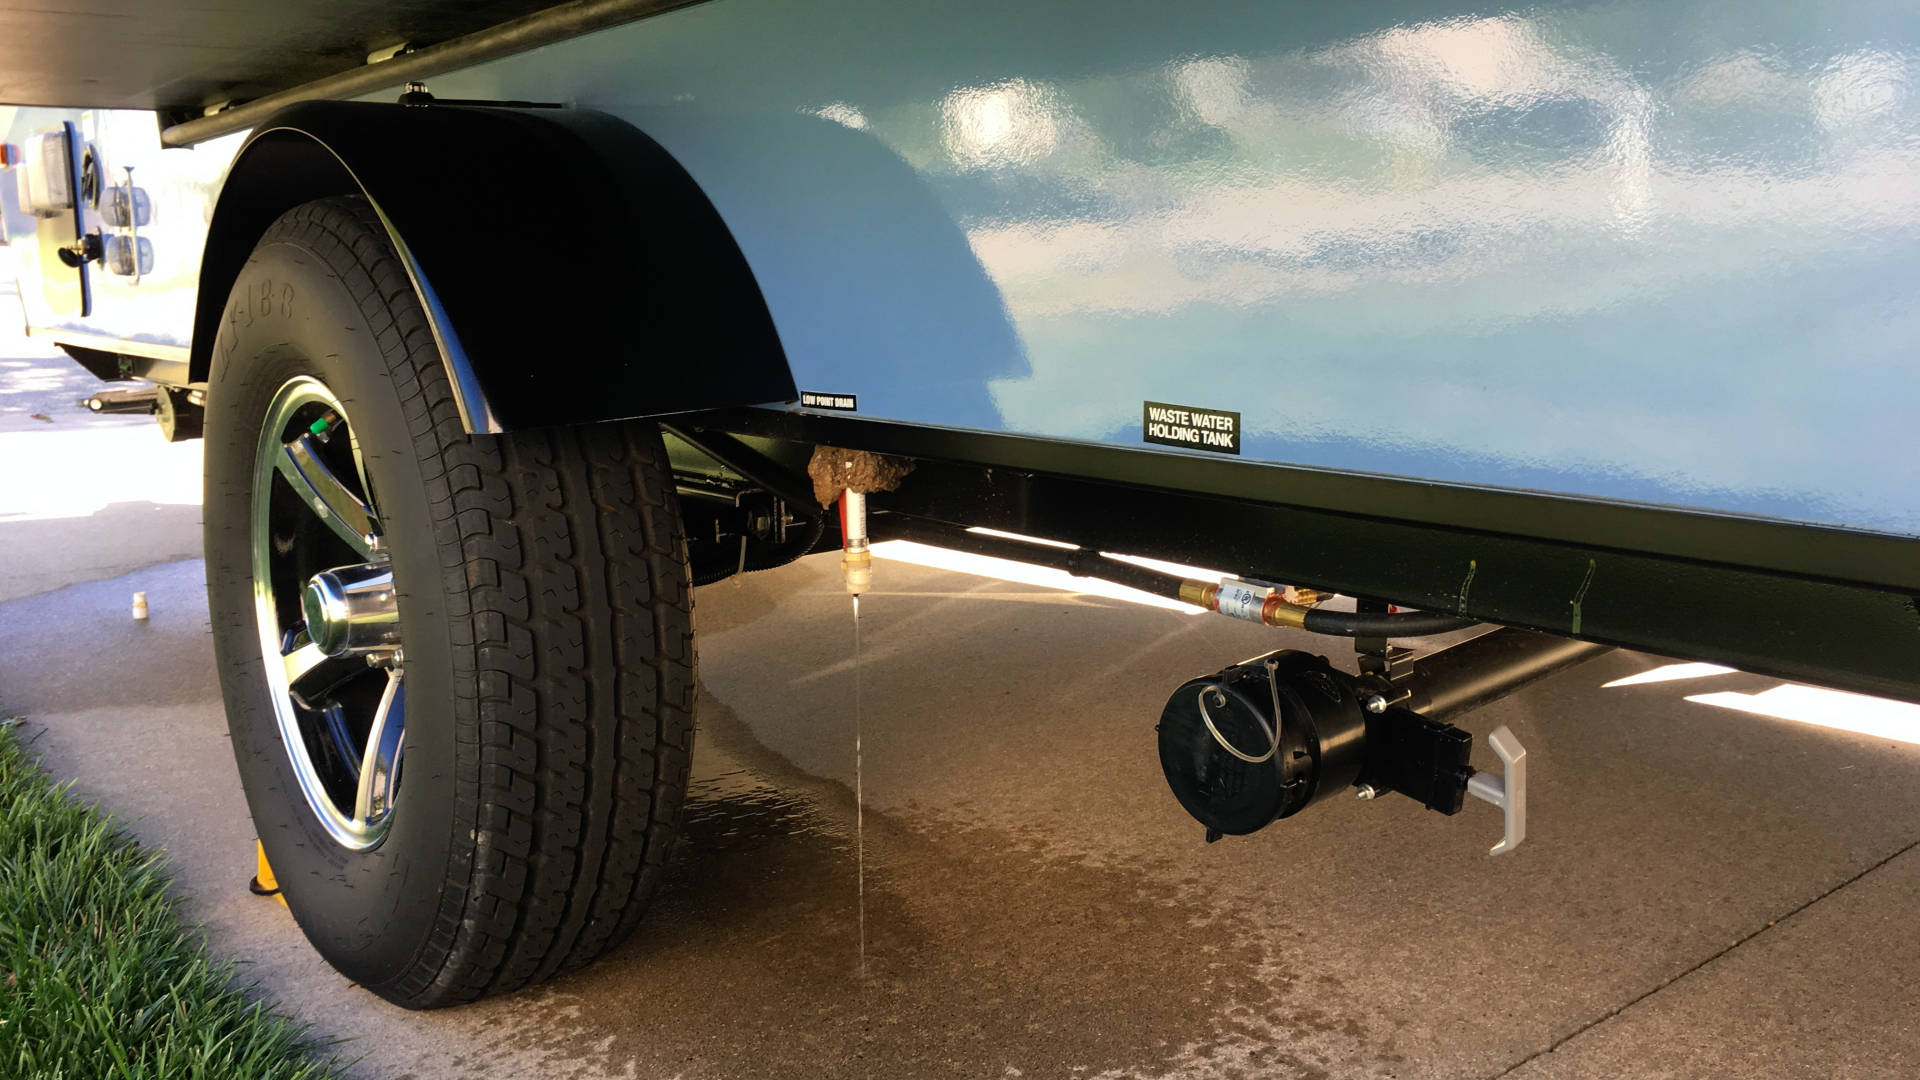
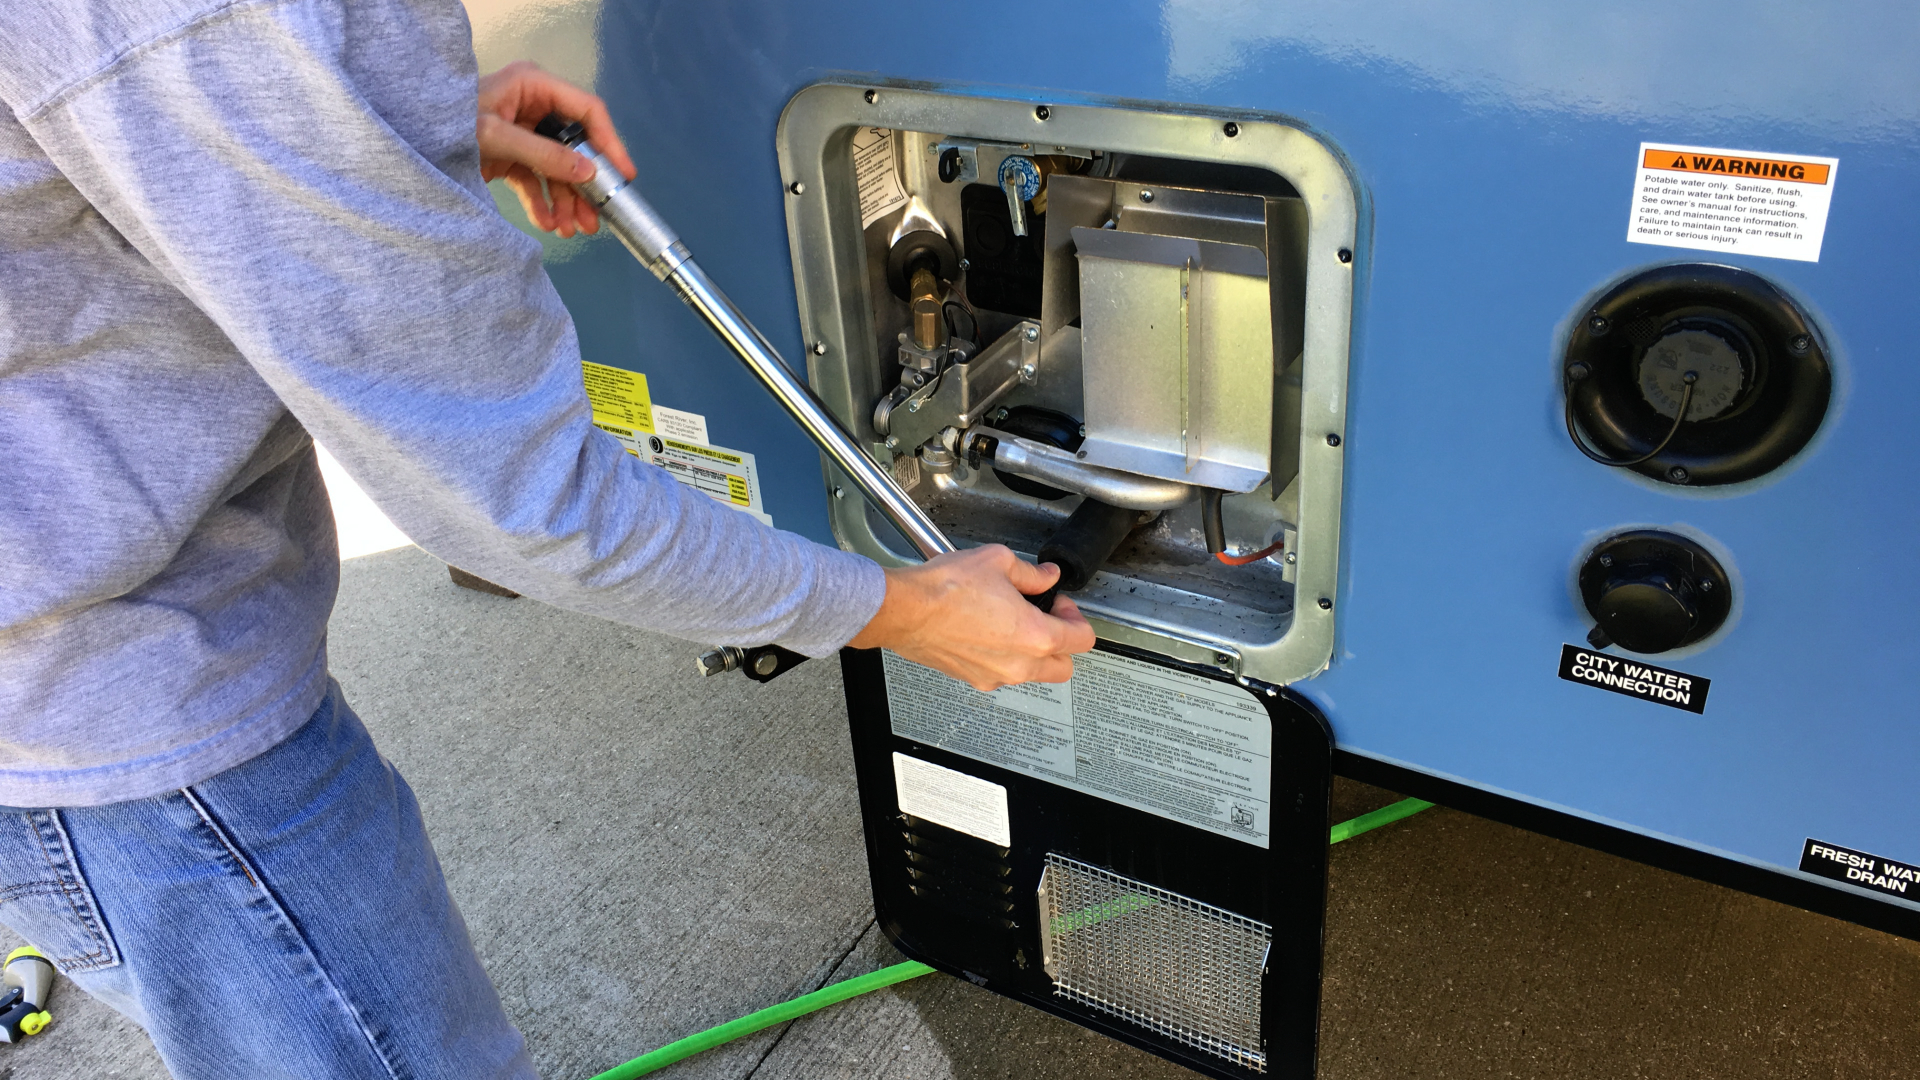
Get water out of your water heater/hot water tank. This tank needs to be fully drained and sprayed out. If a small amount of water remains, it has room to expand and usually won’t cause a problem.
Remove water from plumbing lines. A water lines need to be fully clear of water. You will need to use an air compressor to clear the lines or replace the water with RV antifreeze to keep the lines and connections from breaking.
Ensure water faucets are clear of water. Freezing water can cause real issues with faucets, showers (inside & out) and your toilet. Don’t forget the outdoor hose quick connect line as well.
PART 2 – GET ANTIFREEZE IN
The second part to the process is to inject RV Antifreeze (pink food-safe) into the plumbing system. Here are a few steps:
Bypass the hot water heater tank. If you don’t do this, you will fill the entire hot water tank with RV antifreeze. There just isn’t a reason to push RV antifreeze into the hot water tank off-season once it is drained. All it will do is waste several gallons of antifreeze. Bypassing the tank will ensure RV antifreeze gets to where it needs to reside in the plumbing lines.
Change the water pump intake valve to pull antifreeze into the system. There is usually a valve to switch the water pump from drawing from the freshwater tank to drawing from an open hose (some RVs require a kit with a small hose attachment). Once you change the valve position, you can draw antifreeze from the antifreeze jug directly.
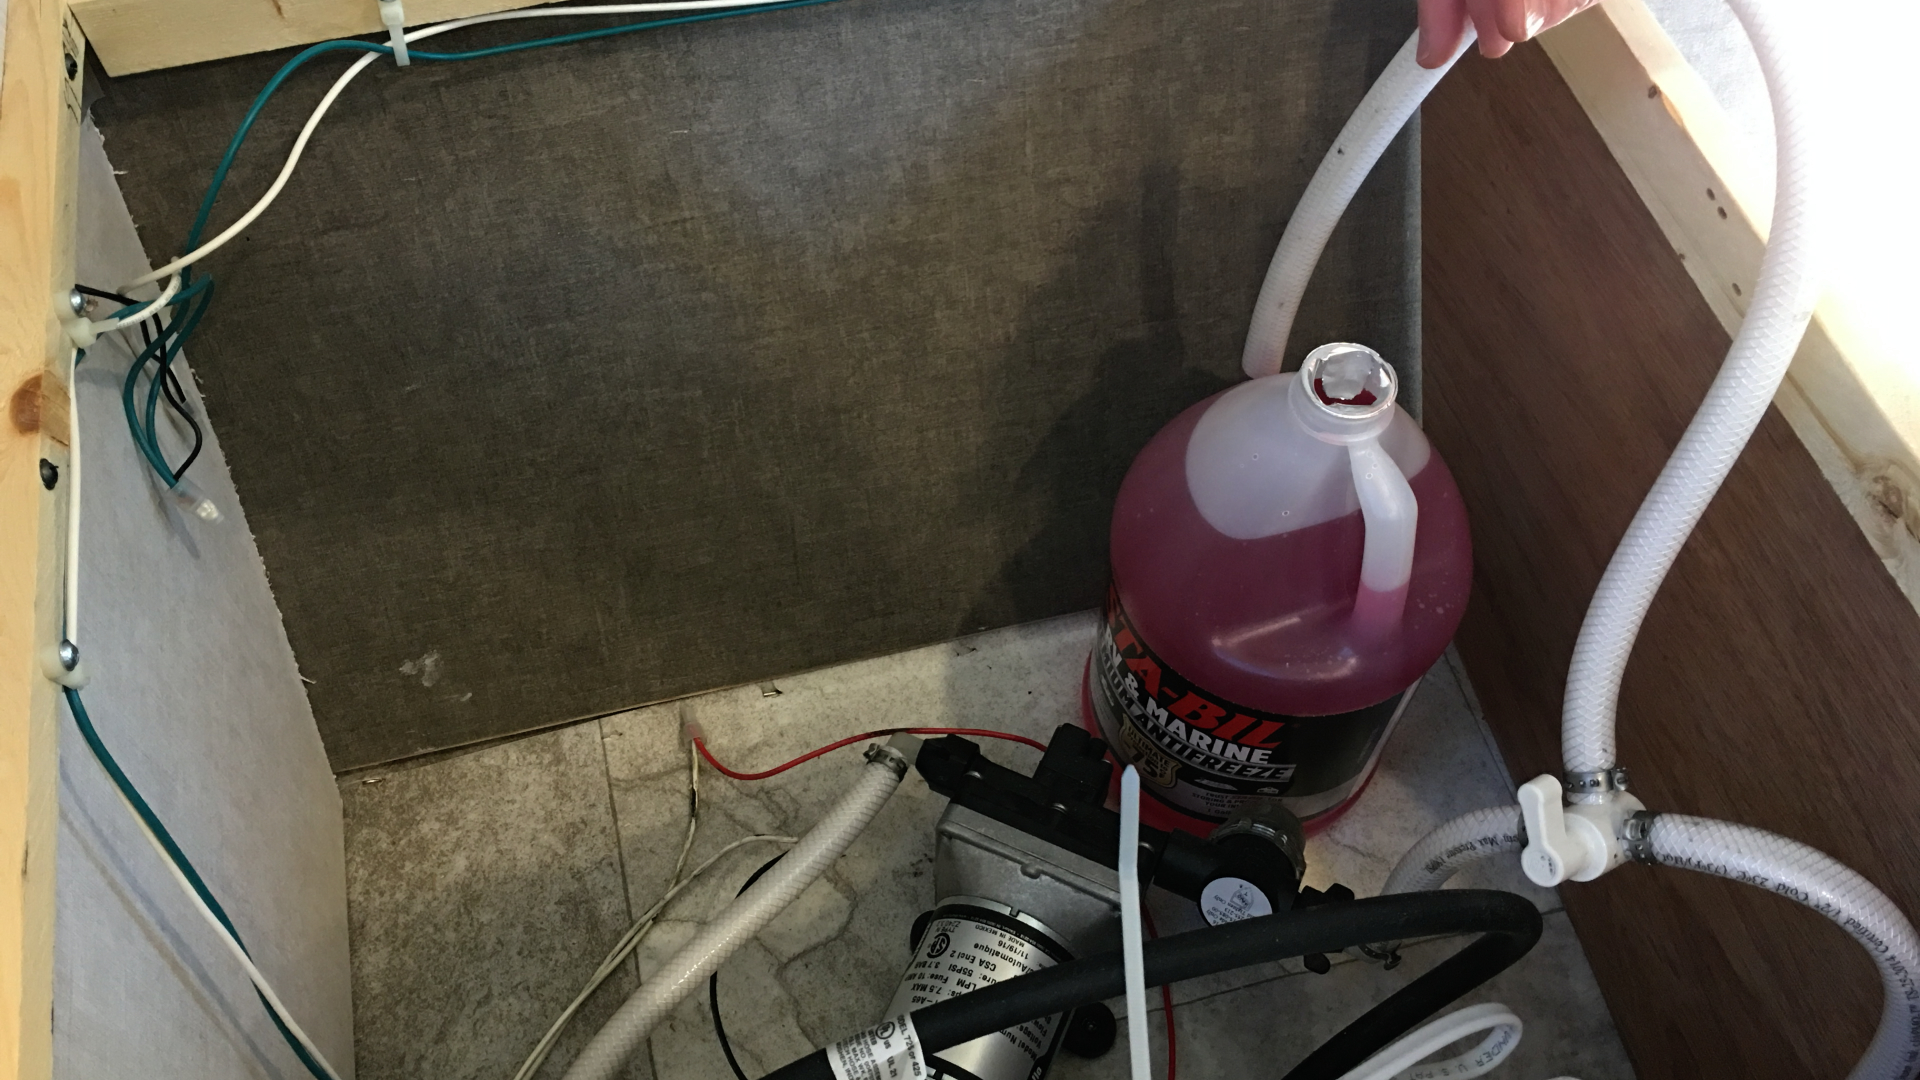
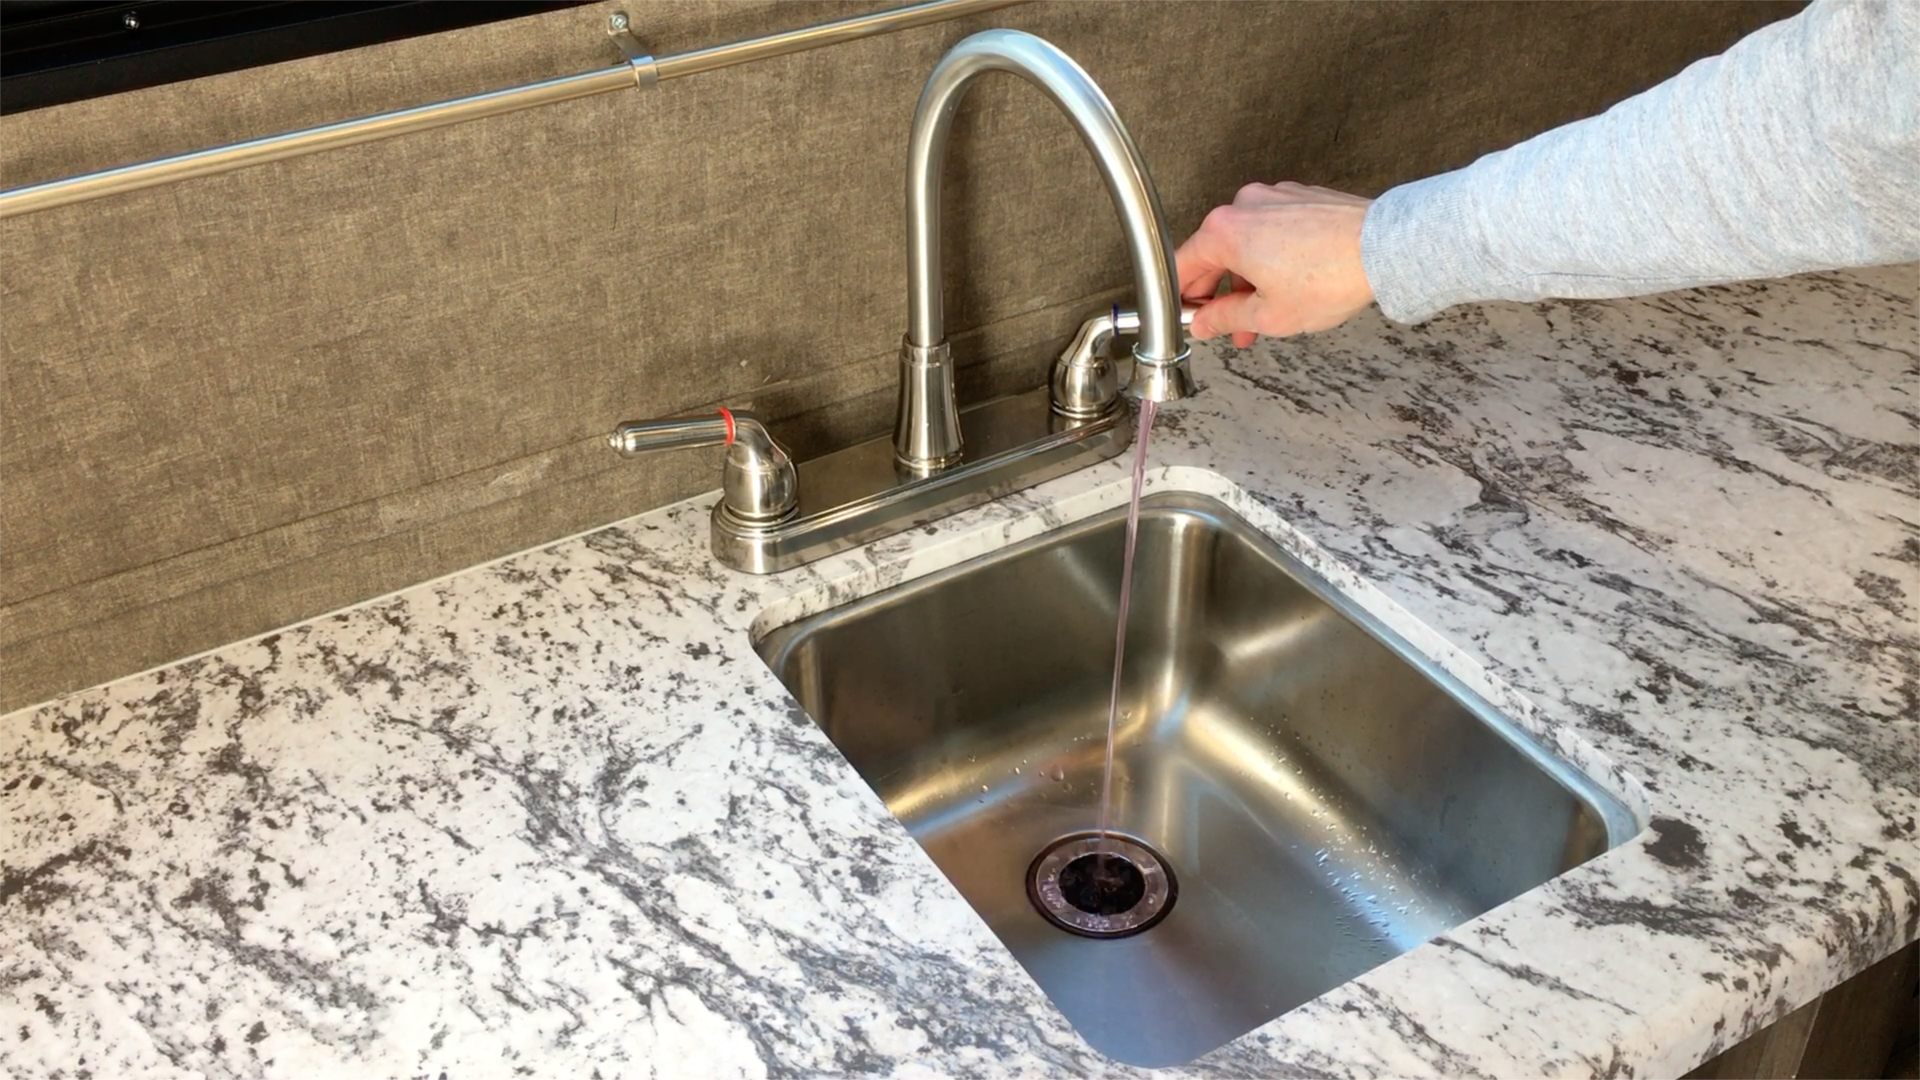
Run RV Antifreeze through to low point drain and all lines/faucets. Just turn the water pump on with the hose inserted into the antifreeze jug and begin opening faucets, starting with the low-point drains. You should see pink antifreeze proceed from each faucet. Make sure you do both the hot and cold sides to each faucet. Don’t forget any outdoor faucets, showers and water quick connect lines.
I have been asked a few times why I use the RV antifreeze method. Many folks use an air compressor and simply empty all the water they can from the plumbing lines and then blow out the lines with compressed air at say 40 psi. Some have been doing this for years even in very cold climates without issue. Although I have considered this method, I use RV antifreeze mainly because I am not certain that the forced air method will actually remove all the water. I feel more confident injecting RV antifreeze that I can visibly see is in all the lines vs not knowing if I removed all the water. The risk is high if I get this wrong, a higher risk than I suppose I want to take. Also, it is important to note, that if too much air pressure is used, line connections and seals can be broken. So if you decide to only used forced air to blow out your lines, make sure you watch several videos on how to do this correctly.
PART 3 – GET STUFF OUT
The final part is to get stuff out of the trailer before you store it for the off-season. This would include items like smoke detector batteries, puck lights, and any other batteries. It would also include removing anything you think of that may be of interest to critters. We have an Off-Season Storage video on the channel to help you out with this part. One important safety tip is to leave the door of your smoke detector open after removing the battery for the season. This will remind you to replace it when you start out in the Spring.
All the best in your camping endeavors!
We’d love for you to join the On The Road Team by subscribing to the YouTube channel. If you want to dive deeper, we put more content and photos on Instagram and Twitter @JohnMarucci. You can also follow John on Facebook @JohnMarucciOnTheRoad.
As always, thanks to our teammates who support the channel by watching the YouTube Ads and by starting their shopping from the On The Road Amazon Storefront at: amazon.com/shop/johnmarucci. Your support is greatly appreciated!
Watch the more than 100 videos from John Marucci – On The Road!