
In this blog, we’ll go over five serious R-Pod travel trailer problems to avoid. Each of these issues I have personally had to deal with in time and money, and in many cases frustration on my 2017.5 R-Pod 179. No sugar coating here of my ownership experience and the hope is that if you own or plan to own an R-Pod from my era, you will at least be aware of these problems and potentially fix them preemptively. I will put links to each DIY fix-it video after each section for your reference.
We’ll cover these issues in rank from least to most problematic. Each of these five woes have been somewhat common among late model R-Pod owners. So here we go…
Number 5 – Power Converter Failure
There have been so many people who have had to replace their power converters in R-Pods that it is almost a practice to keep a spare one with you when traveling. I’ve done this ever since my power converter failed during a long camping trip. The power converter takes 30-Amp shore power and converts it to 12-volt power and keeps the battery in the RV charged. The battery powers all the 12-volt systems, like the lights, fridge panel, thermostat, slide motor, furnace fan, bathroom fan, water pump, stereo, etc. Basically, if you lose your power converter, you can’t charge your battery unless you have a battery charger, solar panels, or a generator with you.

The problem is one of location and vibration. The converter sits on the floor on many R-Pods and absorbs much of the trailer’s shock when in motion. Apparently, there is a small solder connection that fails when excessive vibration occurs. WFCO who makes the unit has been good at replacing them under their 2-year warranty, but it would be better to not have the unit fail. The units should be made better and, in a manner that maintains all electrical connections under vibration, but as much if not more blame rests on the placement of the unit in the trailer.
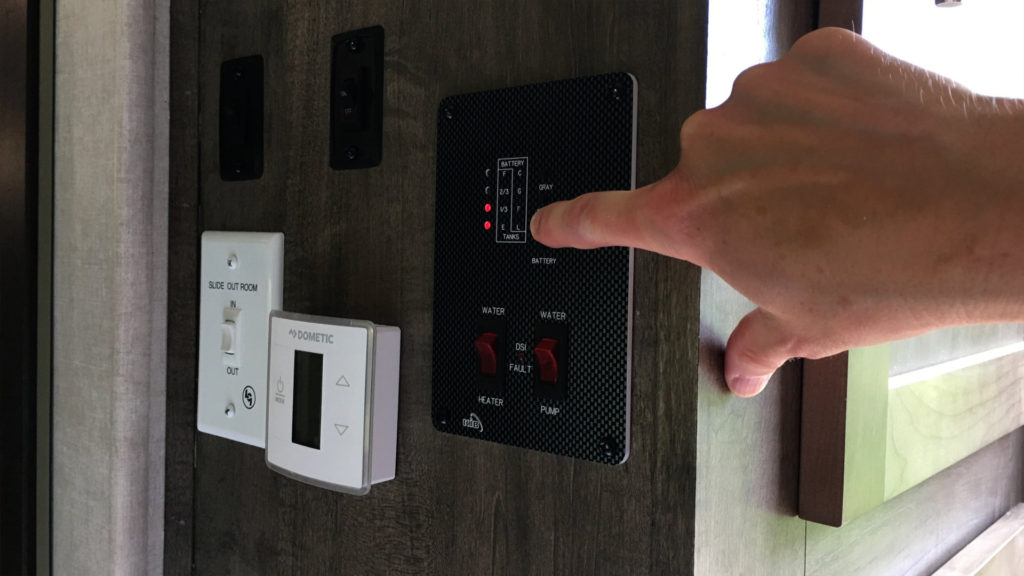
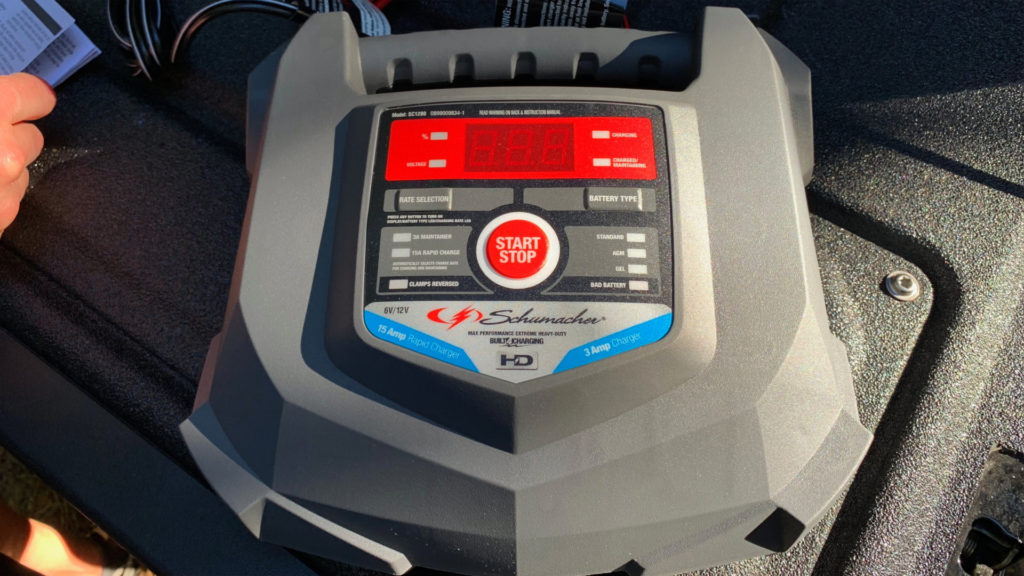
You’ll know you have an issue when your battery indicator lights on your monitor panel are not all on when plugged into shore power when you turn off all 12-volt draws on the battery. Also, after a trip, when you first plug into shore power, usually the converter fan will kick on as the converter charges the battery from shore power. If this fan never comes on after a trip, likely you have an issue. We have an entire video on diagnosing the converter and the steps to take to replace it. If you don’t plan on traveling with a spare converter, at least travel with a battery charger in case this woe besets you while on the road.
Also, I haven’t had a converter fail since replacing my tires with the Goodyear Endurance tires that can handle much more air than needed. These tires have an 80 psi max, while much less psi is needed for the R-Pod. This means a better and softer ride and less vibration. Since I have switched to these tires, I have seen less debris or things jostled in the cabin after traveling. So, one thing you can do is to upgrade tires to provide a softer ride. Your trailer will thank you.
Video: Power Converter Replacement – Step-By-Step
Number 4 – Black Tank Hanger Failure
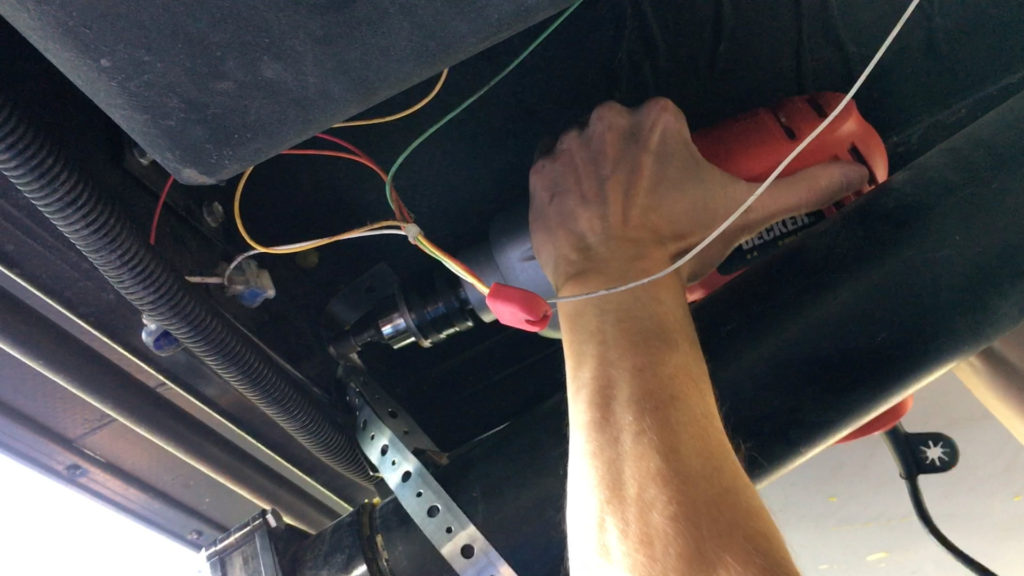
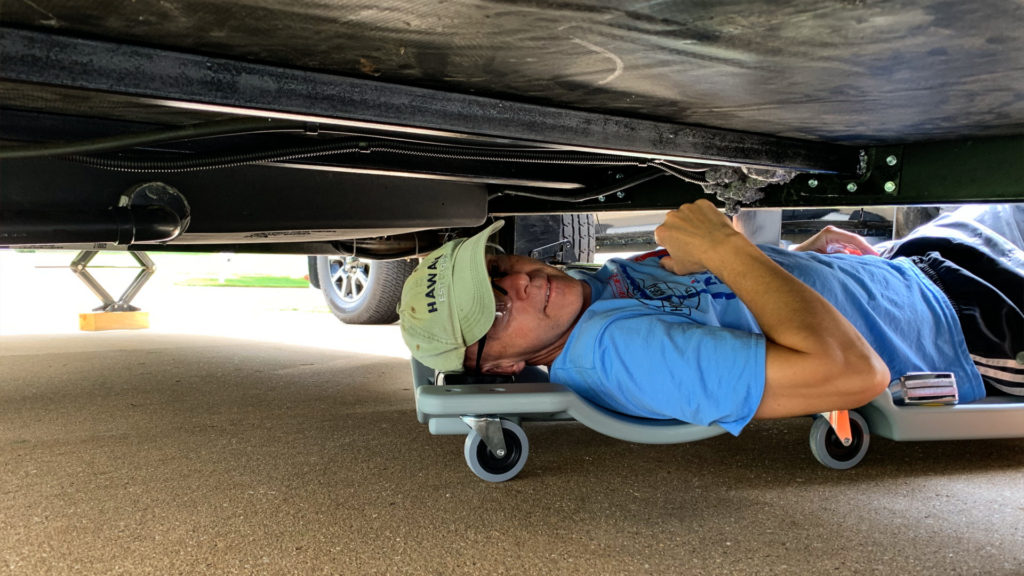
Some R-Pod owners are unaware of the lack of support to the black tank outlet. I found out the hard way early on in my ownership experience when the factory hanger with an extremely short bolt failed while traveling. Fortunately for me when the hanger failed the black plastic tank outlet didn’t drag on the road surface and break. Some haven’t been as fortunate, and the result was the contents of their black tank draining as they drove along. There are so many stories of this happening to R-Pod owners that it has nearly become a rite of passage for new owners.
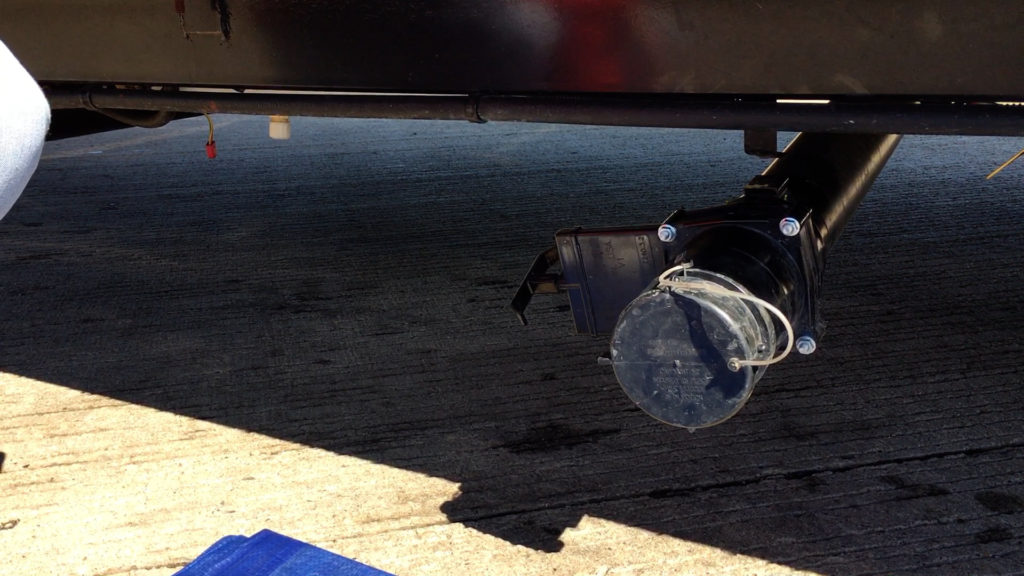
You can tell if you have this potential problem by inspecting the black tank outlet and looking at the existing hanger. Usually, it is a thin piece of metal attached to the frame by a short nut and bolt. Often the nut comes off via ongoing vibration, for others, the thin metal support simply snaps.
This problem has an easy fix and should be done proactively. Many owners use an exhaust pipe hanger to secure the tank outlet, I installed galvanized hanger strap used for plumbing. A large role of this material is inexpensive at a local home improvement store. I put the hanger strap around the outlet and secured it to the frame using the existing self-tapping screws nearby. This fix is still secure on my R-Pod after several years. We have a video on how to fix this issue on the channel.
Video: R-Pod Black Tank Pipe Reinforcement
Number 3 – Cargo Area Leak
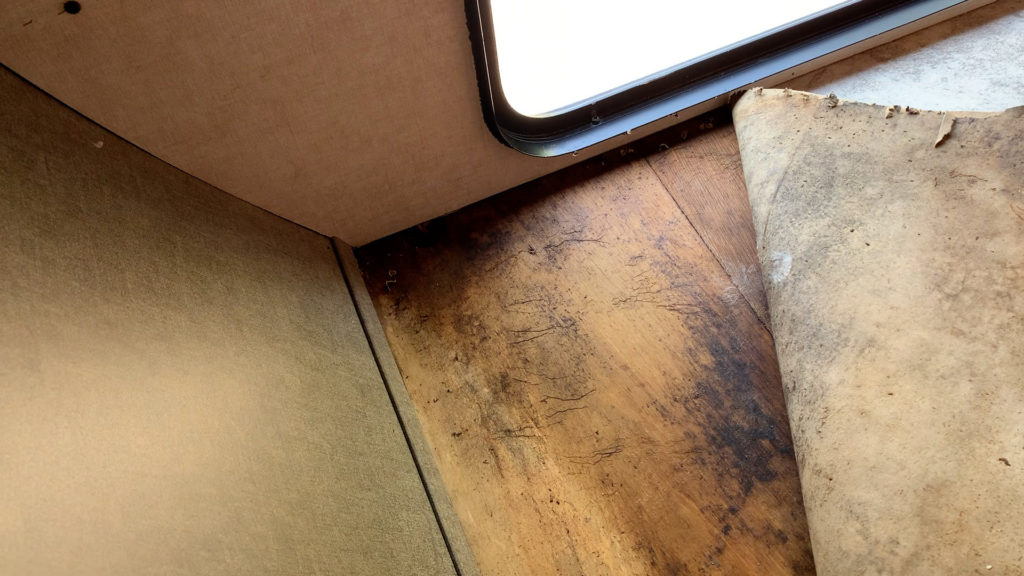
This past summer while inspecting my R-Pod 179, I noticed that the cargo area vinyl floor was rippling at the front of the trailer. This led to pulling up the vinyl floor to discover a huge water stain on the wood floor underneath. Fortunately, the lauan wood was not damaged but just stained.
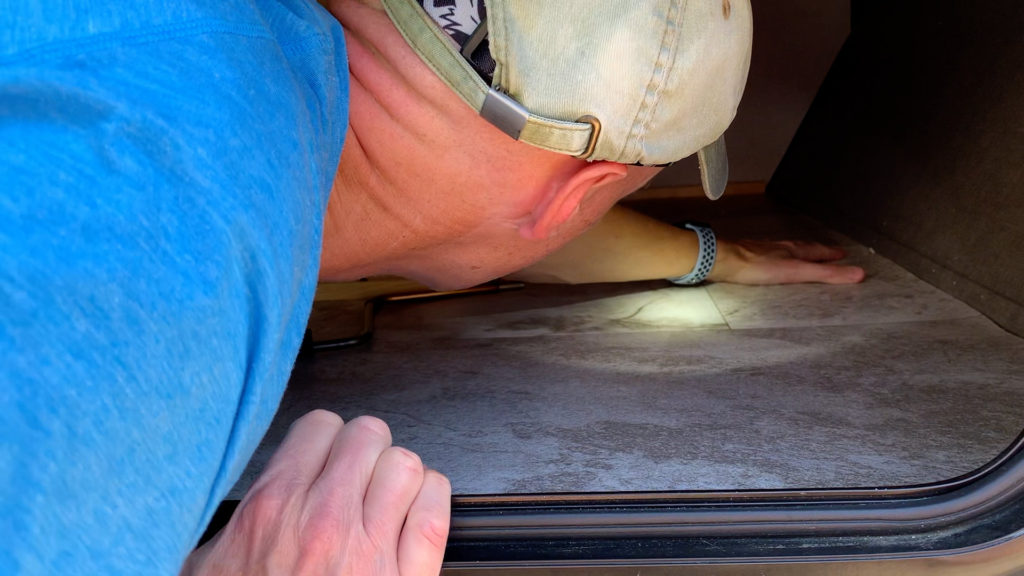
What we learned after looking into this issue online was that many owners had experienced a similar problem in the cargo area. Unlike the black tank hanger issue which you can readily see and diagnose, the cargo area leak isn’t as easy to see. The risk is allowing the unseen problem to persist which can cause your floors to deteriorate over time. Basically, you will know you have a problem when it becomes visible in some fashion. You can try and check with a water meter, but you may need to pull back the vinyl to do so. If you are going to pull back the vinyl flooring in the cargo area anyway, you may not need the meter to tell you that there is an issue. Once you see water stains on the floor surface, you know you have a leak somewhere.
We go into detail on dealing with this on a video if you want to see the steps we took to diagnose and fix the problem. We’ll include a link in the description, but for now, it should suffice to say that if you have this issue, you will probably need to seal the cargo door better and look carefully at the front lower corner of the outside wall. My door had a slight leak and the wall at the lower outside corner was loose and needed to be re-caulked. So, the first step to prevent the issue is to carefully inspect the caulk at the outside front lower corner of the trailer and reinforce it.
Video: R-Pod RV Cargo Area Leak
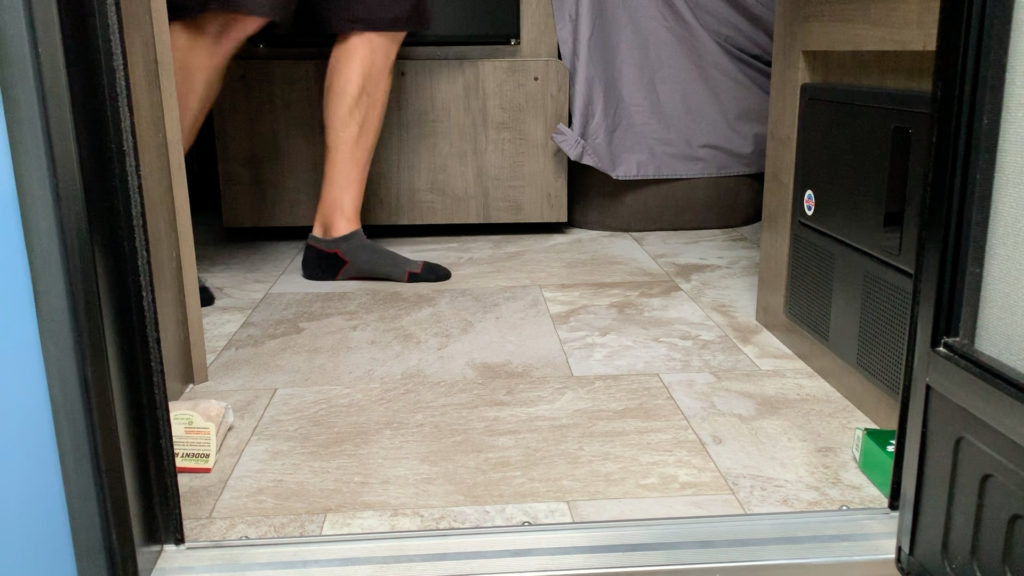
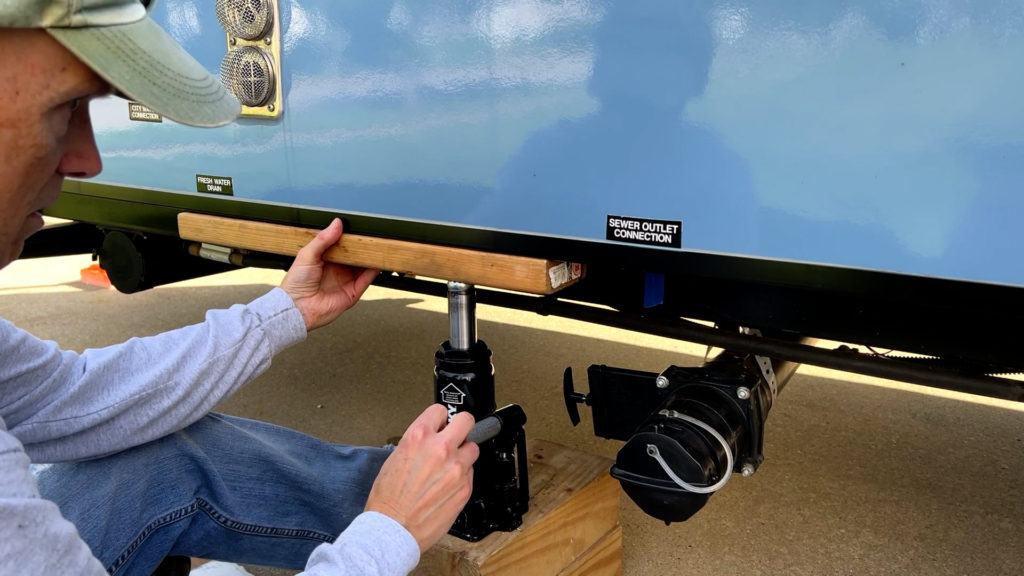
Number 2 – Unsupported Floor Area
Number 2 in our countdown is the lack of floor support in the kitchen area on the 179s. All the 20’ models (180, 189, 190, 191) have the same lack of floor supports in the same area, but in the 179 model, it is right where you stand when entering the coach and when doing dishes. So, the issue tends to show up in the 179 more readily.
Unfortunately, almost all the structural floor issues, including this one, show up well after the Forest River 1-year warranty period has expired. So, you are on your own after Year 1. If your trailer is very lightly used, it may never show up as a problem. Also, it may only be isolated for certain model years. For me and my 2017.5 179, the lack of floor support in the kitchen floor showed up in just under two years. I was one of the lucky few who purchased the second-year warranty extension when I purchased my 179 new in April 2017 (Forest River dropped offering that warranty extension almost immediately after I purchased mine).
You’ll know you have this issue when the floor near the rear of the cabin gets bouncy. It’s hard to miss the floor becoming soft and springy underfoot. This will show up more so the more the trailer is used. In my case, I was heavily using the trailer the first two years. I show this springiness to the floors in detail in the videos we did on the subject, but you’ll know when you start to have this problem by your floors getting bouncy.
The proactive solution is to install floor support under the trailer. Forest River did this for me under warranty after some delay and a painful runaround. But they did do the fix. We cover the factory fix in detail in our video on the subject, but some have modified the official fix with potentially better ideas. Whatever solution you decide upon, you should consider doing this floor reinforcement even if it is not yet an issue. Also, if you are looking to buy a used 20’ R-Pod model, inspect it closely for the bouncy floors and ask if this solution has been applied to the trailer for sale.
Video: R-Pod Floor Warranty Fix
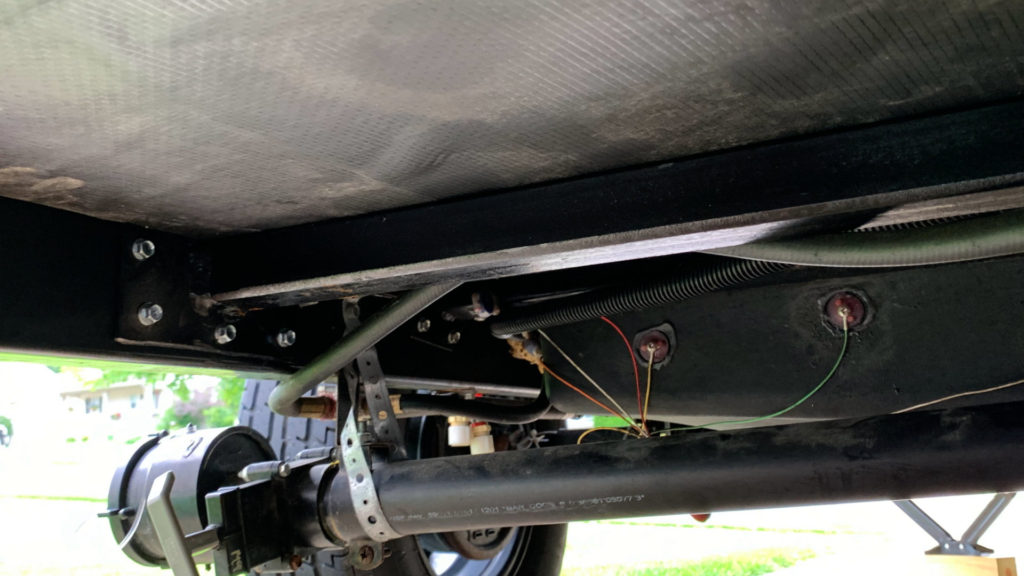
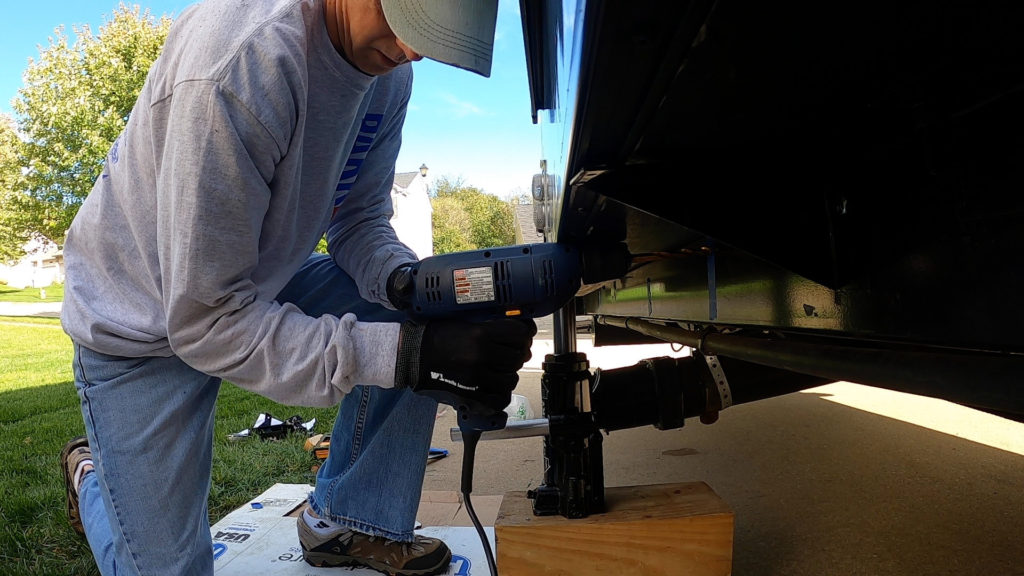
Number 1 – Missing Outriggers and Floor Sag
Our number one woe in our countdown is the troubling and value-killing slide-out wall sag. I can’t mention this without getting a bit peeved at the manufacturer. This is a real R-Pod killer if it isn’t dealt with. Basically, Forest River and R-Pod didn’t install several needed frame outriggers that support the outer wall on the slide-out side of the trailer. On my 179, there was a 9’ section of wall with no support outriggers. I noticed the problem when I saw that the slide was scuffing the fridge-side ottoman top when pulling it in. I also noticed that the frame tube under the trailer and the floor were no longer square under the slide-out. Alarmed, I went to the R-Pod Owners forum (rpod-owners.com) and discovered a lengthy thread about the outrigger issue. Several owners were alarmed and working to fix the issue by installing new outriggers under the slide-out.

In essence, R-Pod decided to go cheap and not put the needed outriggers under most of the slide-out. The 179 is more susceptible mainly due to the length and weight of the slide-out. However, the issue isn’t isolated to the 179 model. It appears to be showing up in this model first. The real problem again is the floors. The Styrofoam sandwiched by thin lauan wood floor panels just aren’t engineered to hold this much weight over time without outriggers strategically placed. The floor will lose its strength over time and the wall will literally begin to sink down vs the frame.
The solution is to jack up the slide-side wall and add outriggers under the slide area of the wall. We added five outriggers to the slide-out side of the trailer and were able to bring the wall back to square with the floor. We show the process of how we did this fix in a video on the channel. Outriggers can also be added to the door-side of the R-Pod, but we didn’t see any issue on that side. Doing this work isn’t for the faint of heart or strength, and many people will want to have a local professional do this for them.
Video: R-Pod Outrigger Installation – Step-By-Step
Ok, that should do it. These 5 woes can really cause major issues for an R-Pod owner. If not dealt with, these problems can lead to considerable loss of economic value and overall useability of your R-Pod.
All the best in your camping endeavors!
We’d love for you to join the On The Road Team by subscribing to the YouTube channel. You can also follow John on Facebook @JohnMarucciOnTheRoad.
As always, thanks to our teammates who support the channel by starting their shopping from the On The Road Amazon Storefront. Your support is greatly appreciated!