
In this blog, we’ll go over the step-by-step process of installing outriggers on my 2017.5 R-Pod 179. This blog ties to the recent video on the subject. We had noticed the slide-side wall of the trailer sagging after a recent camping trip, and after considerable research and inquiry, decided to fix the issue. Be aware that this process is NOT endorsed by Forest River or any structural engineer – it is simply what we decided to do on our own to fix the issue. You will need to decide what solution is right for you.
For the list of tools and supplies, please download the free process document.
Here are the steps to complete the process:
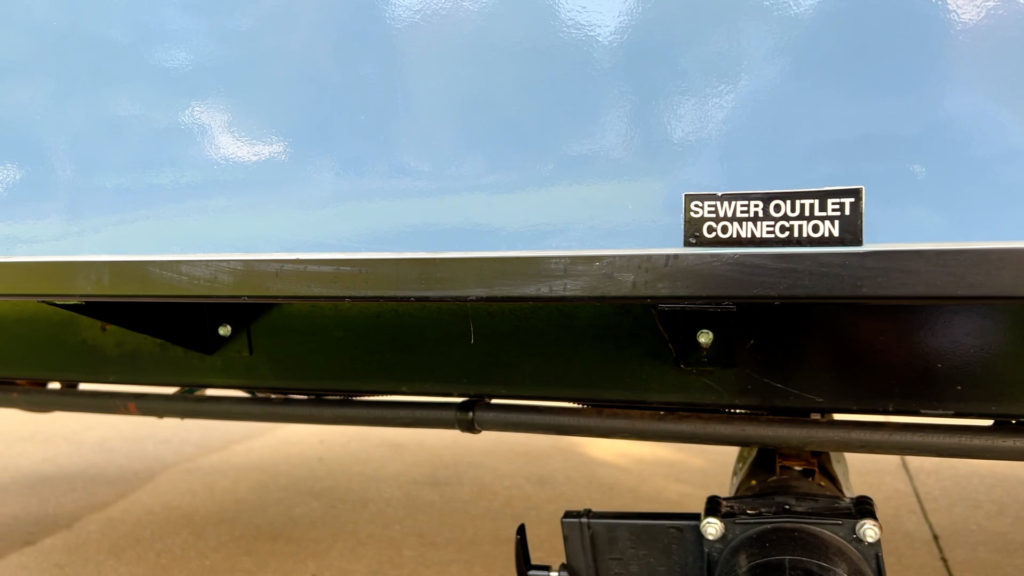
First, identify if your R-Pod is missing outrigger supports under the slide-out area. There should be metal outrigger supports extending from the frame tube to the outer wall of the trailer spaced the length of the trailer. Some of the R-Pod models are missing this key structural support in areas. This seems to be accentuated for the R-Pod 179 model, given the length and corresponding weight of the slide-out. For reference, my 2017.5 R-Pod 179 was missing outriggers for a space of just over 9 feet. If the outriggers are missing, then the outer wall at the slide-out may sag over time or with significant use.

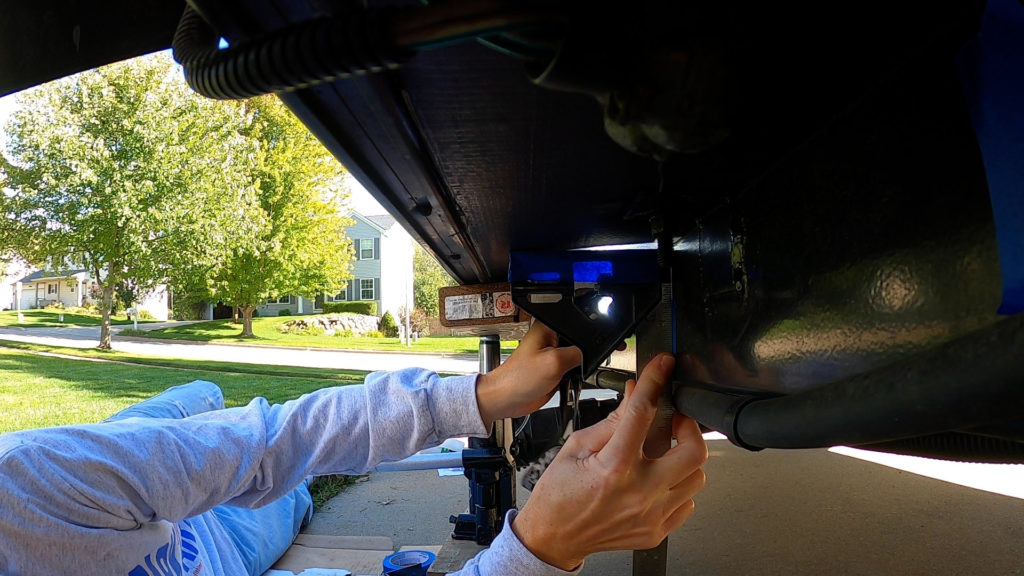
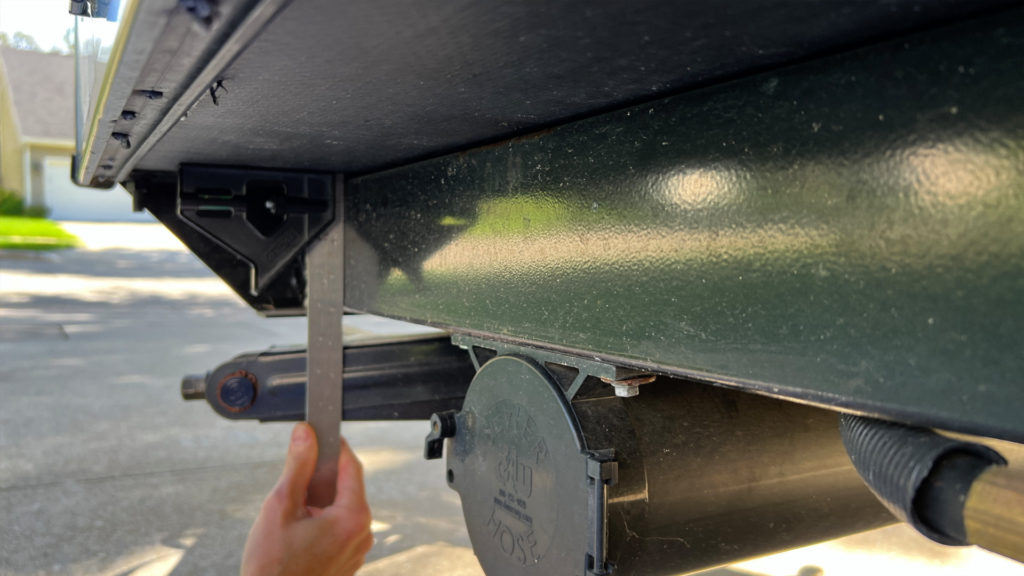
Next, check that the tube frame and floor are square. You can do this by looking underneath the slide-out sidewall with a combination square. I ran the square along most of the floor and tube frame to check the squareness of the floor. My floors were square near the existing factory outriggers but sagging under the slide area where there were no supports.
Information for ordering the outriggers from Forest River is contained in the free downloadable process document.
Once the outriggers have arrived, they will need to be painted to avoid corrosion. I used black Rustoleum paint picked up at a local hardware store and a simple foam brush as an applicator. I used a large old cardboard shipping box laid flat to paint the outriggers on. I also let them dry overnight outside covered and came back the next day and did touch up.

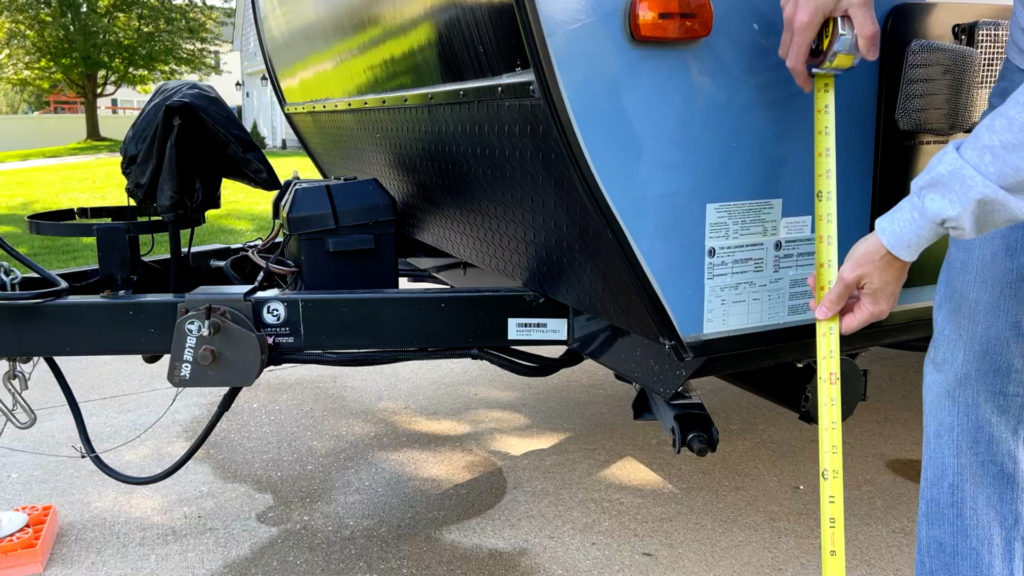
Next, move the R-Pod to a level surface if possible. Chock the tires and level the trailer to the surface. If you don’t have a perfectly flat surface to work on, you will still need to level the trailer to the surface before jacking up the wall. You can do this by lifting or lowering the front tongue jack and measuring the front and rear corners of the slide side until they are equidistant from the ground surface. For me, it was exactly 20” off the ground on both the front and rear corners.
Next, on the slide-side of the trailer, look at the frame under the slide. Locate the outriggers that were installed at the factory. On my 2017.5 R-Pod 179, for example, there are three existing outriggers on the slide-side of the trailer, one 3” from the front of the trailer, and two towards the back of the trailer at 50.5” and 80.5” from the back trailer wall. There were no outriggers for 109.5” between the front factory outrigger and the next closest outrigger toward the back of the trailer. Mark your factory outriggers on a diagram. The diagrams are on the free downloadable process document here.

Next, decide on where to place the outriggers on the frame tube and diagram this out in relation to the factory outriggers. The placement of the outriggers will somewhat depend upon the fastener material used and the severity of the issue. In general, you will want less space between outriggers the more severe the wall sag is. Also, you should place outriggers closer together the lower the fastener’s tensile pull-out capacity. So, if you are using Teks screws with less pullout strength vs bolts with more, you will want to install outriggers closer together.
Since the upper outrigger frame tube hole will carry a large majority of the load, the fastener used in this upper hole is crucial. There is an ICC-ES Service Evaluation of differing sized fasteners and their respective pull-out capacities that we will put a link to in the description for your reference. The bottom line is that you should seriously consider putting a bolt through the upper hole of the outrigger as the main support that goes through both sheets of the frame tube. This is the decision I made. The strength of using a bolt in the upper hole is far superior to using Teks screws in the upper hole.

So, after looking at loads of various sized Teks screws from the ICC-ES Service Evaluation, I decided to use bolts on the top holes and Teks screws on the bottom holes of the outriggers on the frame tube. The main reason for my decision was to provide maximum pullout support where there is the maximum load and to make the installation less burdensome by using the Teks screws on the bottom outrigger frame tube hole.

This brings us back to where to put the outriggers. In my application, I decided to put four (4) outriggers under the unsupported area of the slide. On my unit there was slightly more than 9’ of unsupported wall on the slide-side, however, almost all of the wall sag was within the 57” of the slide-out that had no factory outriggers. It was the unsupported slide that was causing the sagging, so this is where I concentrated the outriggers. I also wanted to add an outrigger equidistant from the front factory outrigger and the closest new outrigger to be installed. So, I used five (5) outriggers of the eight (8) I had ordered. The remaining three (3) outriggers may be employed on the door-side of the trailer at a future date, but there were no signs of wall sag on that side of the trailer, so we didn’t install them this time.
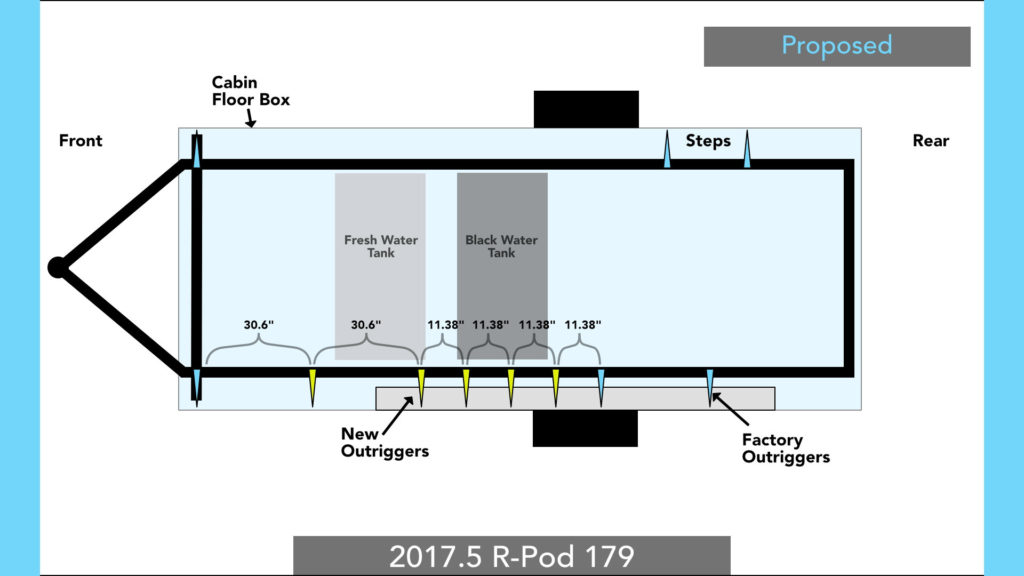
I planned to put outriggers every 11.38” apart under the slide-out, with the fifth outrigger in between the front and new outrigger, however, once I started the work it became apparent that this perfectly equidistant solution wouldn’t work given obstacles such as tank hangers, wiring harnesses, and metalwork. The general locations were kept, but the exact measurements had to change. Some wiring harness frame clamps had to be temporarily removed to install certain outriggers.
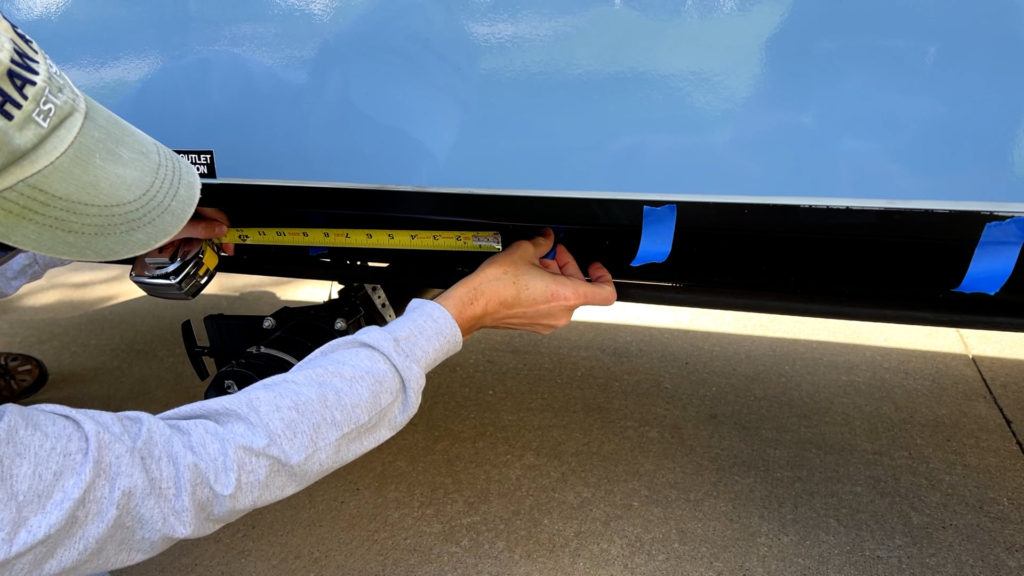
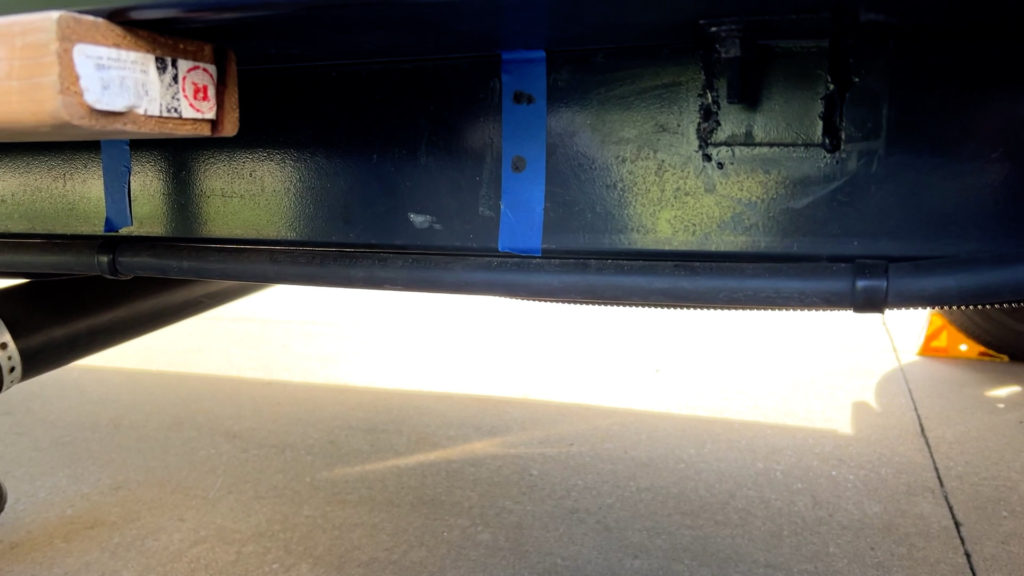
Next, after you have diagramed out where to put the outriggers, place a 3-4” piece of colored painter’s tape on the frame tube where you measured the spacing. Place the tape vertically on the frame. It is important at this point that you physically get under the trailer and look at what is on the inside of the frame tube at your tape marks. At several of my marked locations, the black tank and freshwater tank were only 2” behind the inside of the frame tube. Also, there should be nothing else like tank hangers or wiring harnesses on the inside of the frame tube at the tape marks. In several instances, I had to move my tape an inch or two left or right to miss something on the inside of the frame tube.
Two major points to consider when you are about to drill through the two metal sheets on the frame tube. We covered the first above, to ensure that you won’t be drilling into an obstacle like a tank hanger, wiring harness, or tank. The second is to check inside the frame at the upper hole mark to ensure that you can set a large 1-1/4” washer on the bolt and apply a box wrench to the nylon lock nut. It gets tight up high behind the frame tube, so take time and think about the spot where the hole will bore through.
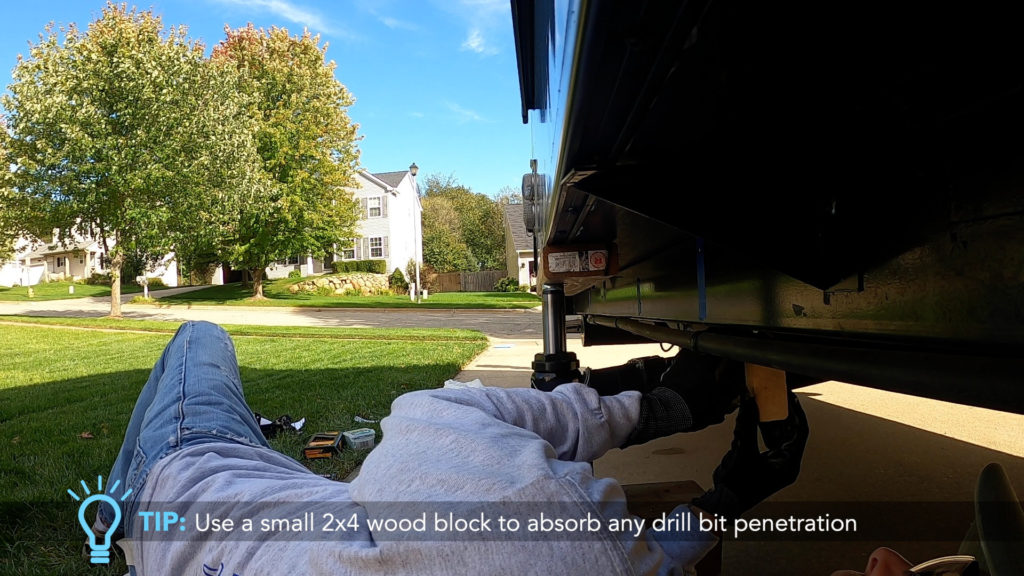
I’ll reiterate a major precaution: don’t drill through the water or waste tanks! You will be putting a lot of pressure on your drill and drill bit when pushing through two layers of the metal frame tube, and it would be easy for the momentum of the drill bit to penetrate the plastic of the black or freshwater tank once it breaks through the inner metal sheet. I used a small 2×4 wood block to wedge between the fame tube and any tank nearby to absorb any drill bit penetration. This wood buffer scrap worked wonderfully. The space between the inner frame tube and the nearby tanks is almost exactly the size of the thickness of a 2×4, so it wedges right up and will stay there while drilling. Cut a small 3” scrap of 2×4 as this drill bit blocker and you’ll likely be happy you did!
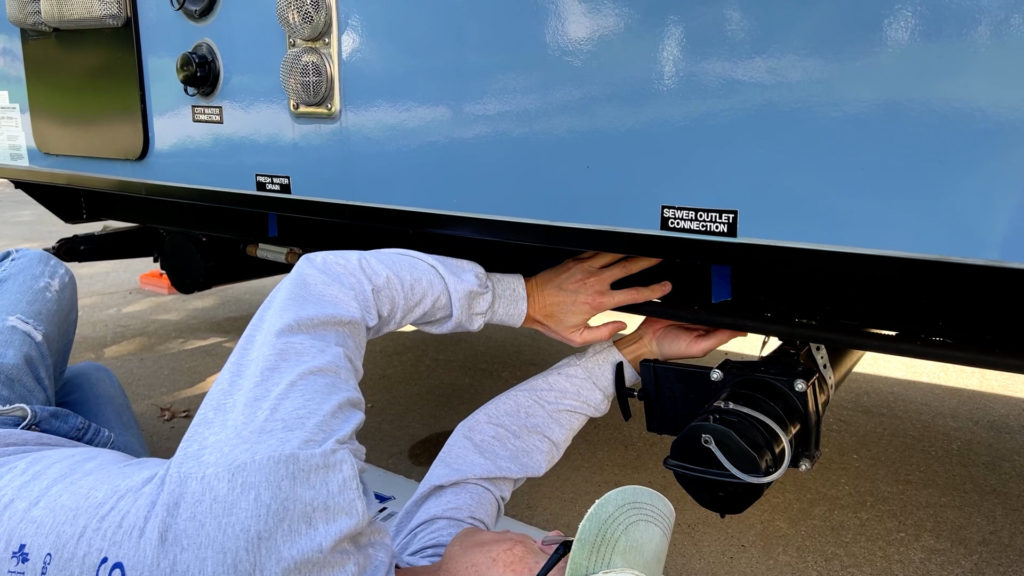
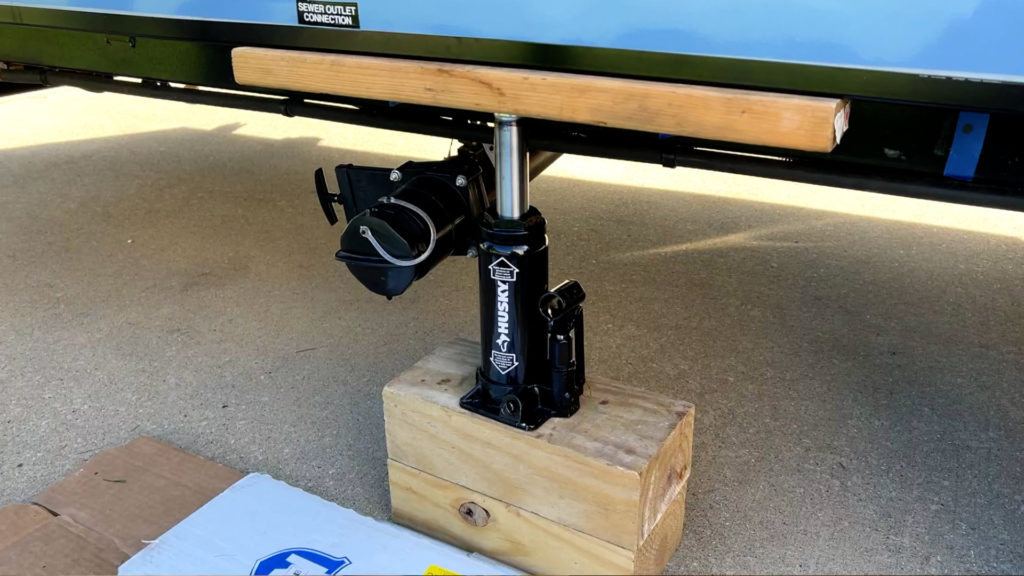
Next, once you have marked the outriggers with painter’s tape, set up your jacking rig using the wood for this and the 6-ton bottle jack. I used a 6-ton bottle jack, but other sizes will work as well. I stacked two stout 4×6 blocks for the bottle jack to sit on. If you have a cinder block and a small piece of wood, this will also work as the base. Whatever base you apply, ensure it won’t move or break under load, and that it will give the needed height for the bottle jack.
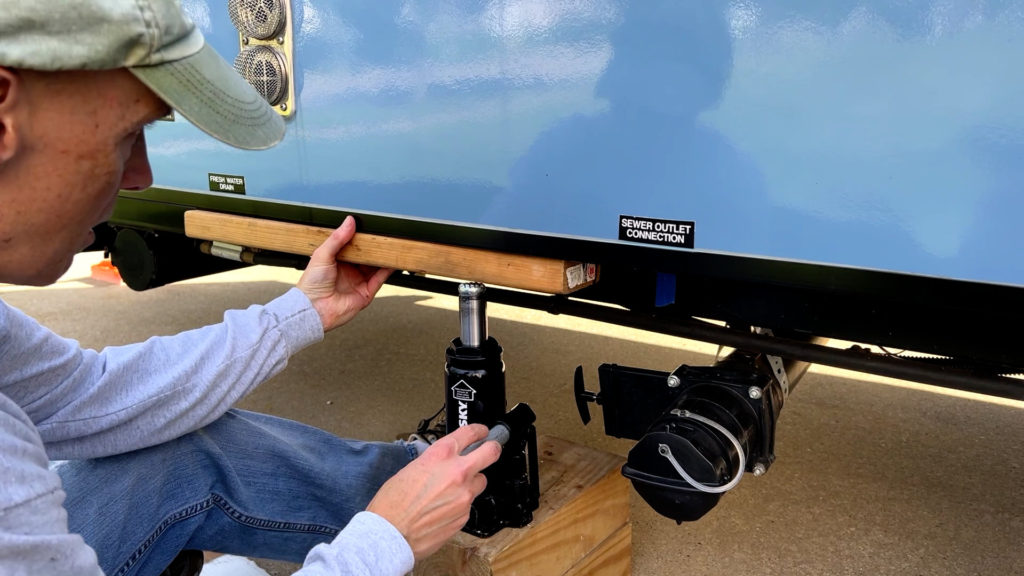
To disperse the concentrated lift from the jack, I used a 24” piece of 2×4 on the lower wall railing for the jack to lift. Others have used a similar length of angle iron to disperse the lift at the lower outer wall railing. If you don’t disperse the lift force from the bottle jack, it will likely bend the wall railing at the point where the bottle jack is applied. For me, the 24” 2×4 worked perfectly as the piece was set against the lower wall railing and properly dispersed the lift from the jack.
Next, slowly jack the slide-side wall up. You may hear your R-Pod creak a bit as the wall is set back to square with the frame tube.
The goal is to jack up the wall to bring the floor and frame tube back to square. Use your combination square to check that it is square and jack the wall up as needed to reach this goal. Once my floor and wall were square, I was ready to mark the outrigger holes on the painter’s tape.
One caveat here is that you likely won’t be able to drill all the outriggers at one jacking event, given their location close together under the slide and the need for the bottle jack rig to be in the same area. Whenever you use the 24” 2×4 header that the bottle jack is using to push up the wall, the outriggers can’t be manually placed. In this regard, you may need to move the jacking rig on occasion to accommodate the installation.
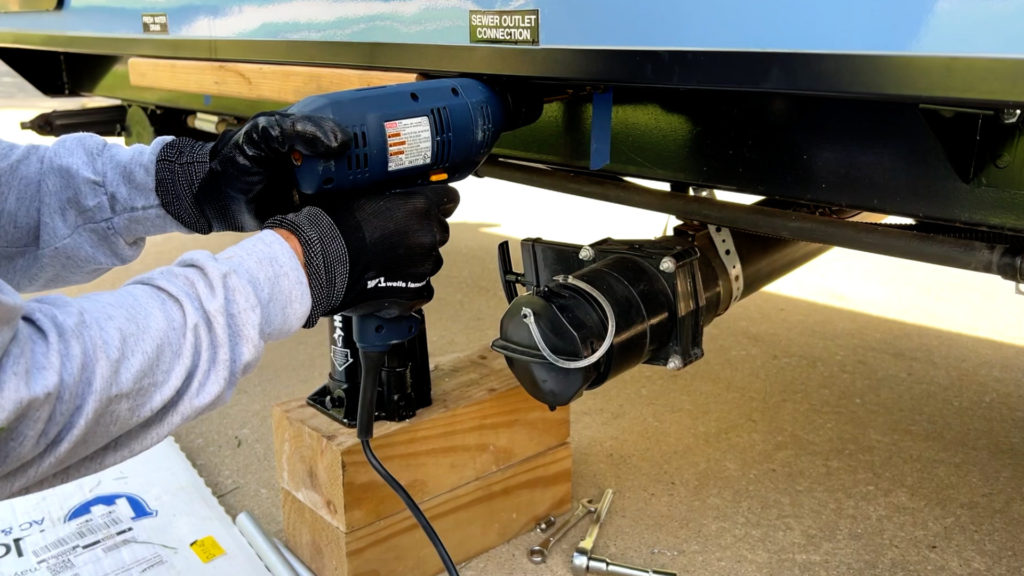
Next, hand-place an outrigger as high as possible and square against the frame tube and floor on the painter’s tape and mark the two holes from the outrigger onto the painter’s tape using your felt marker. You should now have the placement on the painter’s tape for your drill marks. Put the outrigger down from the frame and out of the way.
Next, attach your 3/8” metal cutting drill bit into your power drill. Make sure the drill is safely plugged in, rotating in the right direction, and that the bit is secure in the chuck. Drilling the holes will require significant pressure, so double-check that everything is connected securely.
Next, if you are drilling near a tank, place your 2×4 scrape between the inner frame tube and tank. I had to look under the trailer to confirm that I had the piece of scrap in the right place with each outrigger install.
Next, set your kneeling mat in a place where you can kneel directly in front of the first outrigger and apply leverage to the drill.
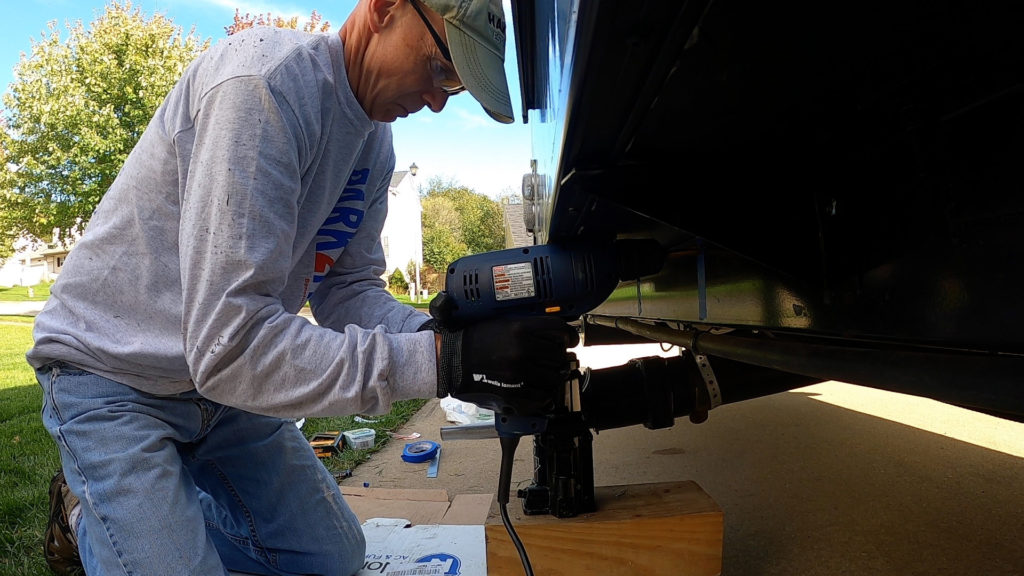
Next, place the drill bit on the upper hole mark and try to level the drill so that you don’t drill upward on the inner frame tube sheet. This will not be easy as the top outrigger hole will be high on the frame, meaning the top of your drill housing will be near the floor’s bottom, if not touching. You will drill once but through two layers of 0.1” metal approximately 2” apart. Be aware that the drill may jump on you after breaking through each layer.
Next, set the drill bit against the upper hole tape mark and power up the drill slowly while firmly placing the bit onto the mark. After a few seconds, depress the trigger to full power as you apply pressure. You’ll want to be kneeling with your torso upright when doing this. Your drill bit should start to work through the metal and break through the first sheet within 30 seconds or so, depending on the quality of your drill, the quality of your bit, and the pressure maintained.
Next, once the drill bit has broken through the first metal sheet of the frame tube, keep the drill level and proceed to pierce the second sheet in a like manner. Remember that the drill may jump when it fully pierces each sheet, so hold onto the drill firmly.
Next, after you have bored the two holes, remove the wood buffer 2×4 scrap if it was used.
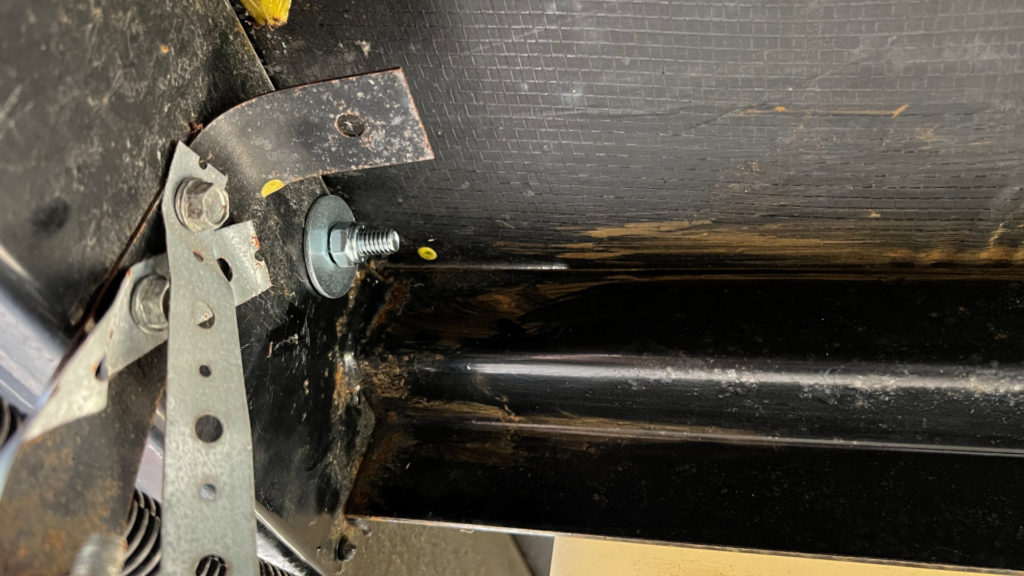
Next, apply an outrigger to the mark and put one of the 3” hex bolts through the upper outrigger hole and both holes in the frame. It should slide right through.
Next, go under the trailer and place a fender washer onto the bolt. You may have to angle this washer to get it onto the bolt. The large fender washer acts to apply the force of the bolt’s strength over more of the frame tube’s surface.
Next, grab a nylon lock nut and thread it by hand onto the bolt’s threads. It will be cramped to do this, so be patient. Once it is initially threaded, employ your ½” box wrench onto the nut.
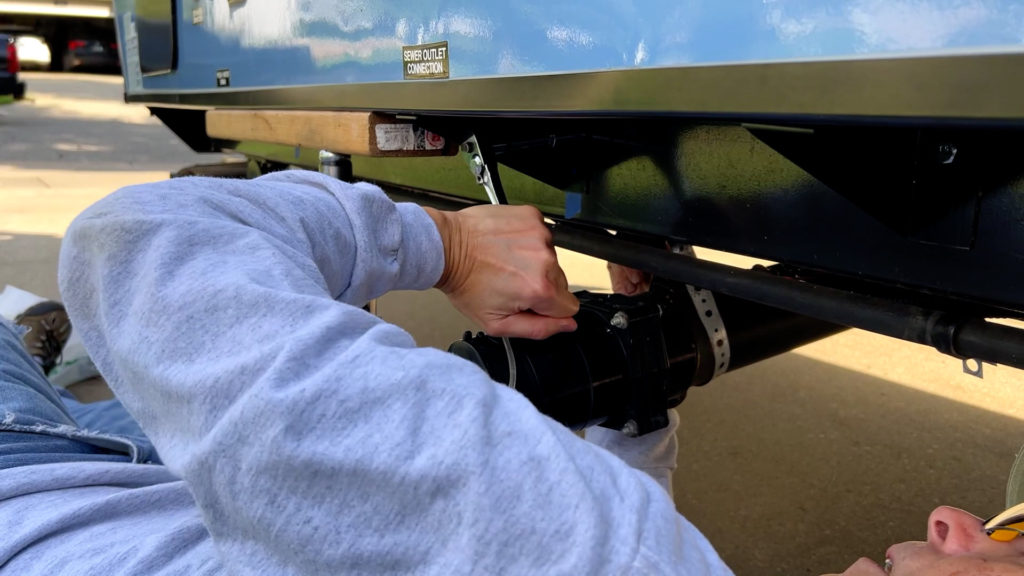
Next, use your ratchet wrench, extension, and ½” socket to tighten the hex bolt while holding the lock nut stable with the box wrench. Tighten the lock nut snug plus a bit, but do not overtighten it to the point of bending the frame tube. Ensure the outriggers remain plumb to the frame tube when fully tightening the nuts. I repeated the above process on the five outriggers I installed.
Next, after the outrigger upper holes were fully attached with the bolts, I drilled pilot holes for the Teks screws using the 9/64” bit in the lower outrigger frame tube holes, I used a 1/8” bit but broke that bit trying to pierce the metal. I moved to the slightly larger 9/64” bit and sat the bit deeply into the power drill’s chuck. This seemed to work better, and I was able to drill all the pilot holes for the outriggers into the first frame tube metal sheet.
Next, I removed the drill bit and put a 5/16” nut driver into my drill to seat the #12 Teks screws into the pilot holes. This took very little time to do as the Teks screws quickly found the pilot holes and seated very quickly. Remember to hold on tightly to the drill when seating the Teks screws.
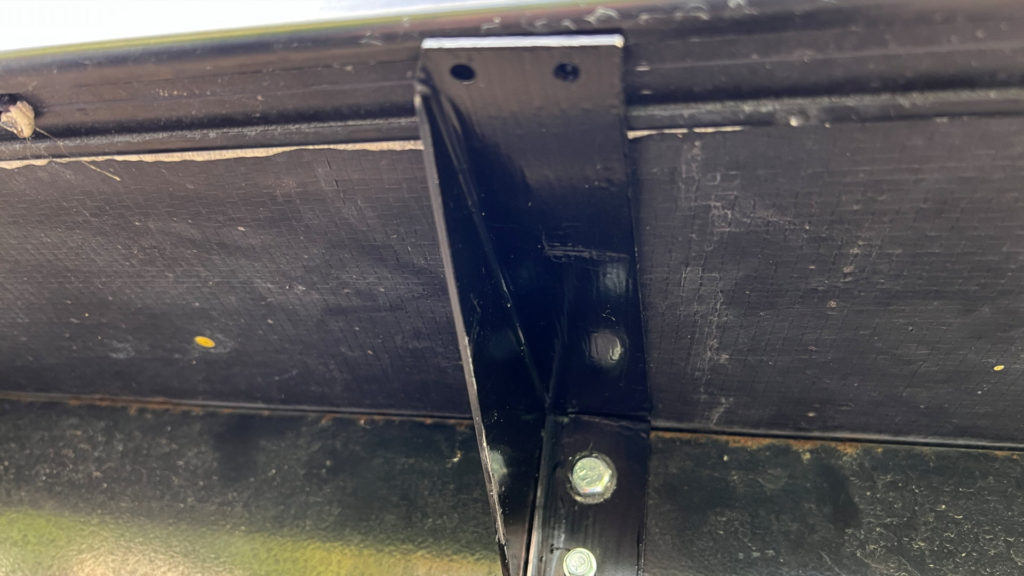
At this point, all five outriggers had been installed with bolts through the top holes (through both frame tube sheets), and Teks screws seated in the bottom holes through the outer frame tube sheet. I decided at this point to not add fasteners at the two holes on the flange of the outrigger at the outer wall railing. My reasoning was simple, I didn’t want to add any weakness or add moisture points to the outer railing and floor. I could readily see that the outriggers were not going to move at all, and the outer wall would be fine to just sit on the outrigger shelf without fasteners. This is a risk on my part and one you may or may not want to take. It is your call to add these two screws on the outer wall, but if you do, you will want to add the appropriate silicon caulk.
Next, slowly release the tension on the bottle jack. The wall will move down with the release of pressure. The wall should now be resting fully on the five new and three factory outriggers unassisted. For me, this solved the issue, and using the combination square proved it. The floor and frame tube were now perfectly square. Inside my R-Pod, the slide was sitting higher and had less difficulty being pulled in.
The solution as outlined seems to be working well to keep the slide-side wall square to the frame. Time will tell if the solution plays out well, but for now, it is working to solve the problem.
All the best in your camping endeavors!
We’d love for you to join the On The Road Team by subscribing to the YouTube channel. You can also follow John on Facebook @JohnMarucciOnTheRoad.
As always, thanks to our teammates who support the channel by starting their shopping from the On The Road Amazon Storefront. Your support is greatly appreciated!