
Click here to sign up for reminders when new blogs are posted.
What do you do when you have a water leak in your RV? It can be an issue that has significant implications in terms of damage that can result to the walls and floors of your unit and isn’t something to take lightly. Unchecked, a water leak can greatly reduce the value of your trailer. In this episode, we’ll walk through the water leak I have dealt with on my Keystone Bullet 243BHS, how we identified it, how we work through troubleshooting the issue, and the solution applied.

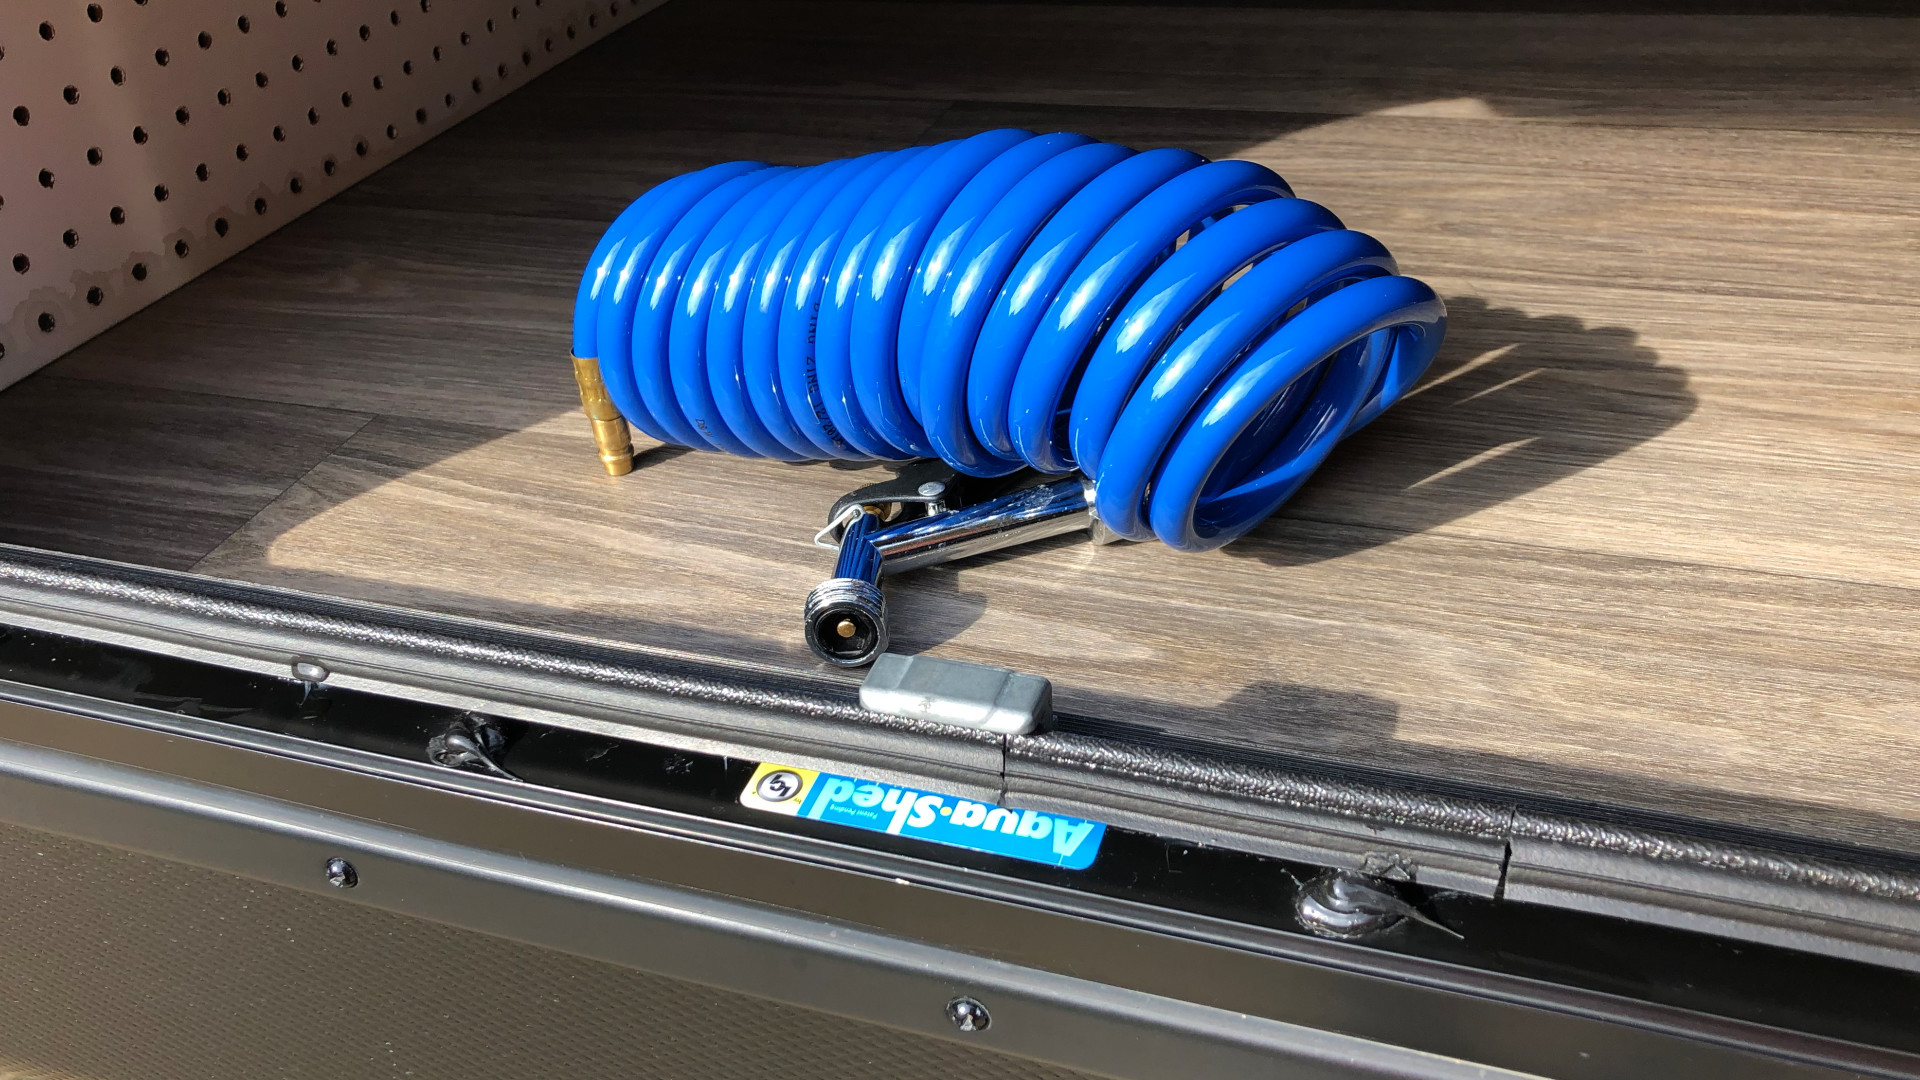
For background, I purchased my 2020 Keystone Bullet in May of 2019. It was one of the first Keystone models with the new HyperDeck water-resistant floor, which I’ll discuss later. During our first camping season, we took several trips without noticing any issue, although there was an odd stain on the peg board in the cargo area. We attributed this to having the quick-connect water hose put in the belly storage with water in the hose. This was done by dealer before we received the unit.
The first time we noticed the issue was at Grayton Beach State Park in Florida. We have a review of this very nice State Park on the channel. One morning, we noticed that the bottom of the bedroom wall was damp. Being at the Gulf of Mexico in the Florida’s Panhandle, the humidity level was high, so we simply attributed the dampness to the humidity.
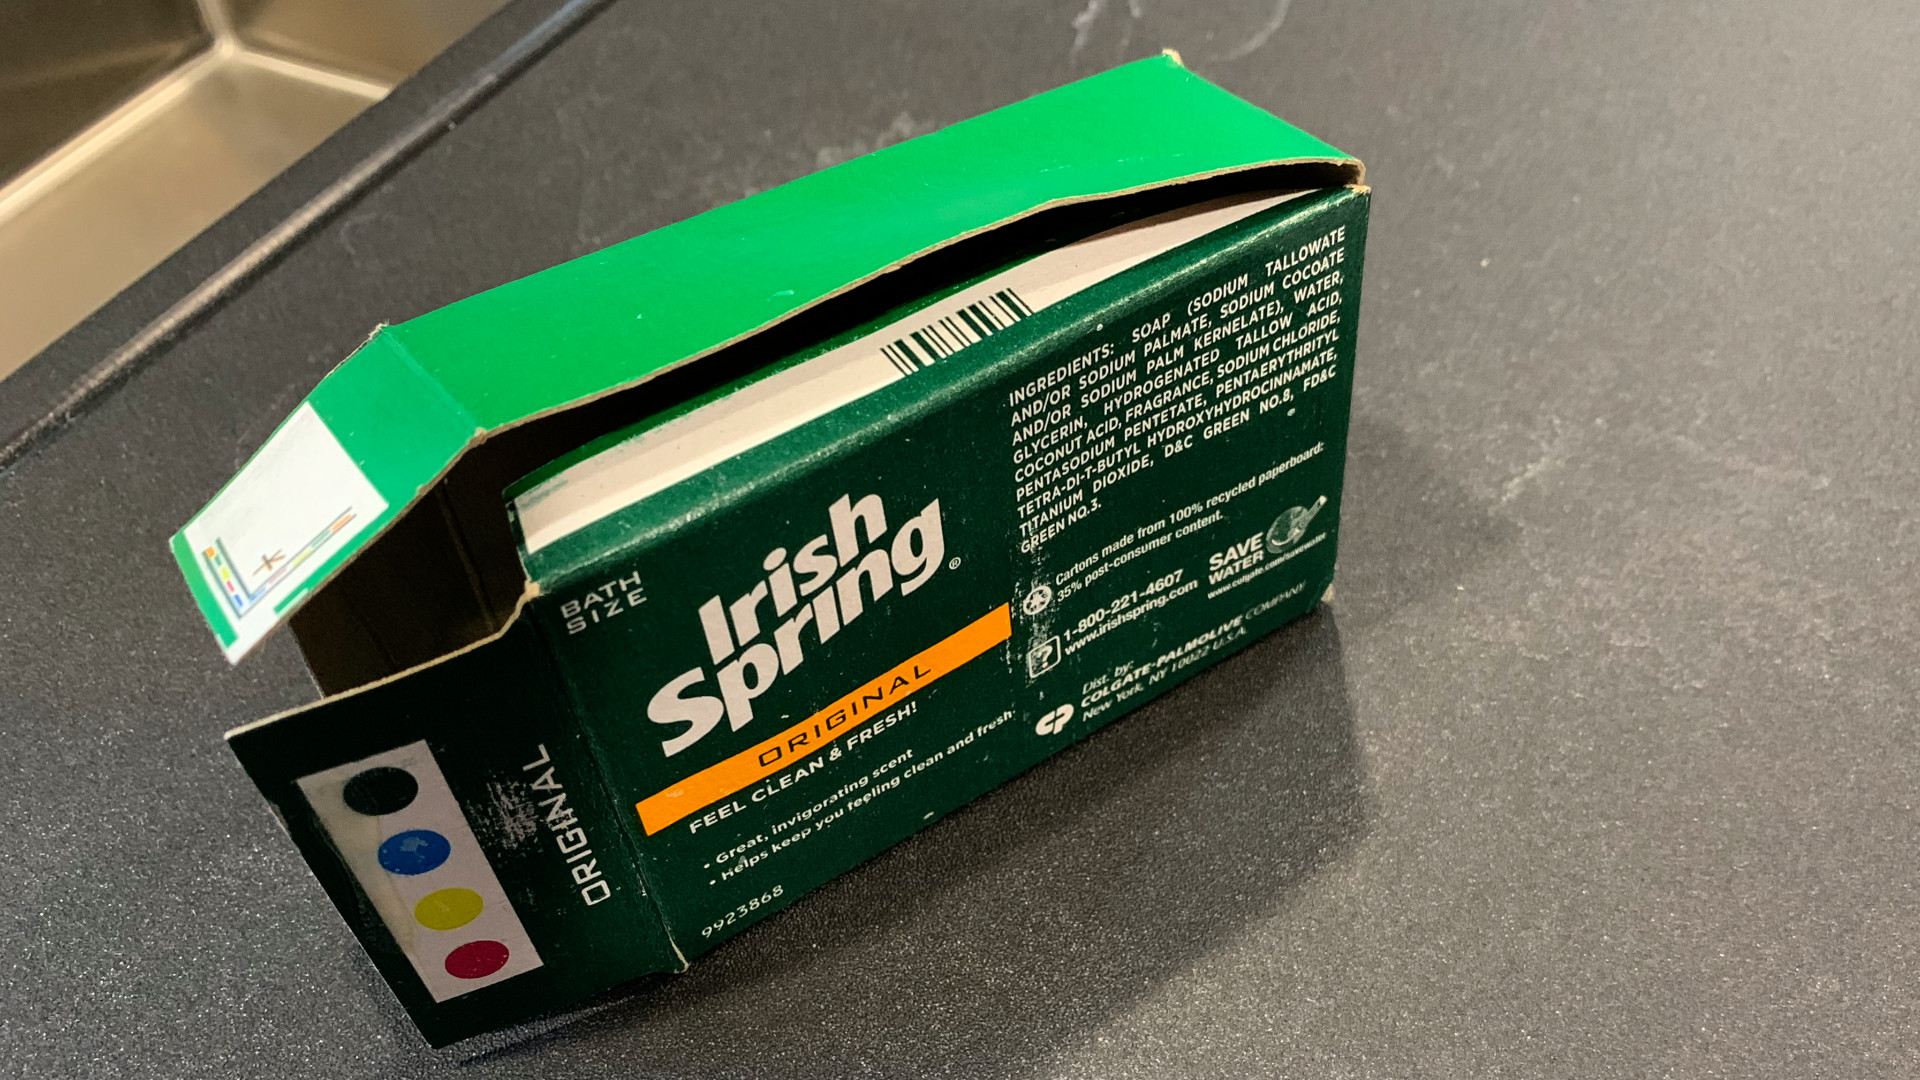
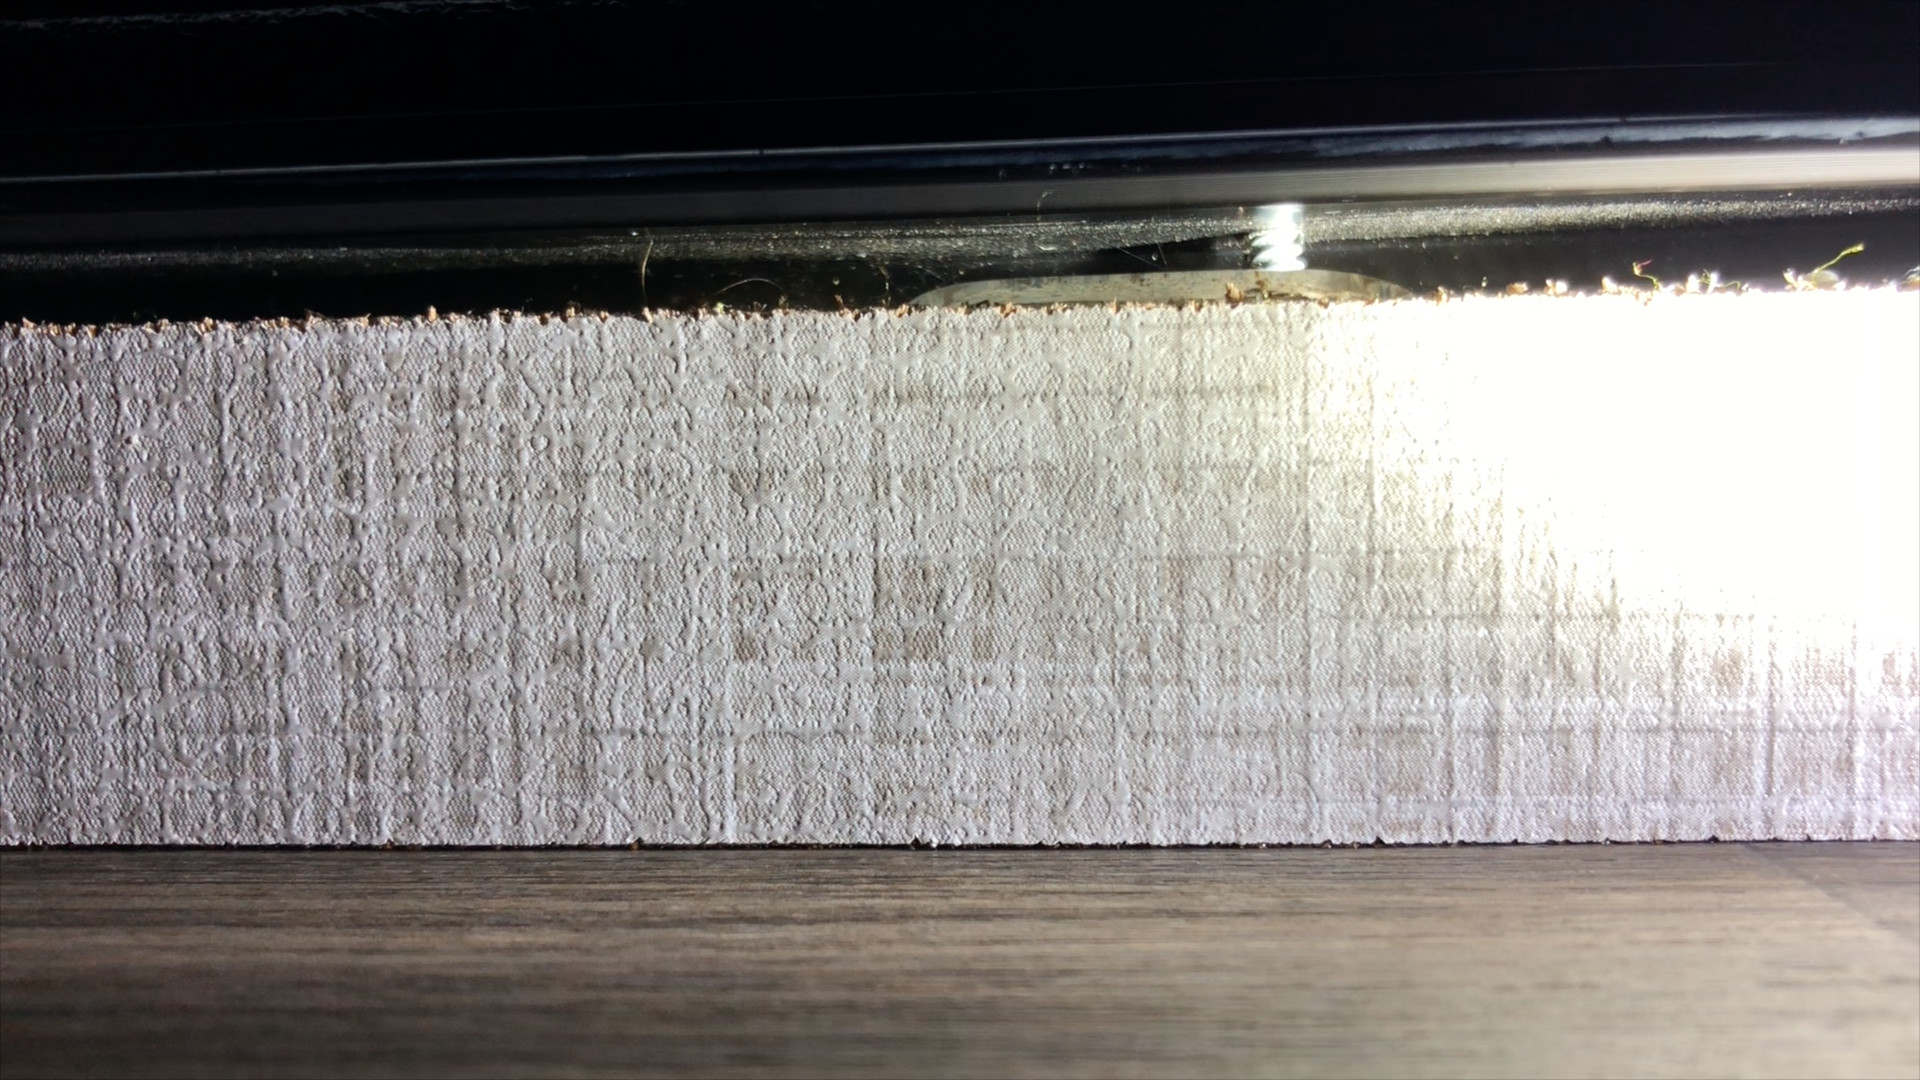
We didn’t see any indicators to give us further concern until this past summer and fall season. After pulling the trailer from storage, we noticed that one of the small boxes of soap we used as critter deterrent had gotten wet. It had been placed near the bedroom wall. While no moisture could be spotted in the cabin, the box itself indicated we had a real issue. In doing further inspection, we noticed additional stains on the pegboard in the cargo area.
As a sidebar, many Keystone Bullet owners who have RVs made prior to the new HyperDeck floor were having similar issues. Many quickly noticed the water issue when their floors developed soft spots in the same general area. Because we had the water-resistant HyperDeck floor it protected the trailer floor but likely masked the problem at the same time.
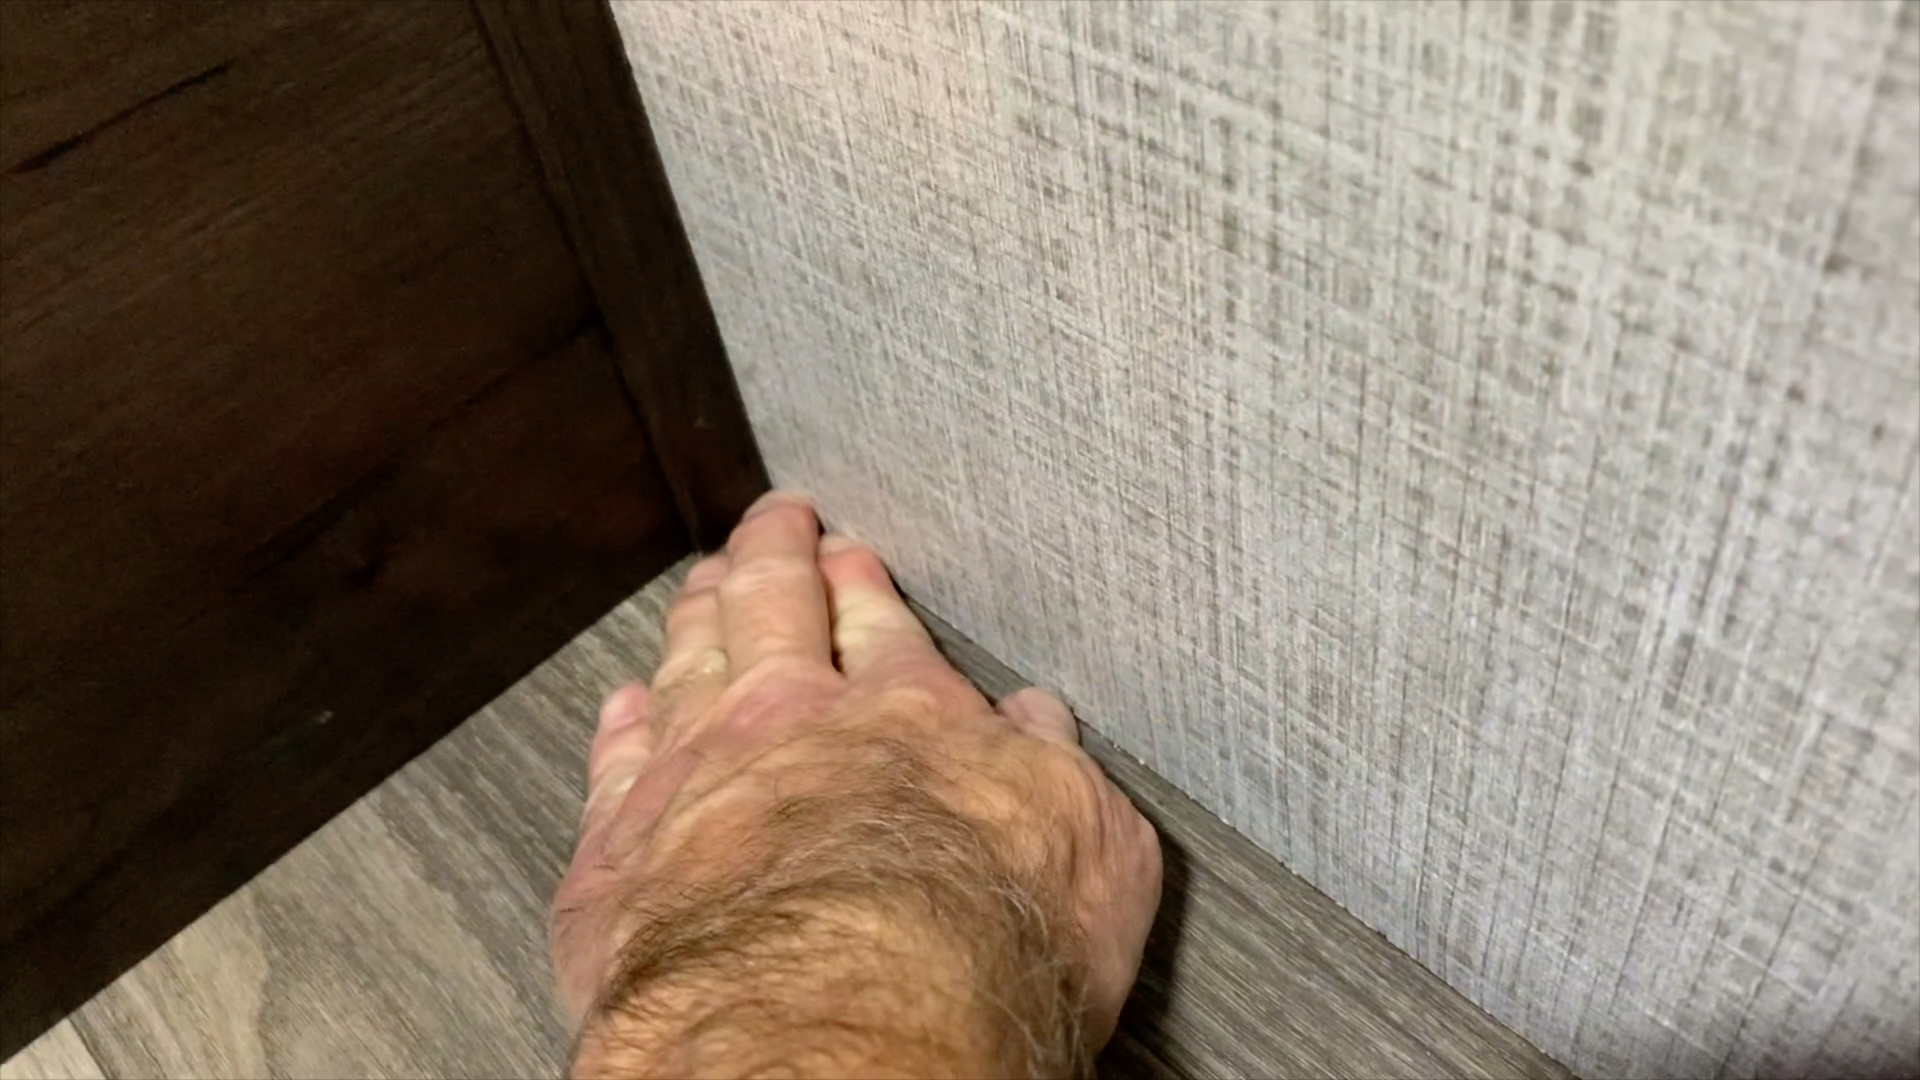
The problem at the bedroom wall was confirmed on a fall camping trip after a rain, when we noticed the bedroom wall near the floor was damp again. Now, we knew we had a real water issue that needed to be addressed.
After checking all roof and wall caulk and seals, we went onto the Keystone Bullet Facebook group and asked about the issue. Unfortunately, there were no shortage of fellow owners who were dealing with the same thing. In almost every case, people pointed to problems with the Slam-Latch cargo doors leaking. With this in mind, we began to tackle troubleshooting the water leak issue.
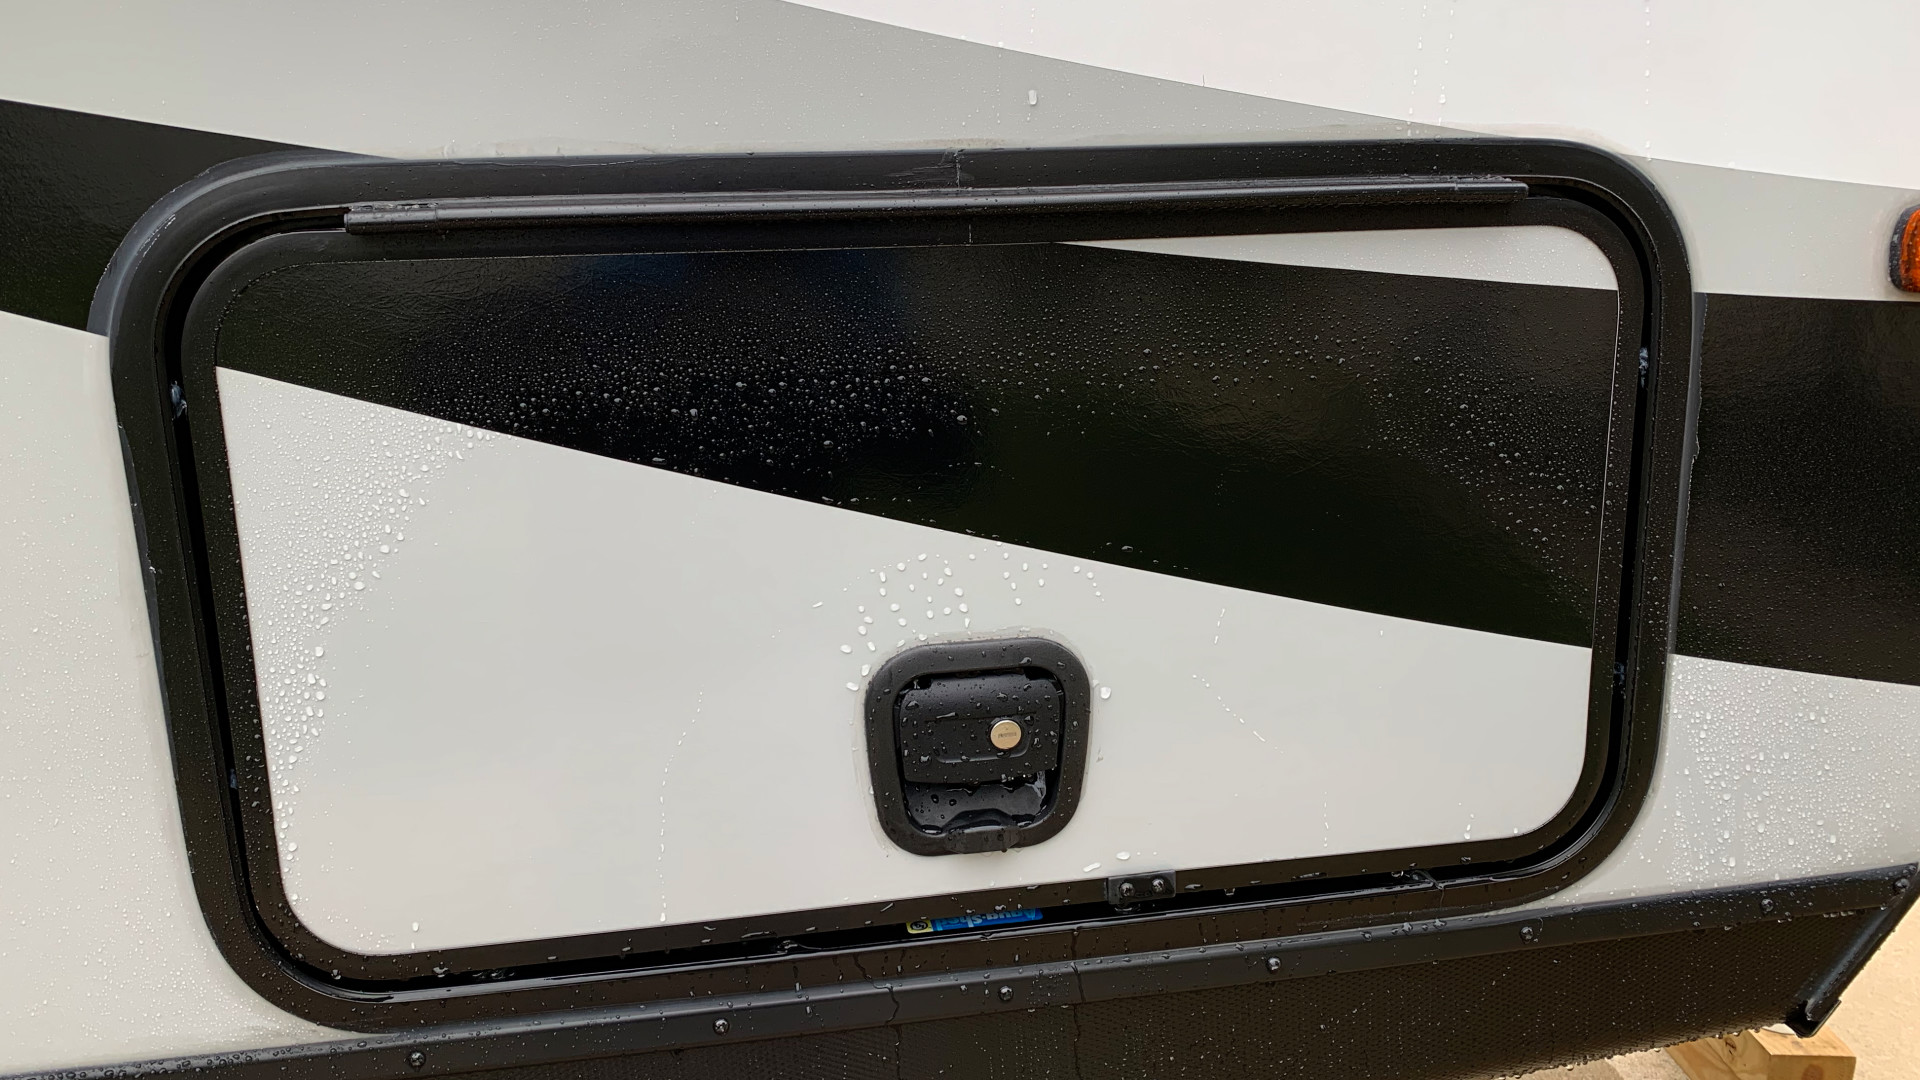
Next thing we did was to inspect the slam latch door. We applied silicon on the external screws on the door housing that didn’t already have silicon on them. The design of the slam latch door placed the screws outside of the seal. The lower screws on our unit already had silicon on them from the factory, so we only applied silicon to the screws on the sides of the door.
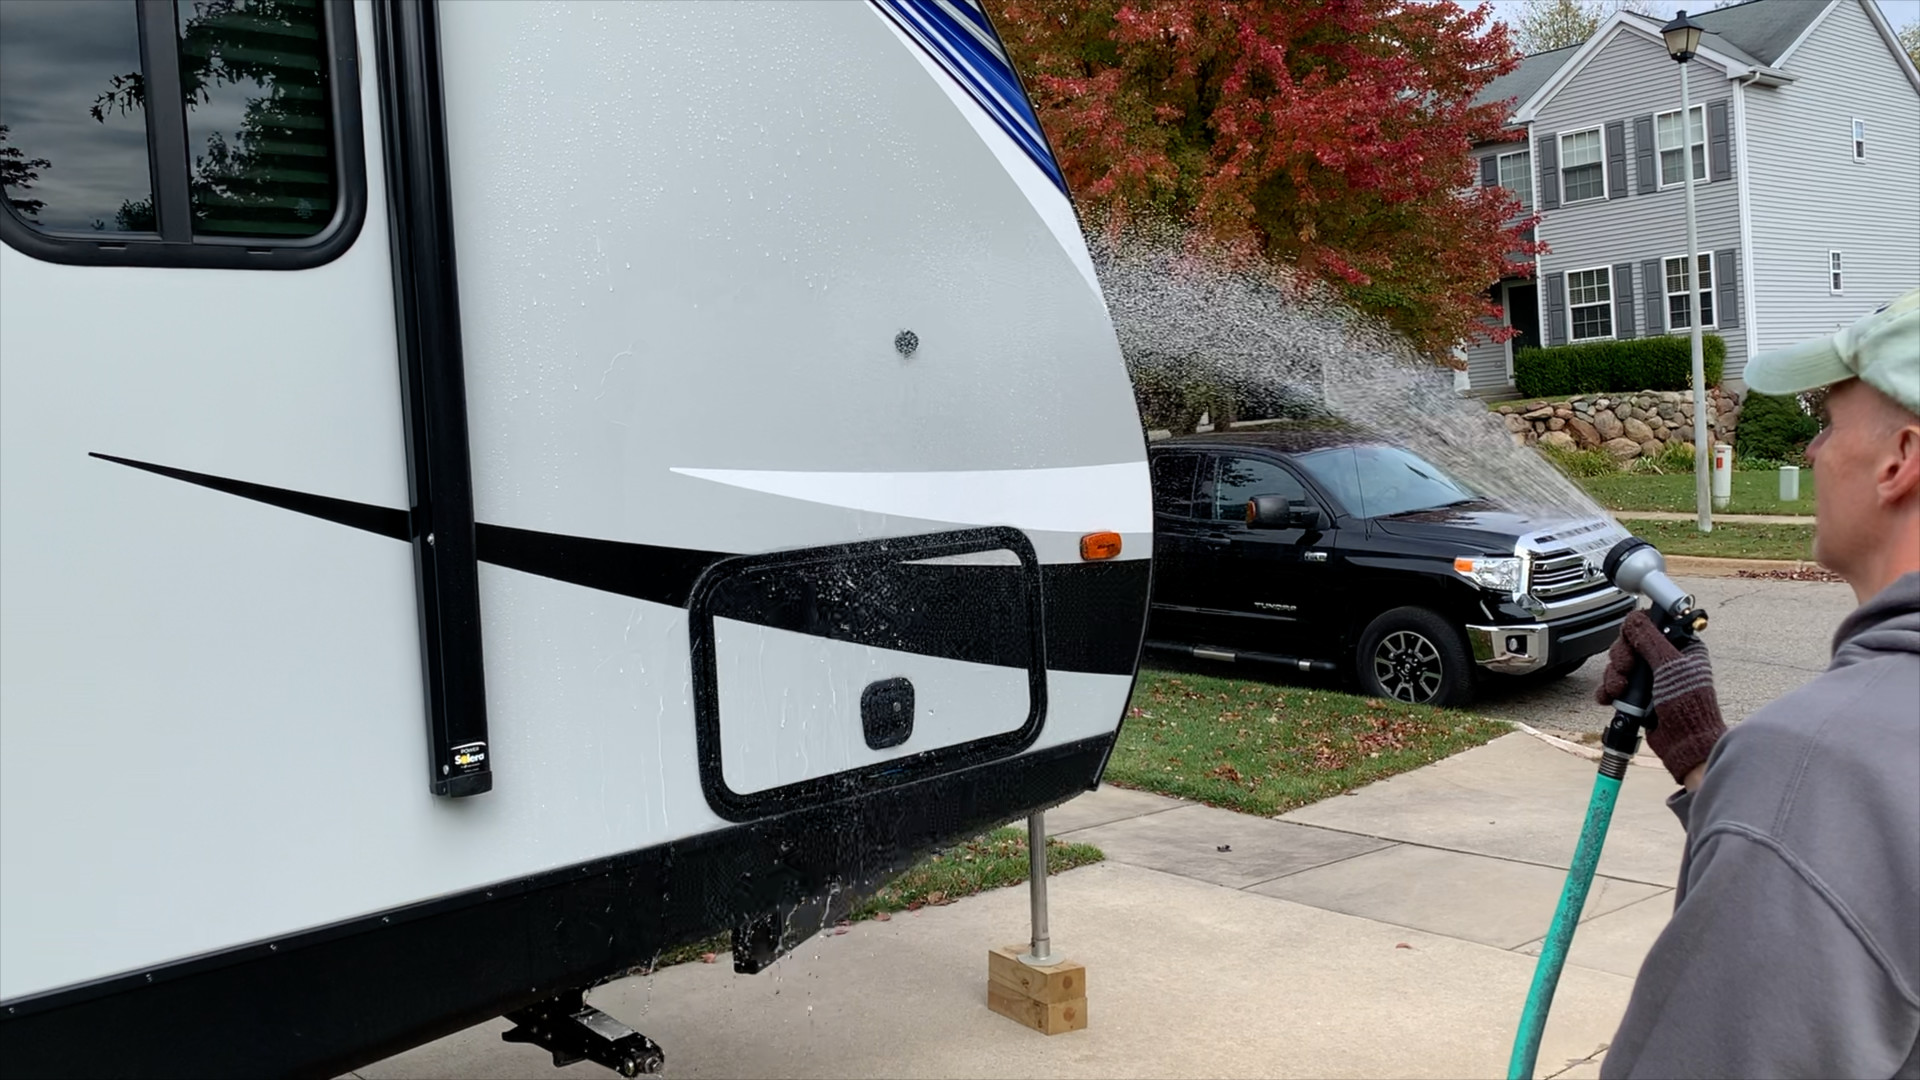
Next, we decided to spray the slam-latch door with a garden hose to imitate rainfall. We put a dry microfiber towel strategically placed in the cargo area near the base of the door opening. After about five minutes of spraying, we stopped and inspected the dry towel. It was drenched with water!
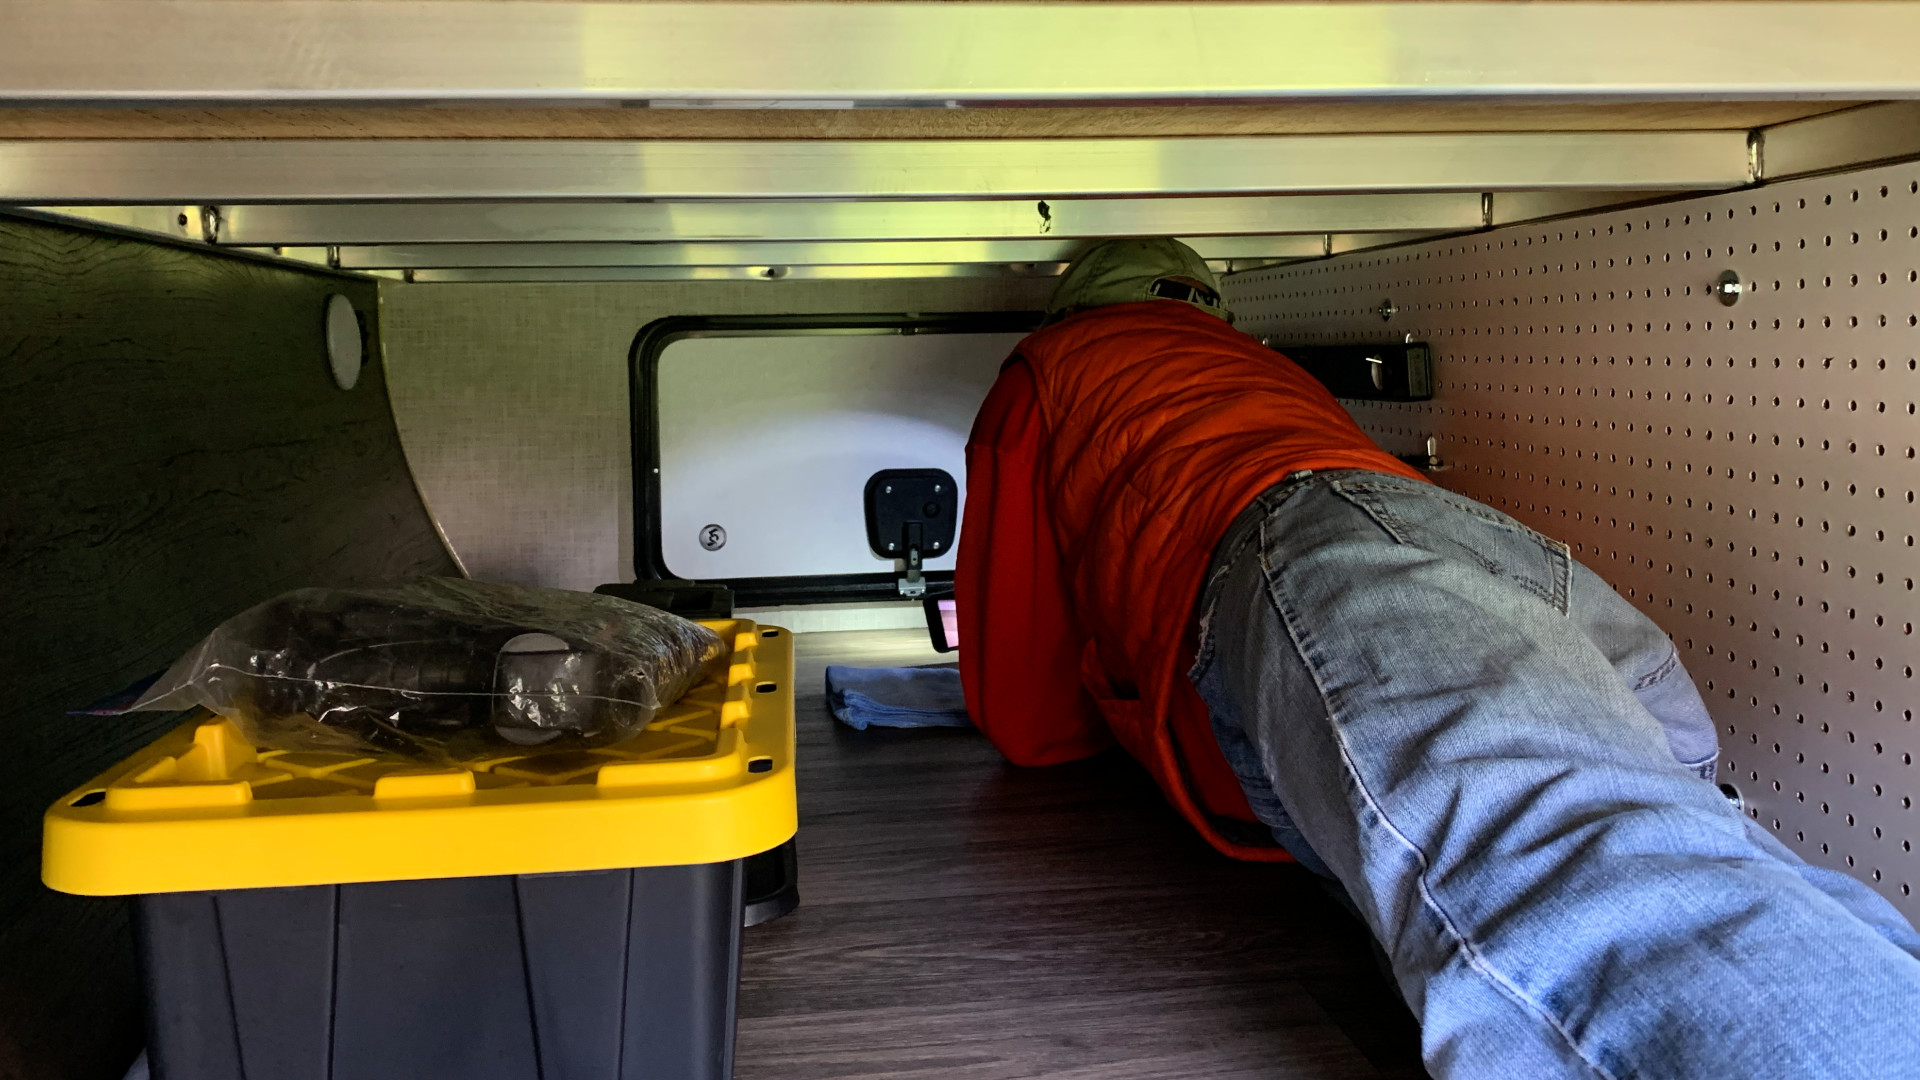
So now we were very certain that the door was leaking badly. The next test we did was to have me crawl inside the cargo hold from the opposite side with a headlight and my iPhone. I wanted to film what was going on. I had some help with spraying the garden hose while I was inside the cargo bay filming. Water quickly came down from inside the wall onto the floor. It was very apparent that the leak was allowing considerable water into the cargo hold.
What is interesting is that right after the water pooled for a few seconds, it flowed back to the base of the wall. The trailer was level side-to-side when doing this test, so I can see why it would flow onto the peg board if the trailer were leaned away from the door. So, the door was leaking badly, but from where?

By the way, we had already inspected all the seams and caulk in detail around the cargo door and found no entry areas, cracked caulk or any issues. So, the mystery continued…
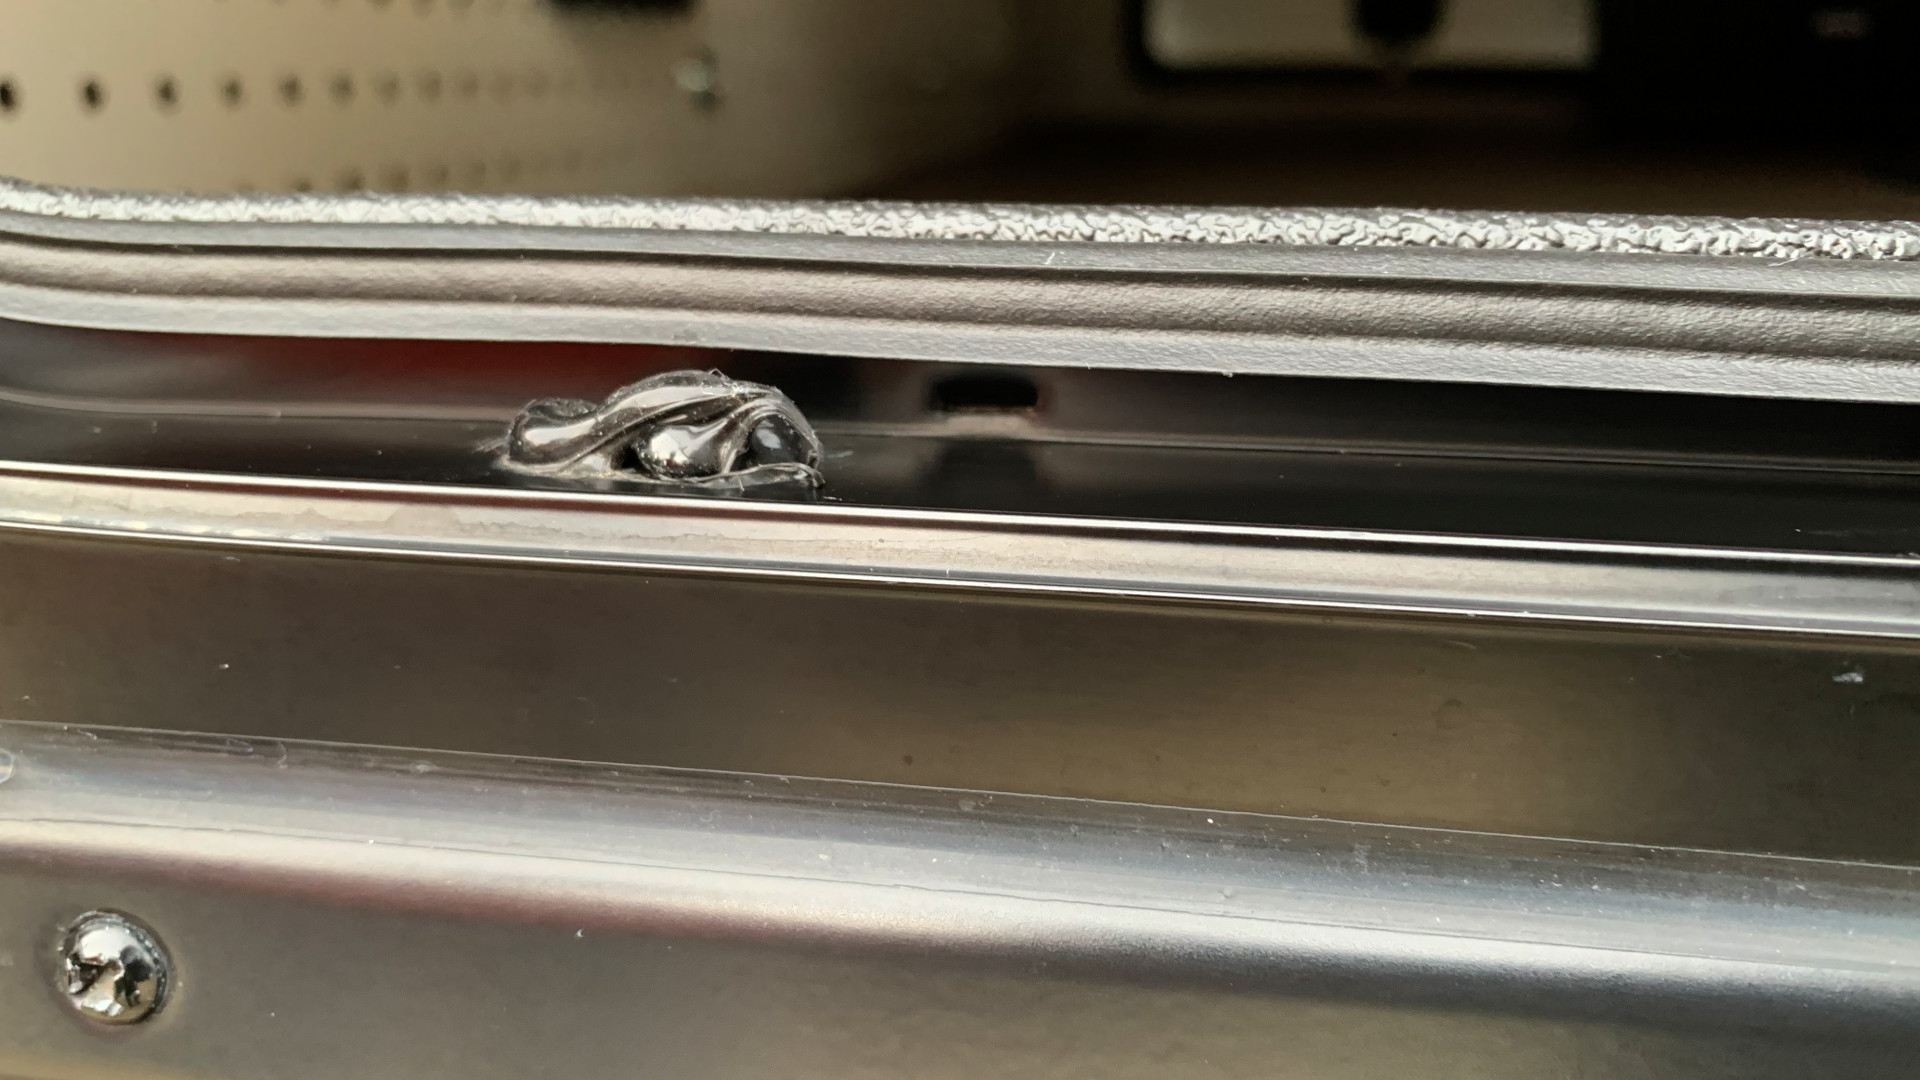
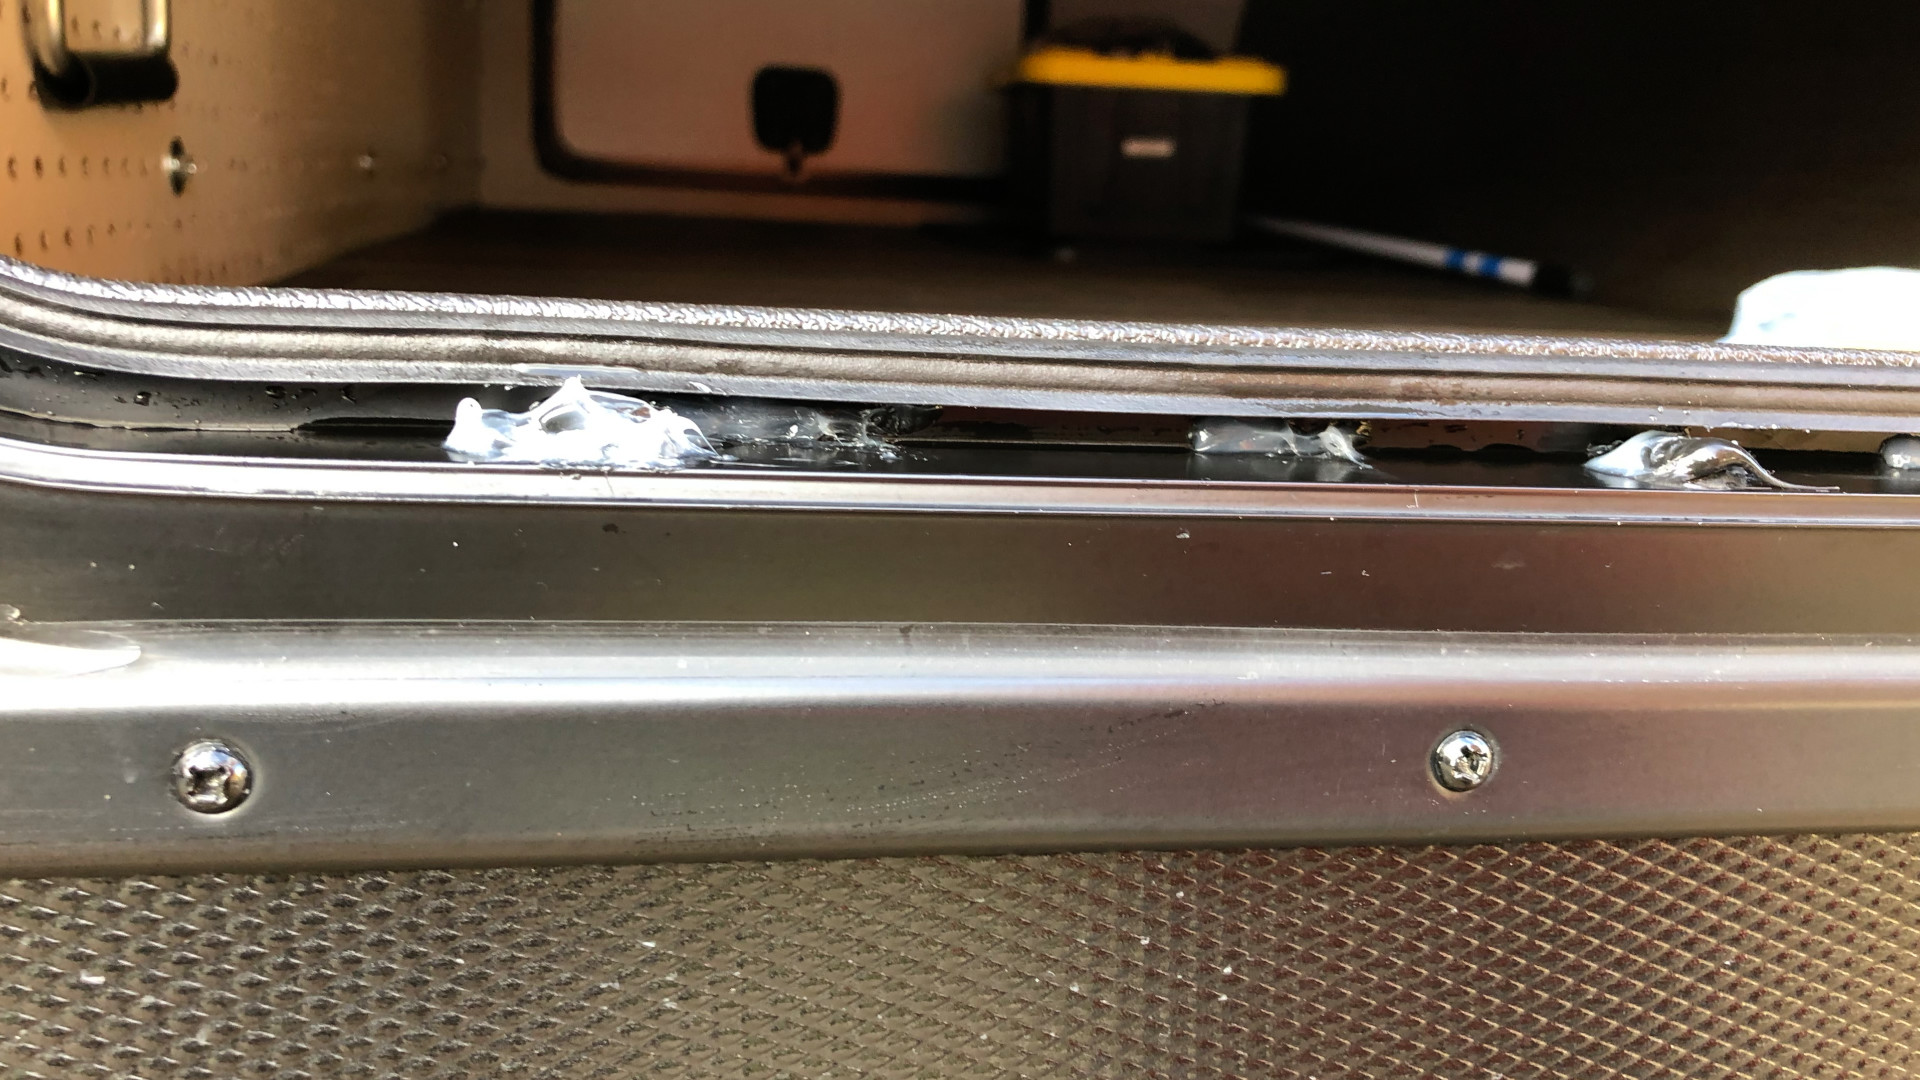
The next test was to try and isolate the issue on the door. We did notice some crimp marks on the bottom frame of the door and wondered if these were actually weep holes in the frame. It didn’t make sense that they would be weep holes, as they would allow water to run into the wall.
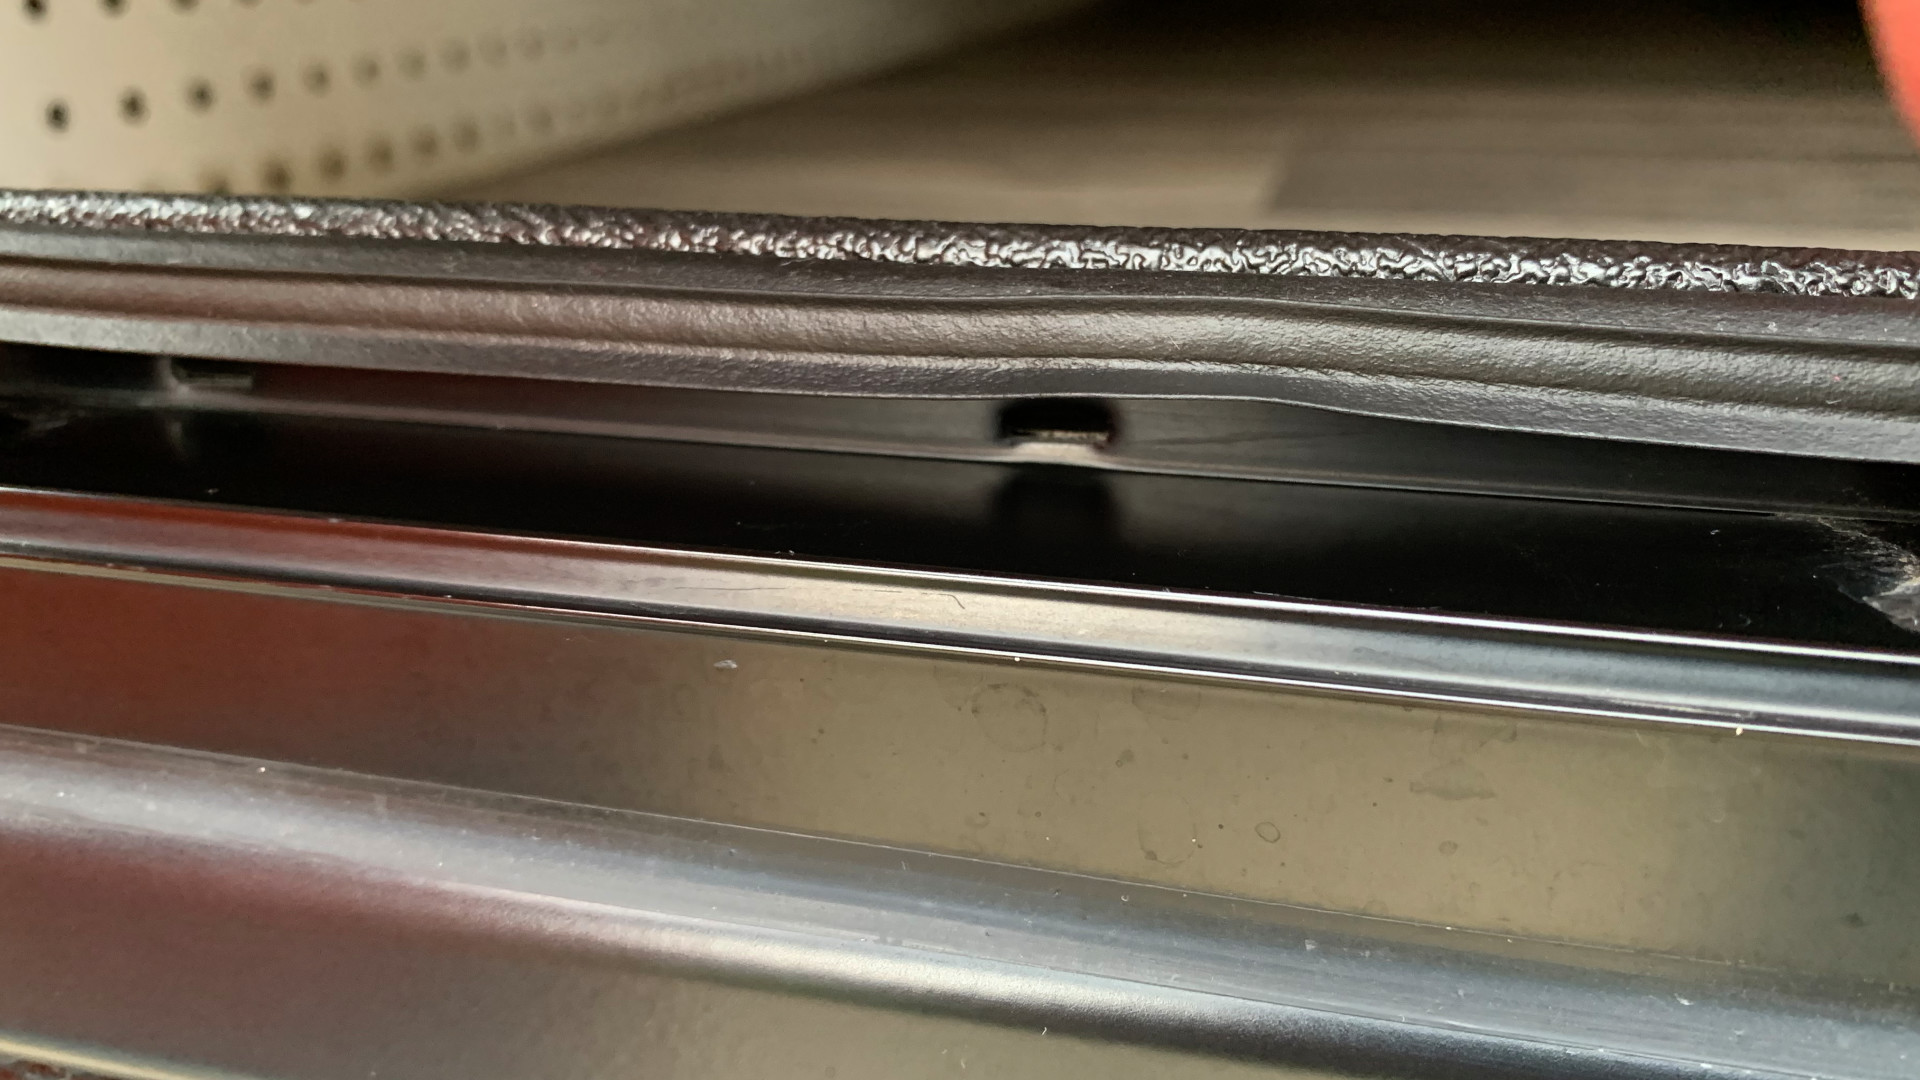
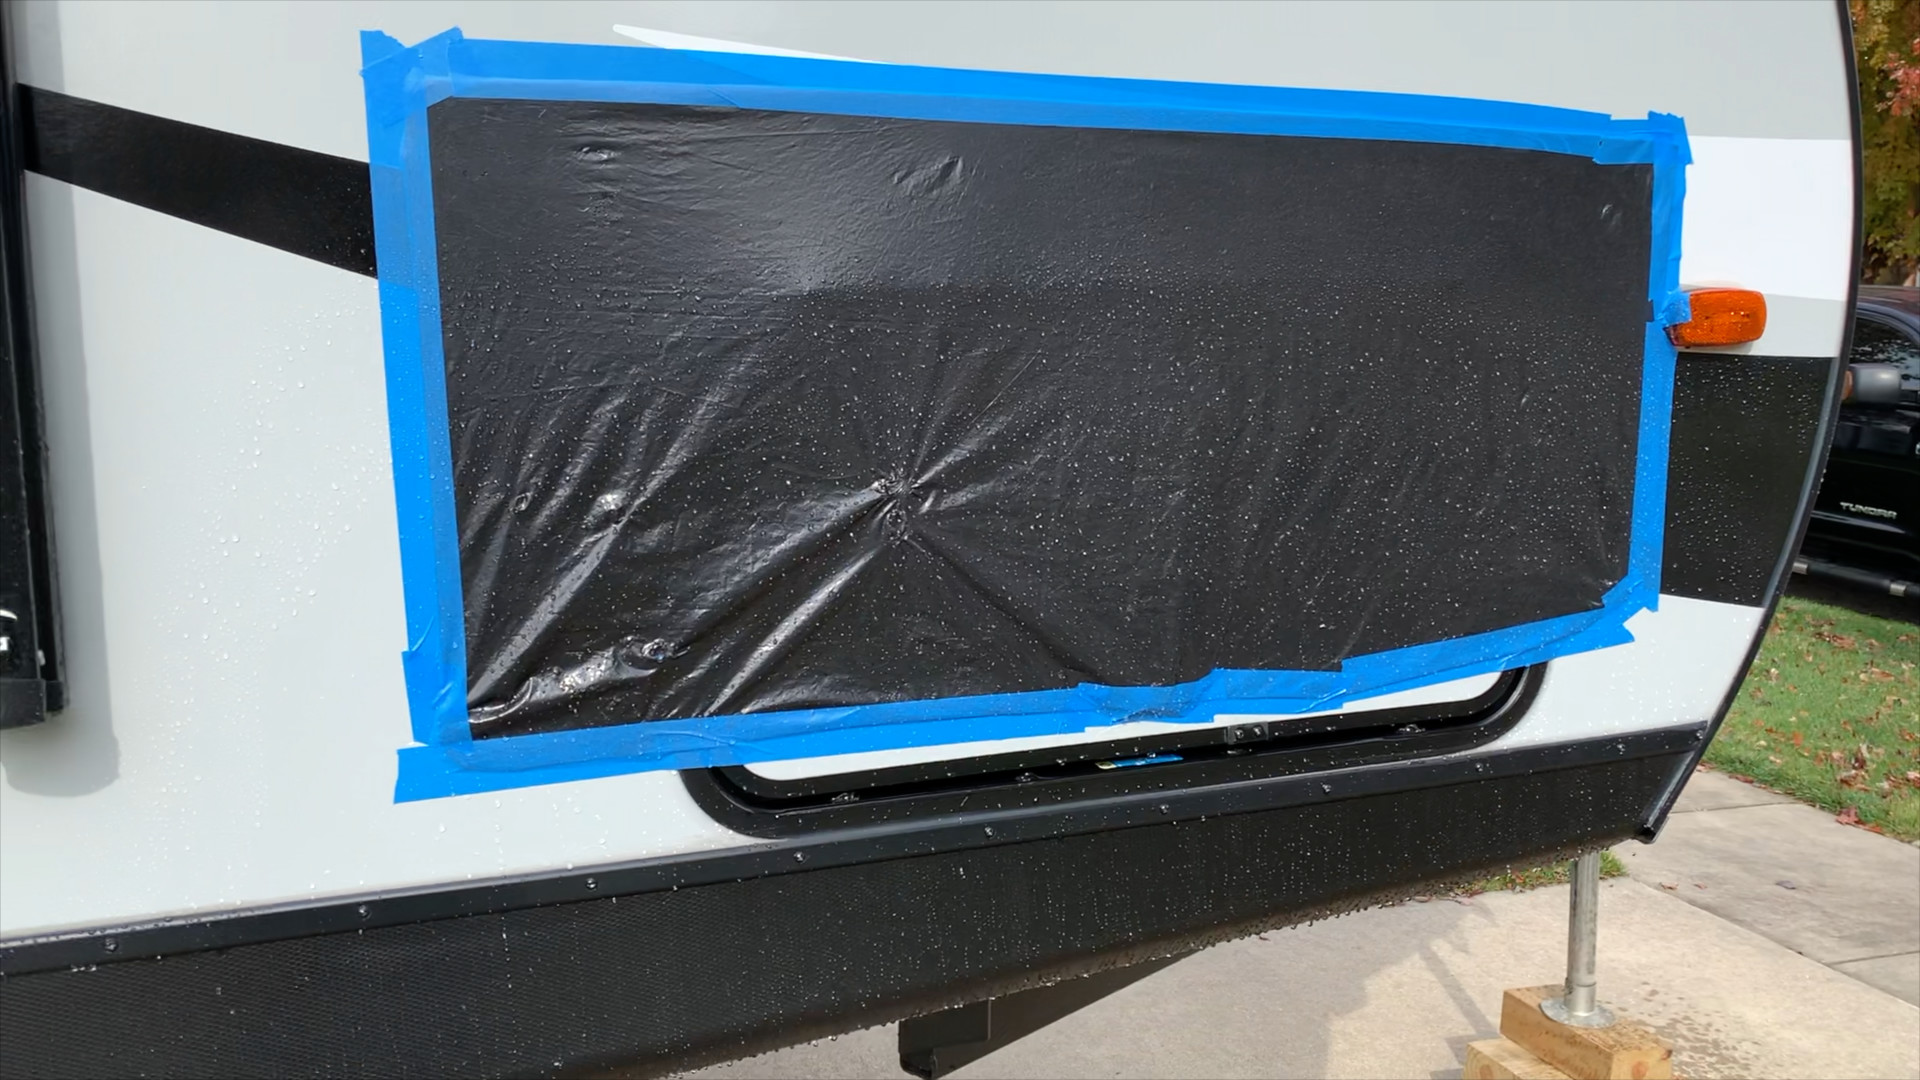
So, we cut a piece of contractor bag and used painter’s tape to cover the entire door, except the bottom channel where we could see the six frame crimps. Once taped up, we reshot the door with the garden hose with me in the cargo hold to film what would happen.
At first no water showed up, but after 15-20 seconds of spraying the lower door, water began to flow almost exactly as it had before. So, the top hinge and latch mechanism were almost certainly eliminated, leaving only the bottom channel and the odd weep holes as the potential culprit.
Now that we had tested down to the actual area that was leaking, we decided to seal the six weep holes with a generous portion of silicon sealant and left it overnight to cure. Later that afternoon, we had a significant storm with a good downpour of rain.
The next day, we took a quick look at the cargo area and noticed some moisture below a plastic tray we had in the area. Apparently, some moisture was still entering the cargo hold. I decided to get in the cargo hold and film again. This time, no water came in on the front side where it leaked before, but it did get in on the bedroom side of the door.
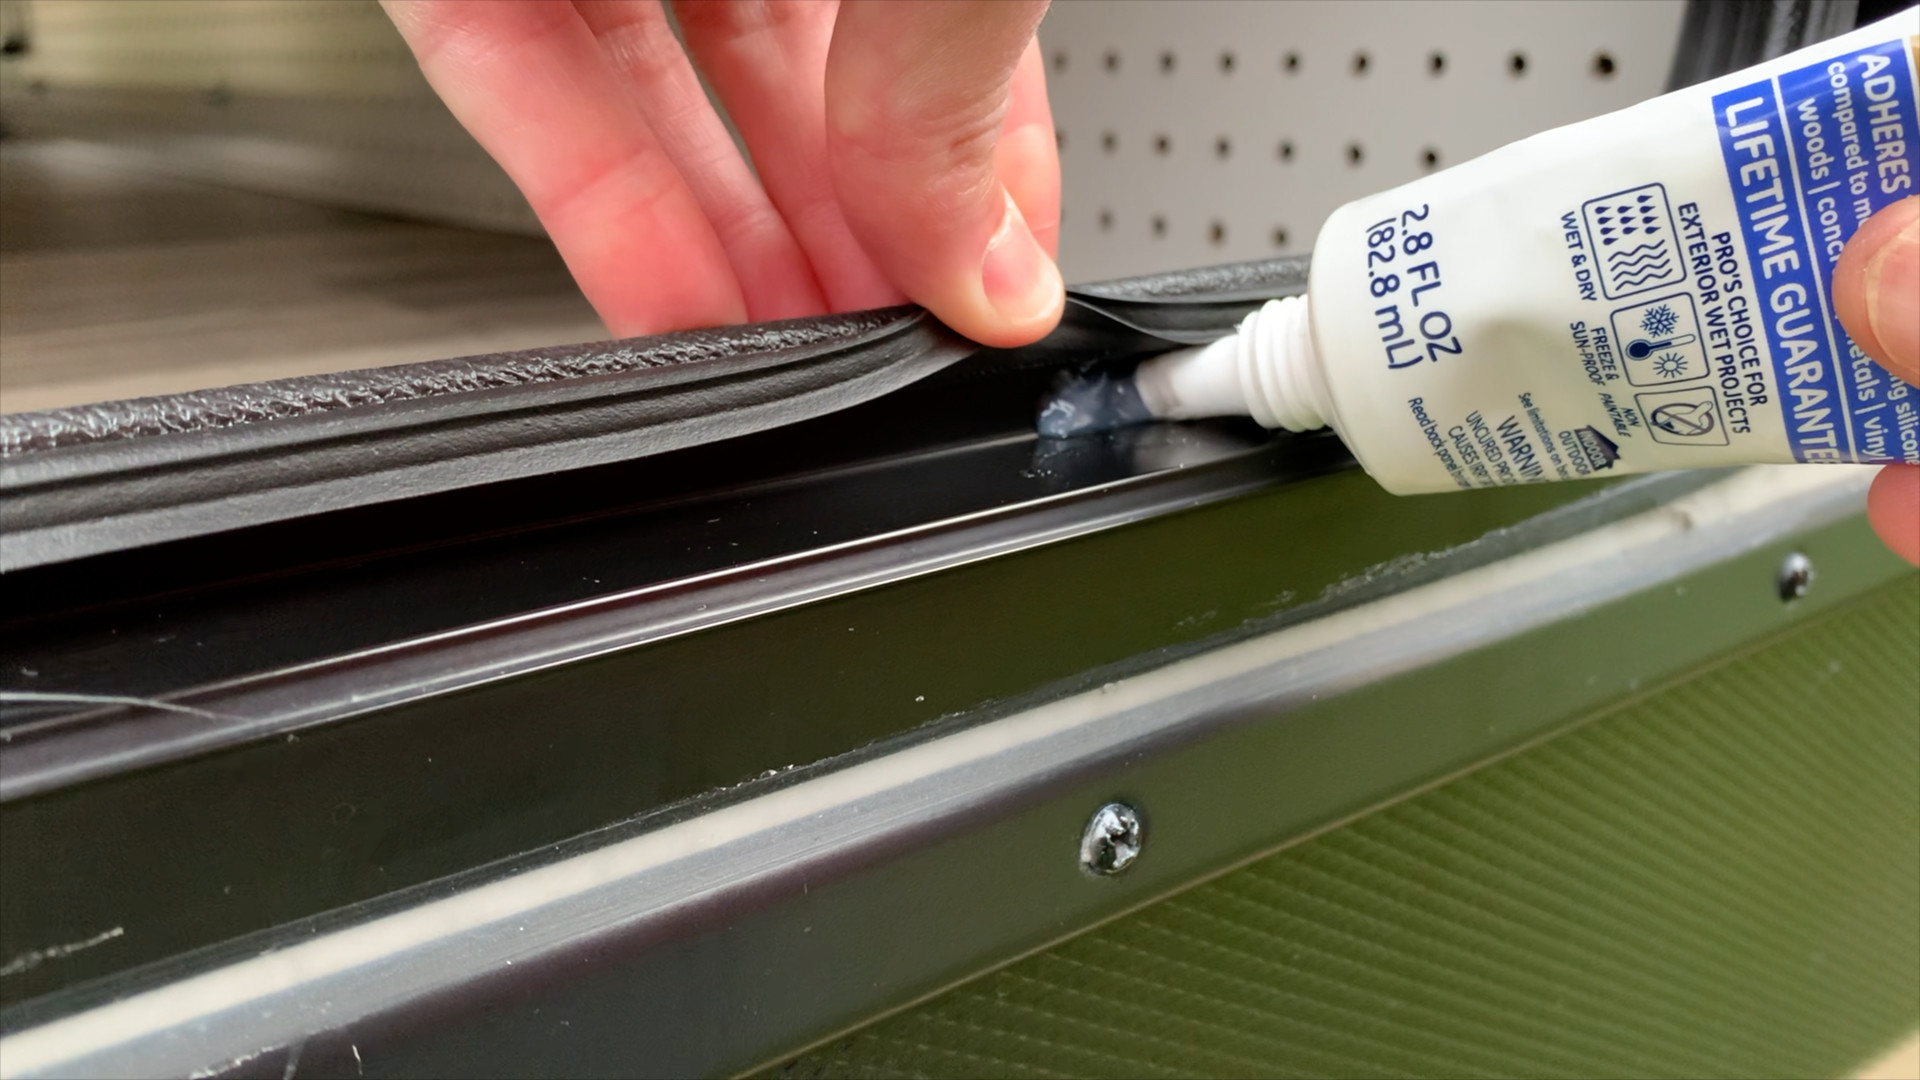
So, it appeared at this point that we had closed one leak when we sealed the weep holes, but water was still getting in somehow. So, while I was still in the cargo area, I decided to tape a close up of the area where the leak occurred. This time we were able to isolate the issue. The water was coming from the screw, pooling on the aluminum door frame, then emptying out onto the floor!
This specific screw was one of four that are along the bottom of the slam latch door frame and had factory silicon applied. Apparently, the screw wasn’t fully covered with silicon and was allowing water to drain into the wall.
So, we applied a healthy portion of silicon around the back of the four screws that had been covered with factory silicon. We let the new silicon set over night. We also placed a dry towel near the door as rain was forecasted. That night we encountered a significant rainstorm. The next morning upon inspection, the towel had remained dry!
Not being fully convinced we had a fix, I again climbed into the cargo area and filmed while the lower door was soaked with the garden hose. After a good 5 minuets of spraying the door and no water showing up, we were fairly convinced we had solved the issue. We did one last test after removing the plastic from the upper portion of the door that proved the solution had worked. We were leak free!
Here is my take…the entire problem and solution is fairly troubling. First, I can’t explain why a cargo door would ever be employed with weep holes that open to the inside of the RV wall. Apparently at least one of these weep holes was letting water into the wall. Second, the screws on the bottom of the door frame were not properly sealed at the factory. This means that likely for much of the life of the trailer, the issue was present. This explains the staining on the pegboard from before I received the unit. Third, had we not had the new HyperDeck flooring, for certain the floor of the RV would have absorbed a great deal of moisture over time and likely would have had to been replaced. The new water-resistant flooring likely both saved the trailer and masked the leak issue.
Fortunately, in my situation, the floor is solid, the frame in the leak area is aluminum, so no damage was done. The minor intrusion in the wall was very minimal and the pegboard can easily be painted or replaced.
Hopefully, this has shined some light on the issue of dealing with a water leak and how to methodically track it down and potentially solve it. The old adage, an ounce of prevention is worth a pound of cure comes to mind.
All the best on your camping endeavors!
We’d love for you to join the On The Road Team by subscribing to the YouTube channel. If you want to dive deeper, we put more content and photos on Instagram and Twitter @JohnMarucci. You can also follow John on Facebook @JohnMarucciOnTheRoad.
As always, thanks to our teammates who support the channel by watching the YouTube Ads and by starting their shopping from the On The Road Amazon Storefront at: amazon.com/shop/johnmarucci. Your support is greatly appreciated!
Watch the more than 100 videos from John Marucci – On The Road!