
Click here to sign up for reminders when new blogs are posted.
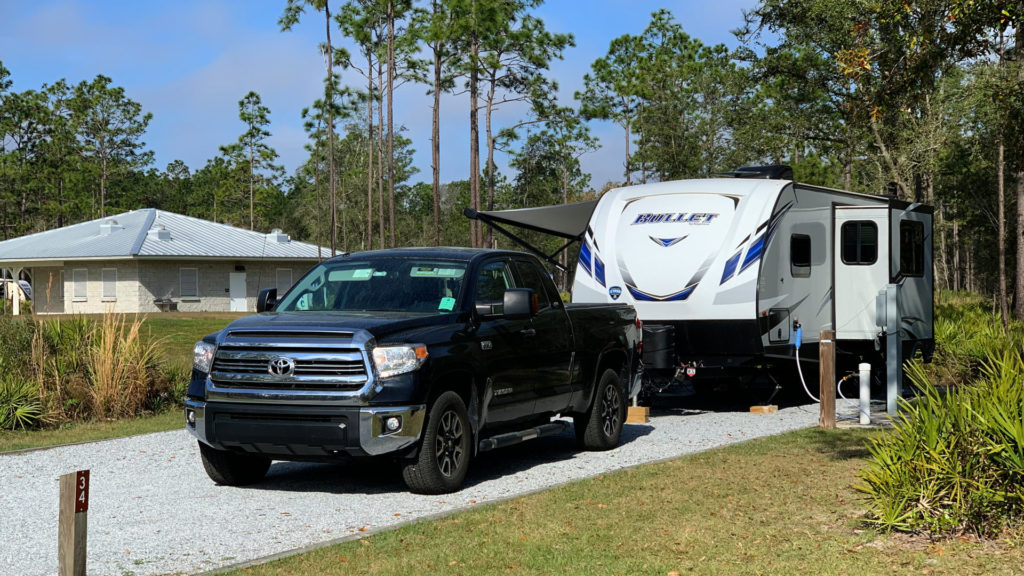
In this blog, we’ll go over the step-by-step process of installing a valve on the Dometic 300 toilet in my Keystone Bullet travel trailer. It had always been a bit frustrating having to turn the water off to the entire RV whenever having to service or clean the toilet. With the installation of this valve, we can now simply turn the water off at the toilet only, which is very convenient. The process of adding this valve can be applied to most plumbing outlets in RVs with PEX plumbing lines.

When we were traveling this past winter, we had an issue with the black tank flush not working in the RV. This meant we had to use the toilet extensively to fill the black tank up before dumping the tanks. Since the sensors for the black tank were giving inaccurate readings, the best way to know when the black tank was reaching capacity was to look down into the tank from the toilet. This was difficult to do with the water running in the toilet while the flush mechanism was open. Because of this, we decided to add this handy PEX plumbing valve to the toilet line. Looking back, even without having this problem, I would do this upgrade again for the convenience it adds.
Here are the tools and supplies needed to do the job properly. Some of the tools are expensive but can be reused on other RV plumbing projects. They are a good investment in your toolkit. You can find these tools and supplies at a local hardware store or on our Amazon storefront. These step-by-step instructions are available at johnmarucci.com on the Docs & Downloads page in the Resources area.
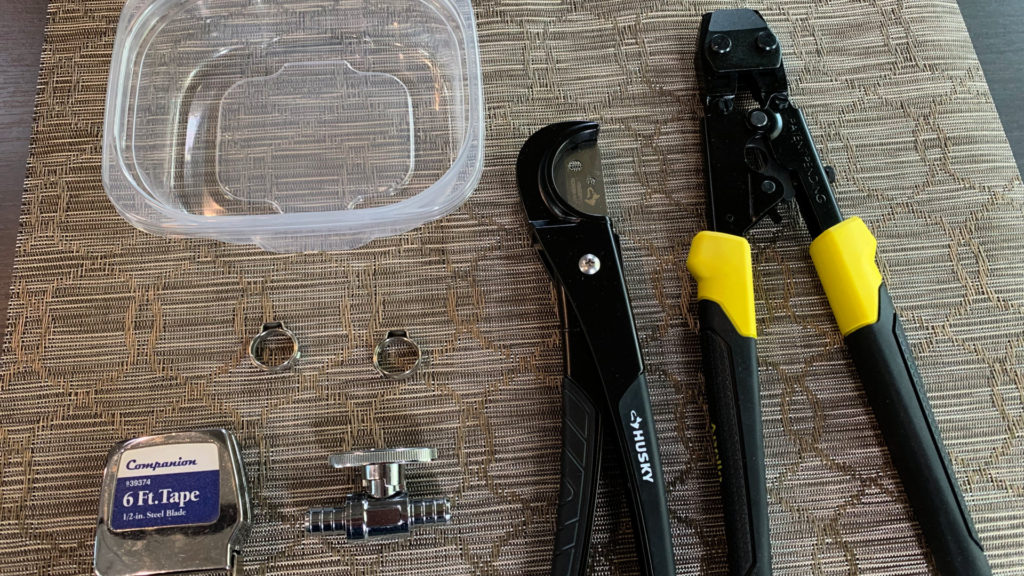
1” Wide PEX ½” Diameter Valve
2 – ½” PEX Pinch Clamps
PEX Pipe Cutter
PEX Pinch Clamp Wrench
Tape Measure & Marker
Small Container to Catch Water
Here are the steps:
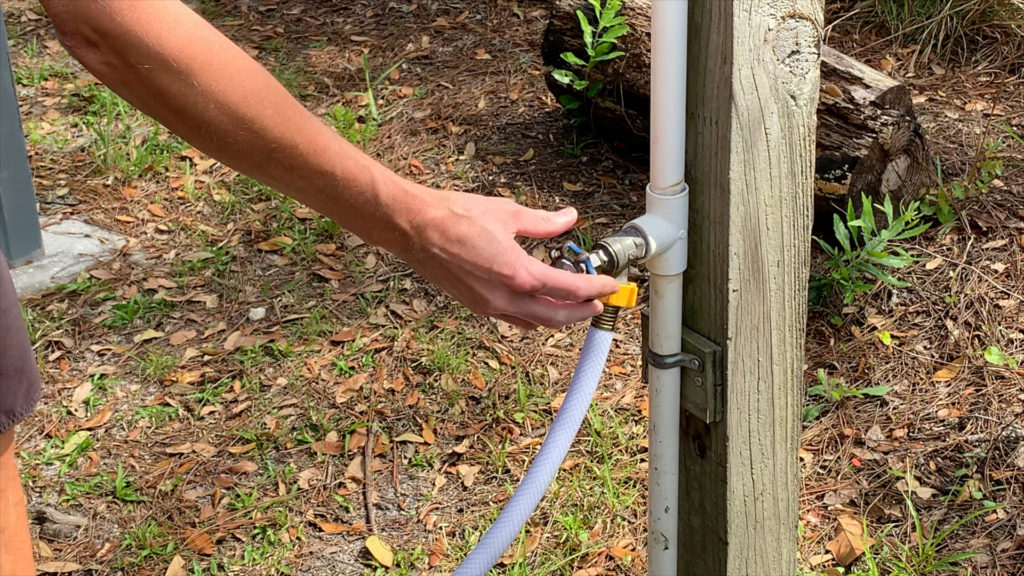
Step 1 – Go outside and turn off the water to the RV.
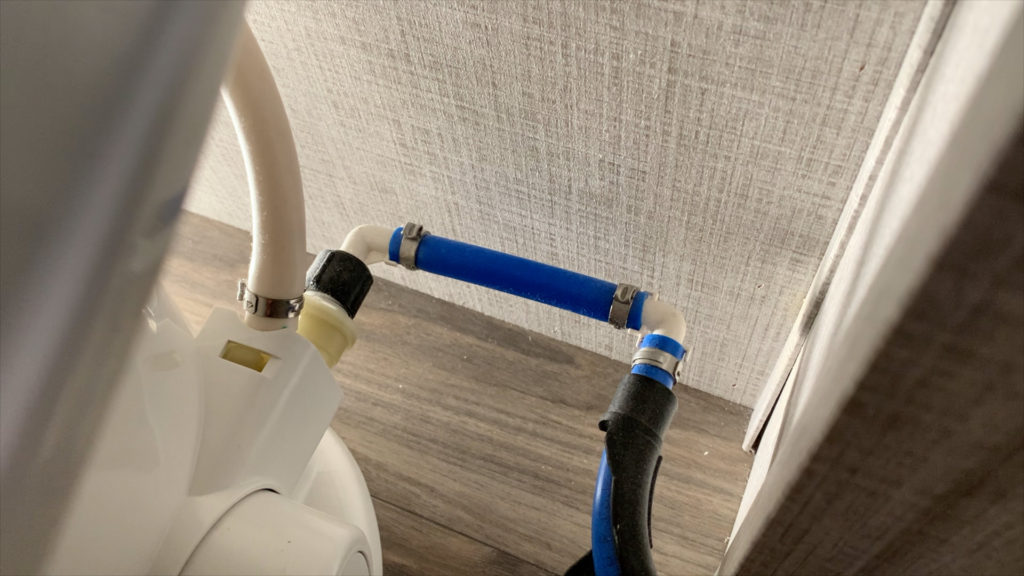
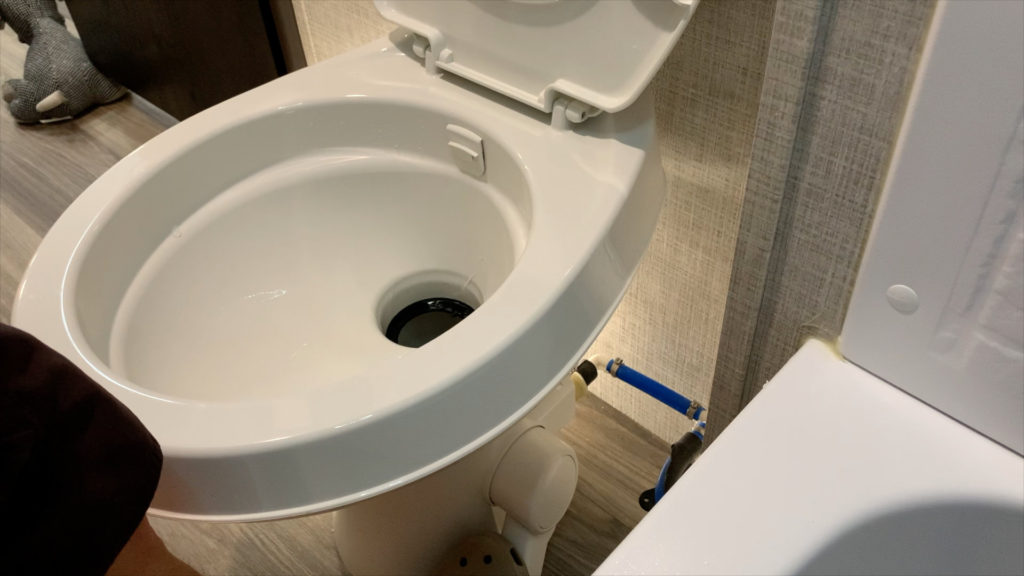
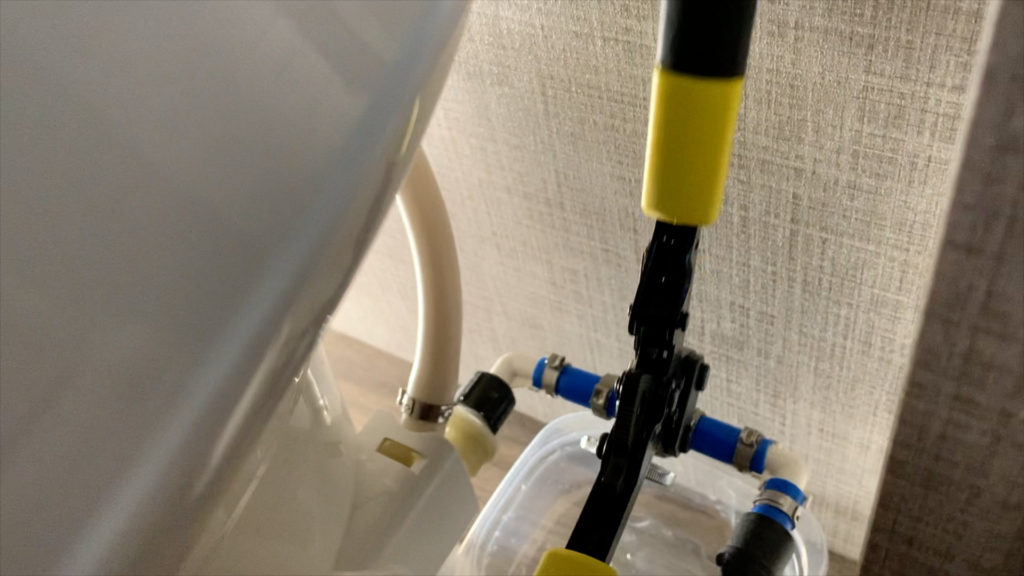
Step 2 – Locate the short PEX plumbing line that feeds water to the toilet. This is where you will install the new cut-off valve.
Step 3 – With the water off, flush the toilet of any remaining water in the bowl to relieve water pressure from the line. Note, there may still be a bit of water pressure in the line even after doing this.
Step 4 – Place a small container under the plumbing line you are about to cut, to catch any water that comes out of the line.
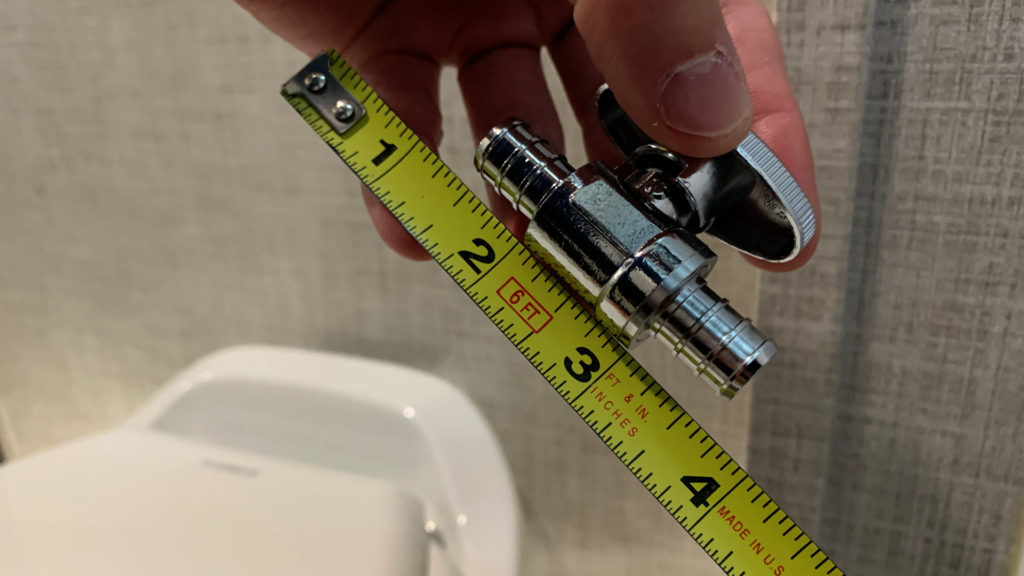
Step 5 – Measure the width of the new valve, not including the part that will fit within the existing lines. This is what you will use to determine how much line to remove. In this case, we needed to remove 1” from the center of the existing plumbing line.
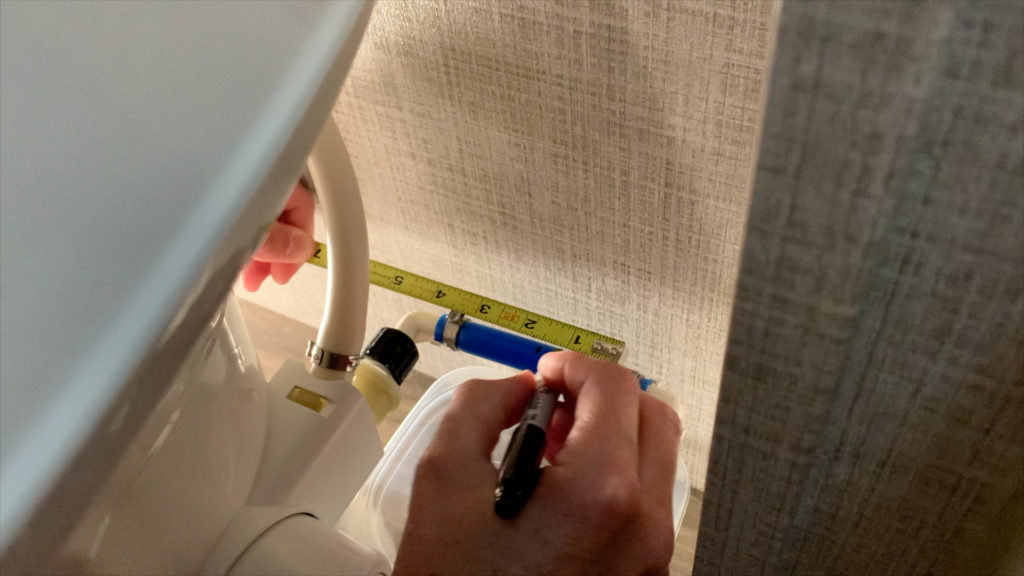
Step 6 – Using the tape measure, mark the center point between the existing clamps or end of the line and then mark ½” to either side of the center point. These are your cut marks.
Step 7 – Using the PEX pipe cutter, cut the PEX line at the cut marks. It is likely that some water will come from the line when first cut. You may want to have a small towel nearby. Try to hold the pipe cutter perpendicular to the line when cutting to ensure a smooth cut. When finished, the line should have an inch gap where the new valve will go.
Step 8 – Insert the two ½” PEX clamps on the freshly cut lines, one on each side. Make sure the clamp pinch rings of each clamp are facing out to be available to pinch.
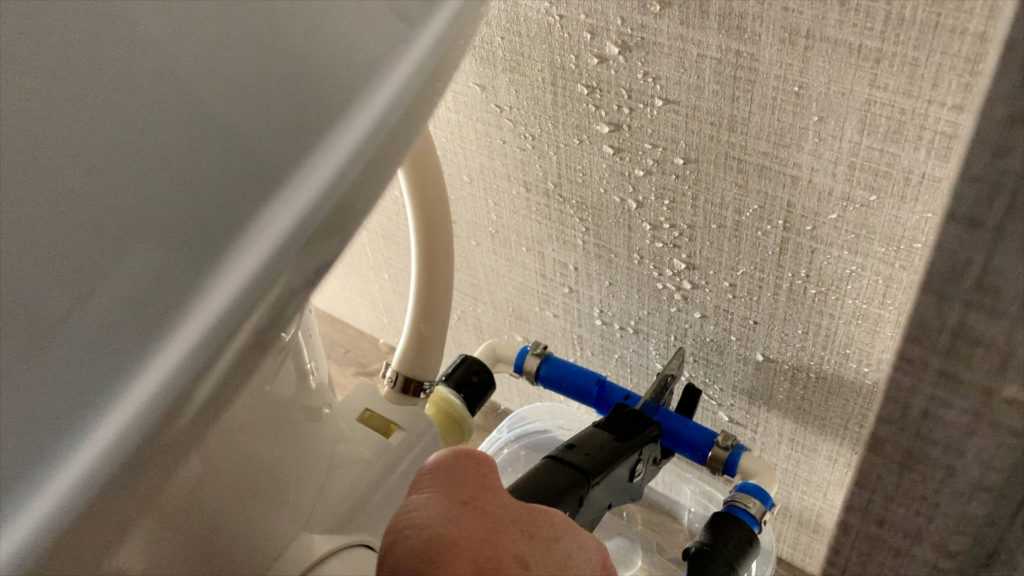
Step 9 – Insert the new valve into the freshly cut lines and snug into position. This may take a bit of effort. Make sure the valve control is pointing forward. Then position the pinch clamp rings within a ¼” of the valve on either side.
Step 10 – Using the pinch clamp wrench, clamp down the PEX pinch clamp rings firmly to seal the rings. This is going to take some hand strength in a small space, so take your time as these seals are very important. Repeat the process on the second ring. Again, it will take real hand strength to seat this properly.
Step 11 – Check that the valve is very securely fastened to the line.
Step 12 – Turn the water back on to the RV and check that the valve is not leaking under pressure. Also, flush the toilet to make sure the water is running properly.

Ok, that should do it! I think you’ll find that this is a very nice convenience to have when needing to clean or service your RV toilet. I certainly have enjoyed having this valve on the toilet in my RV. Remember, if you don’t feel comfortable tackling this project yourself, contact your local RV service center.
All the best in your camping endeavors!
Remember to sign-up for blog reminders so you don’t miss when new blogs are posted.
We’d love for you to join the On The Road Team by subscribing to the YouTube channel. If you want to dive deeper, we put more content and photos on Instagram and Twitter @JohnMarucci. You can also follow John on Facebook @JohnMarucciOnTheRoad.
As always, thanks to our teammates who support the channel by watching the YouTube Ads and by starting their shopping from the On The Road Amazon Storefront at: amazon.com/shop/johnmarucci. Your support is greatly appreciated!
Watch the more than 100 videos from John Marucci – On The Road!