
In this blog, we’ll cover the step-by-step process of replacing LED dome lights in a travel trailer. I’ve had my current trailer for six years and have used it over 700 nights, and some of the LED ceiling lights have begun to fail. This can lower the amount of light in the rig and even flicker to one’s great annoyance.
Background
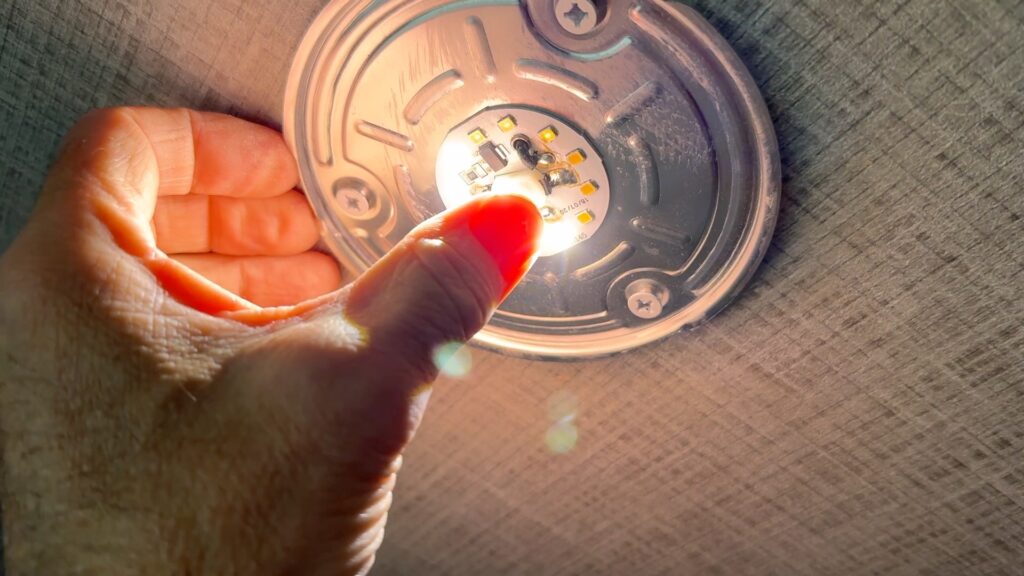
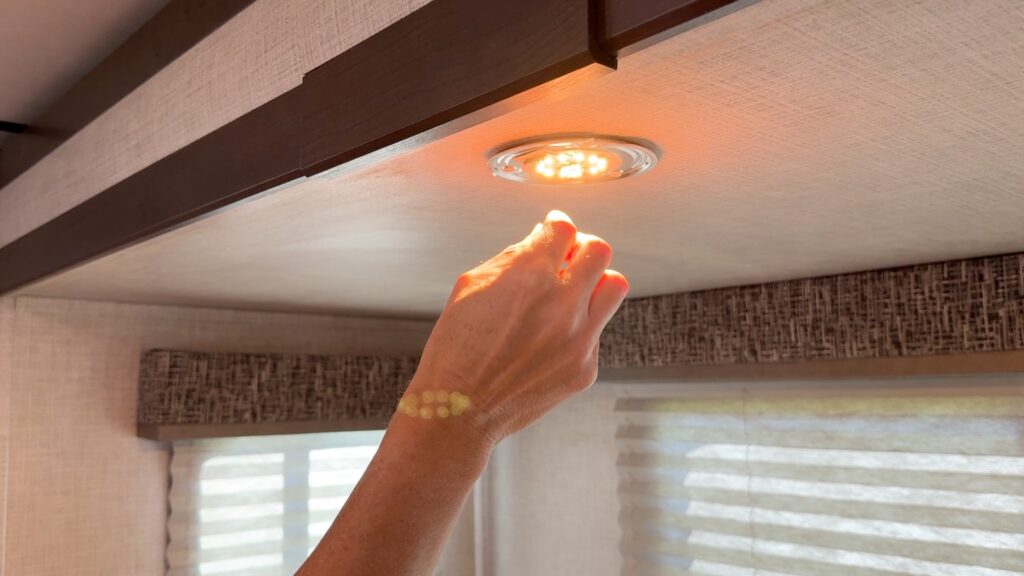
The typical LED ceiling dome lights that come with most RVs today will lose some or all of their diodes over time. It is common not to notice any problem with the light, only to remove the lens and find that several diodes are not working. At times, you will notice the light starting to go bad as it flickers.
In my case, we began to notice that some of the dome lights seemed dim, and after removing the lenses, we found that some of the diodes had failed. Many of the 15 dome lights installed in my trailer were fine, so we had to decide whether to remove a few bad lights or all of them simultaneously. Since the trailer was six years old and had over 700 nights of use, and newer LED technology was available, we decided to do a full replacement.
Disclaimer
Before we get into the replacement process, please be aware that this process includes changing out electrical fixtures. If you are uncomfortable working with fixtures or electrical issues, please contact a mobile RV tech or your local RV dealer to do the work. Working with electrical issues can be dangerous to you and your RV if not done safely and correctly. I am providing the process that I used and was comfortable with. You will need to decide in your case if my process is right for you. Be aware that I am not a certified RV tech or an electrician.
Process Steps
Let’s look at the pre-installation steps. First is to diagnose to what degree you have an issue with your current LED dome lights. You can do this by unscrewing the lenses from the LED light fixtures and testing them. If you find light diodes not working or flickering, it is likely time to replace the fixtures.
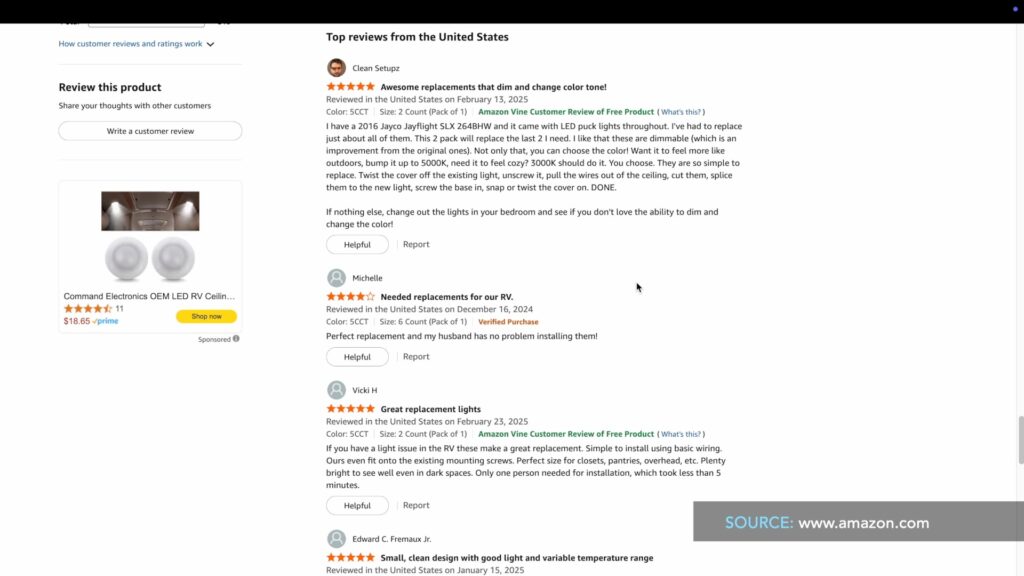
Next, you will need to decide on a new light fixture. I went through the normal process of researching LED RV lights online and reading reviews. After researching, I settled on a replacement fixture from Amazon with more diodes and a toggle for different light temperatures. It is noteworthy that in six years, RV LED lights have come a long way, and getting the latest technology means more choices, including color temperature. Be aware that I can’t vouch for the product long-term since they were recently installed.
Next is to decide on a method to connect the new light fixtures to the existing 12-volt wiring in the RV. This will determine the tools and supplies you will need. I studied a few methods people used to do this and decided against using wire nut connectors, even though Keystone uses these, as they are not rated highly for mobile applications and could shake loose over time in transit.
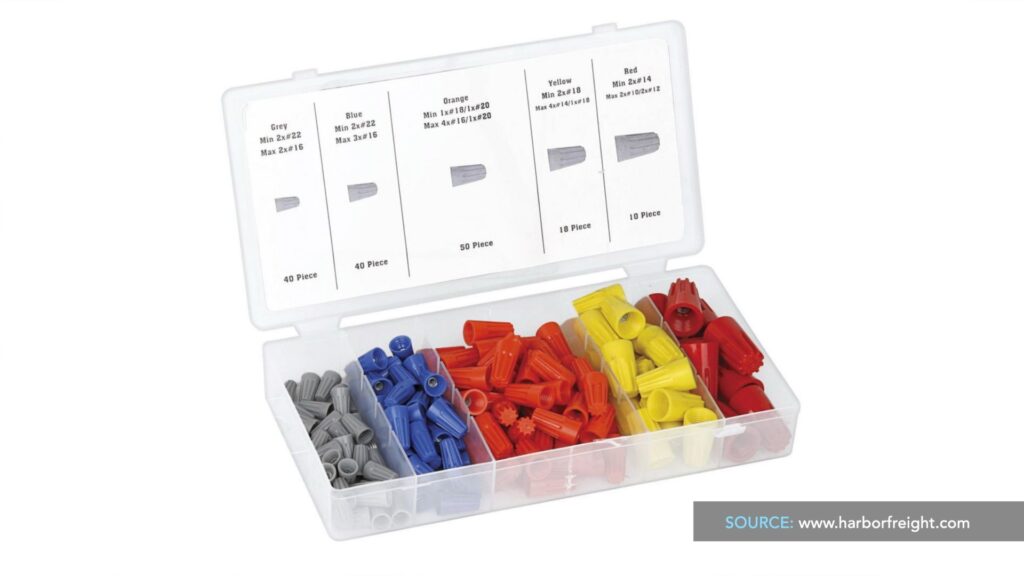
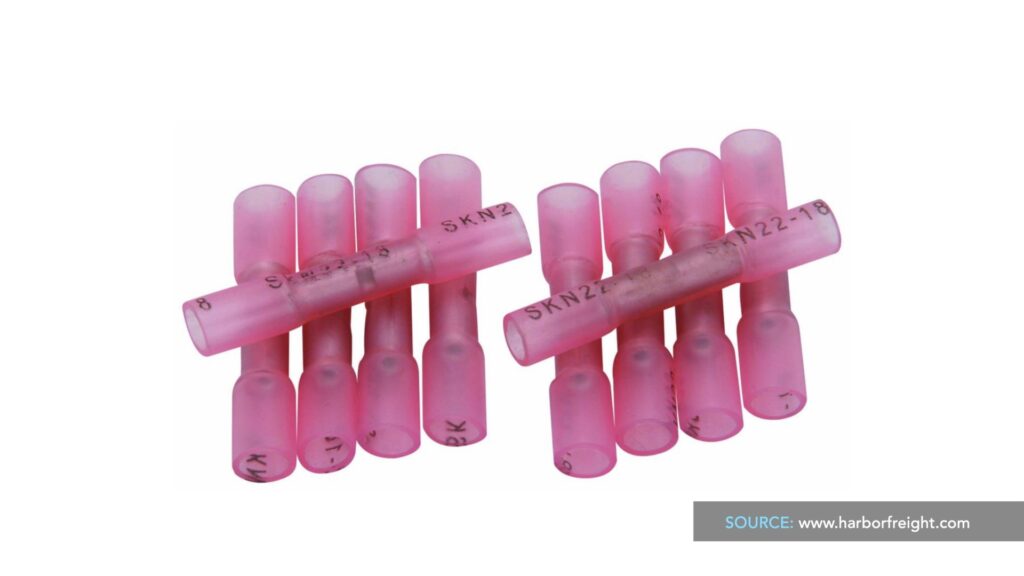
Ideally, using heat-shrink butt connectors would be the best solution; however, I was not comfortable using a heat gun near the RVs ceiling to heat-shrink each butt connector. It seemed dangerous to me and would take much more time. So, I settled on using non-heat shrink butt connectors with a wrap of electrical tape on each connector as my method for installation.
Next is having the right tools and supplies. For this method, you will need the following tools and supplies:
Phillips screwdriver
Scissors
Needle nose pliers
Wire stripper/crimping tool
Headlight/flashlight
New light fixtures
Butt connectors
Electrical tape
Tape/clamp (to ensure wires don’t retract into the ceiling)

Note that the size of the butt connector is important. My method used was to splice the new light’s narrow gauge wire into the existing narrow gauge 12-volt wiring of the RV. My method does not splice the wiring above the ceiling where the RV’s 12-volt wiring was of a larger gauge. It was not possible to pull through the larger gauge wires through the narrow opening in the ceiling.
With that said, here is the process I used to replace the LED light fixtures.
Replacement Process Steps
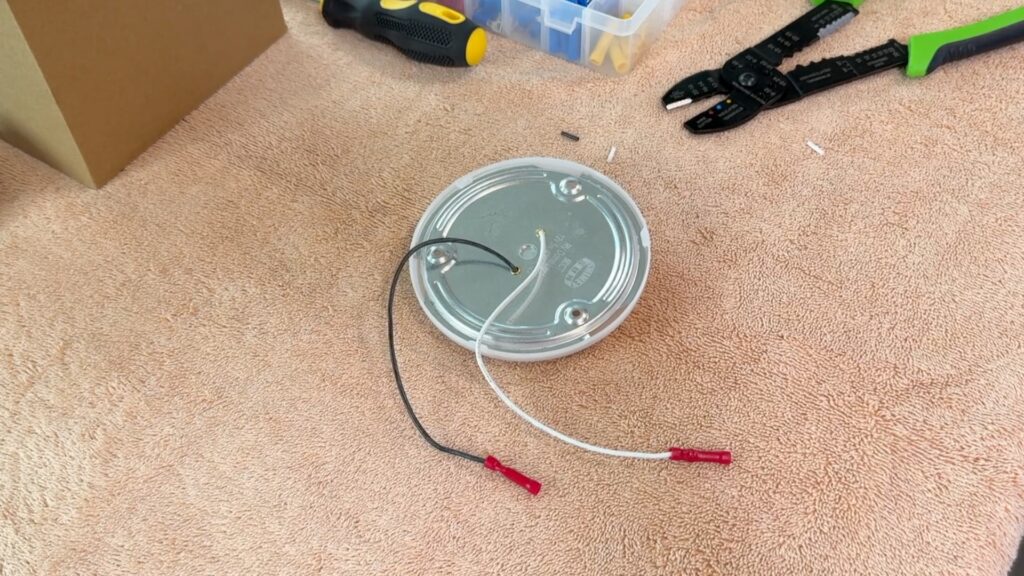
Step 1 is to prepare new lights:
First, open the new light and place lense-side down on a towel
Next, remove the wire sheathing to the black and white 12-volt wires on the new light
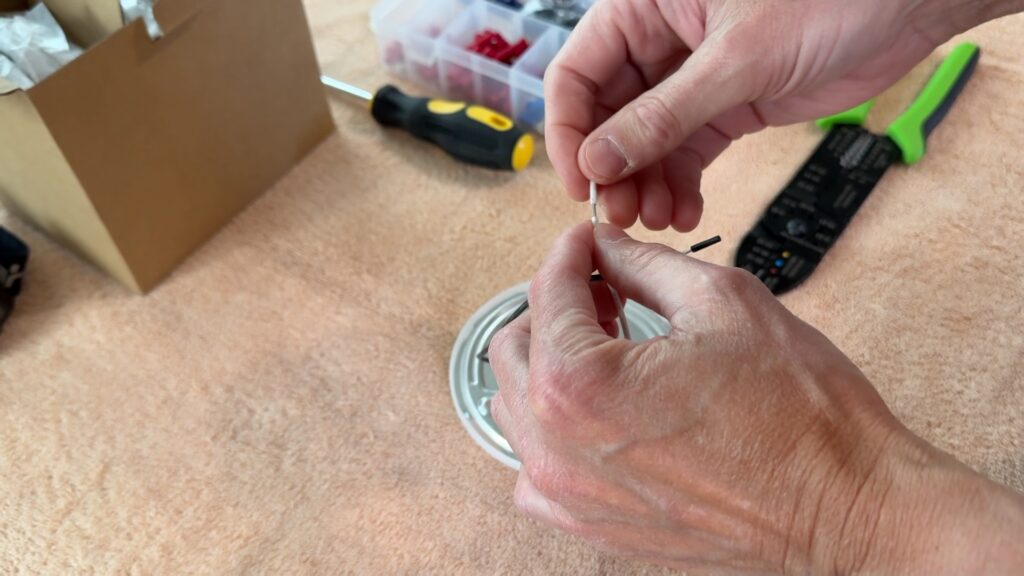
Next, place both white and black wires into individual red butt connectors (18-22 gauge red butt connectors were used)
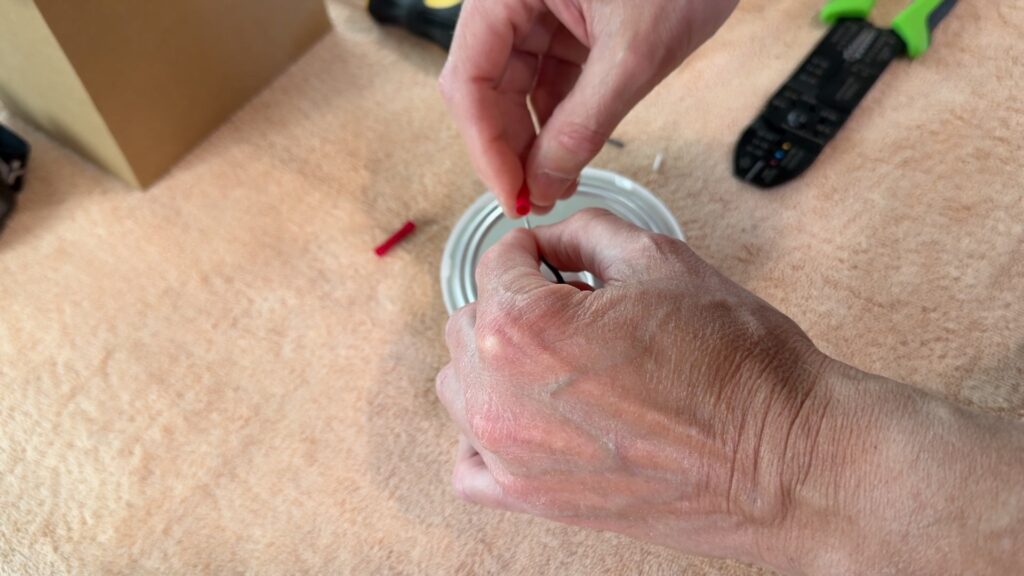
Next, using the crimping tool, crimp each wire into each butt connector

Next, test the crimp with a slight tug on the wire to ensure the crimp is tight
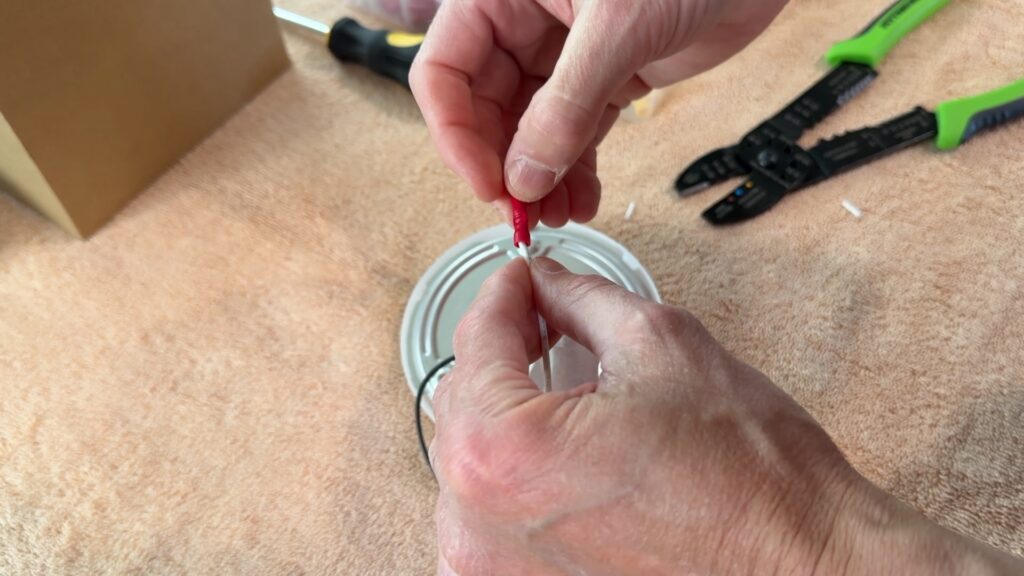
Repeat this process for all new replacement lights
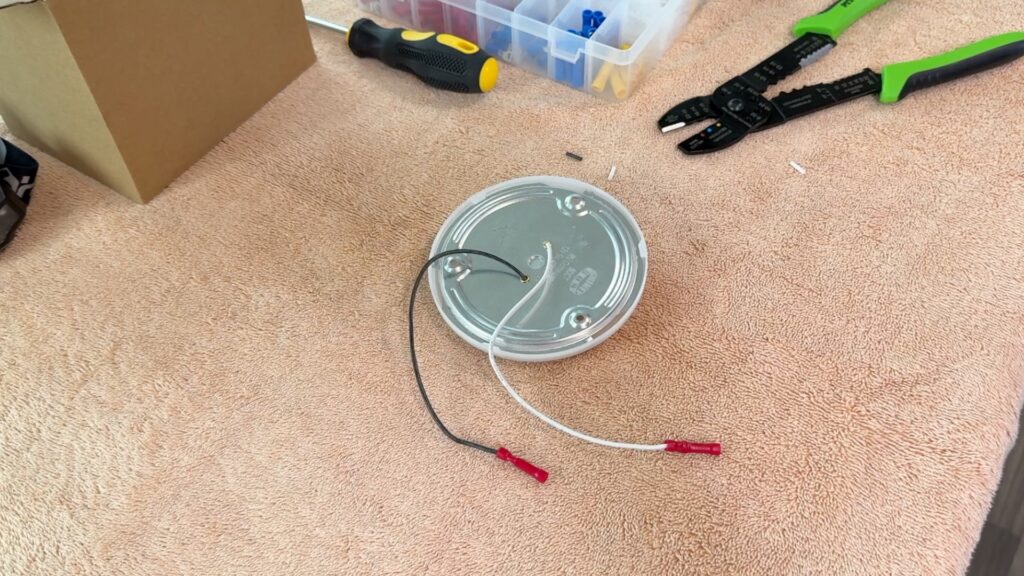
At this point, you should have your new light fixtures with butt connectors attached to both black and white wires and ready for installation.
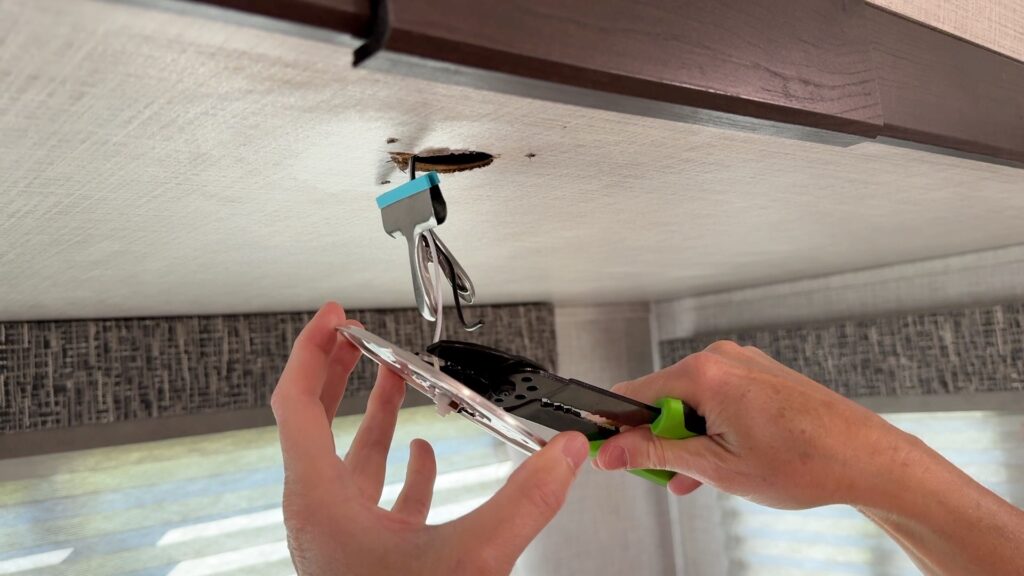
Step 2 is to remove the existing light fixture:
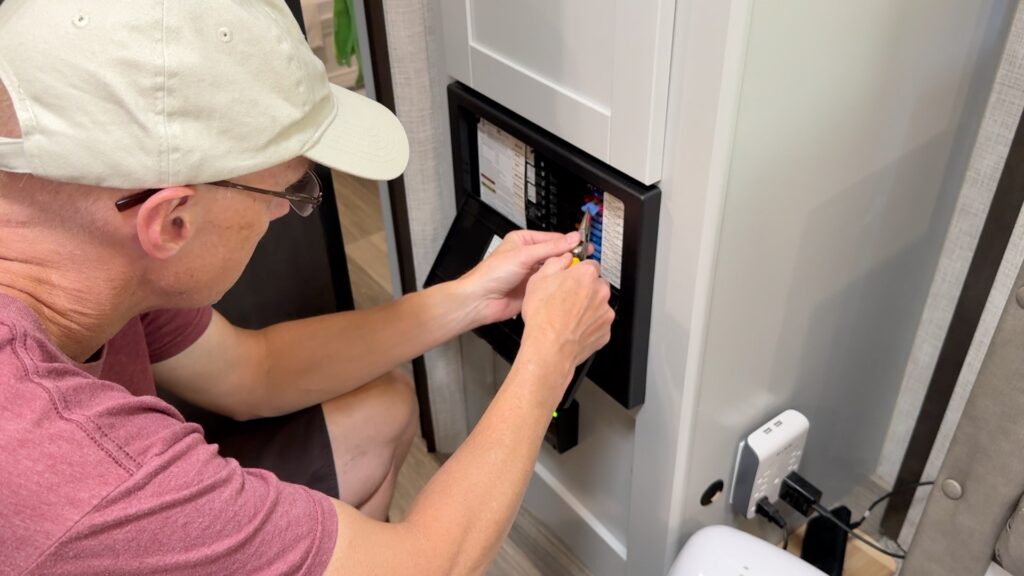
First, turn the power off to the light fixture by turning the power off at the local switch or by pulling the fuse to the circuit that powers the light

Next, remove the light fixture lens, usually by twisting it off the fixture
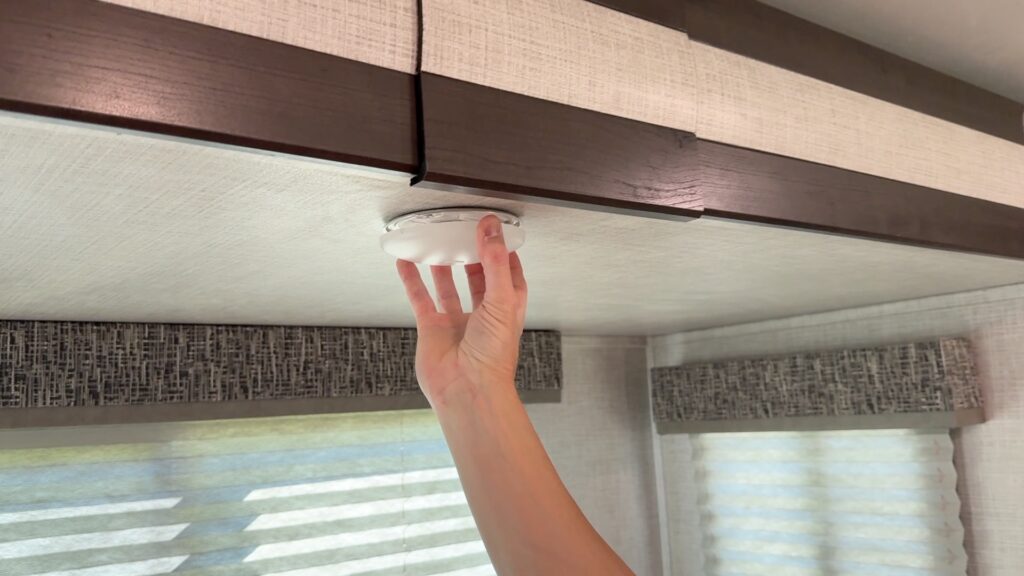
Next, remove the light fixture from the ceiling by using your Phillips screwdriver and removing the fixtures screws

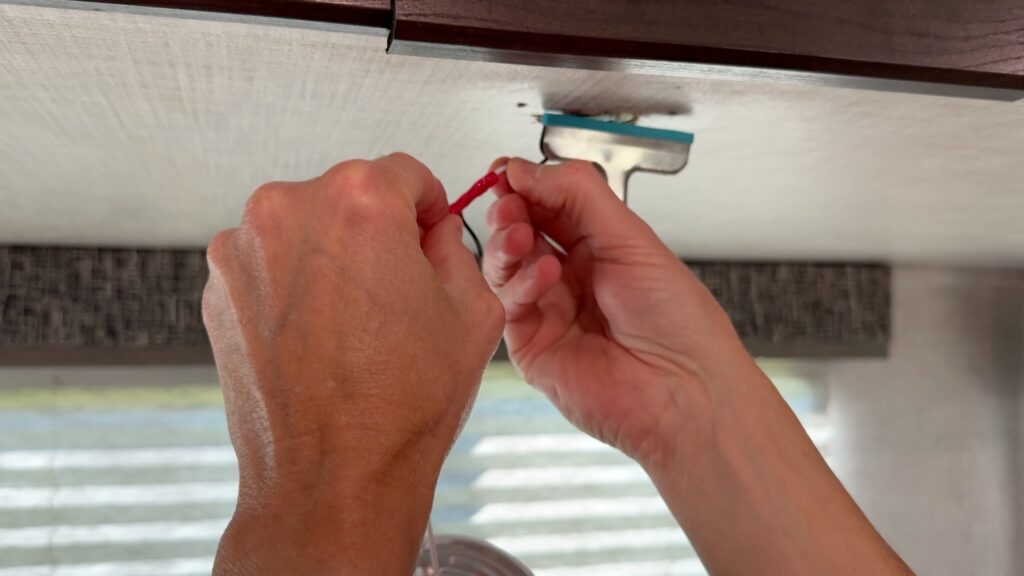
Next, gently pull the light fixture away from the ceiling until 4-5” of wire is exposed
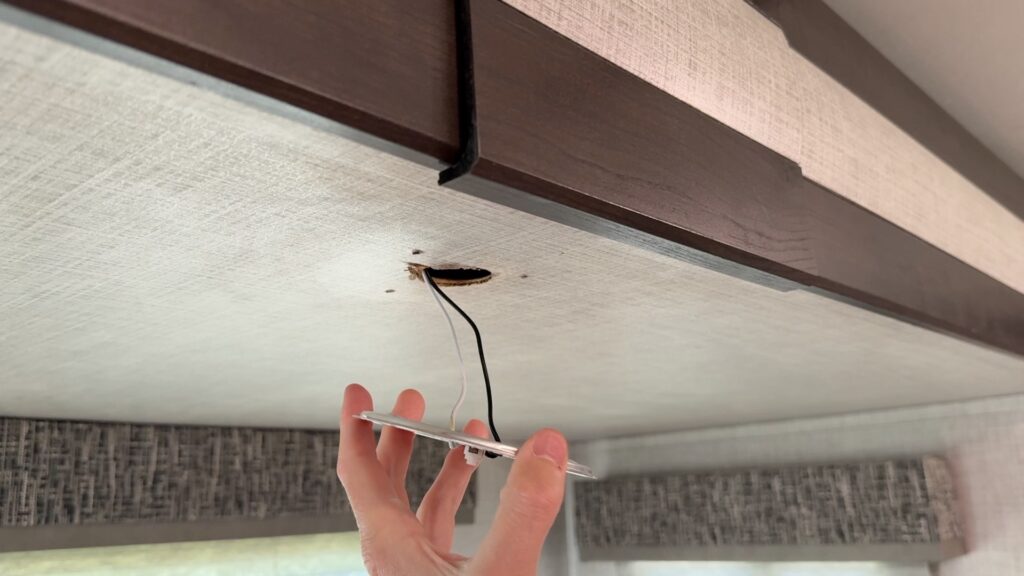
Finally, apply a clamp or tape to the wires coming from the ceiling at the ceiling opening to prevent wires from retracting into the ceiling
At this point, you should have the RV 12-volt ceiling wires hanging 4-5” out from the ceiling opening and still attached to the existing light fixture.
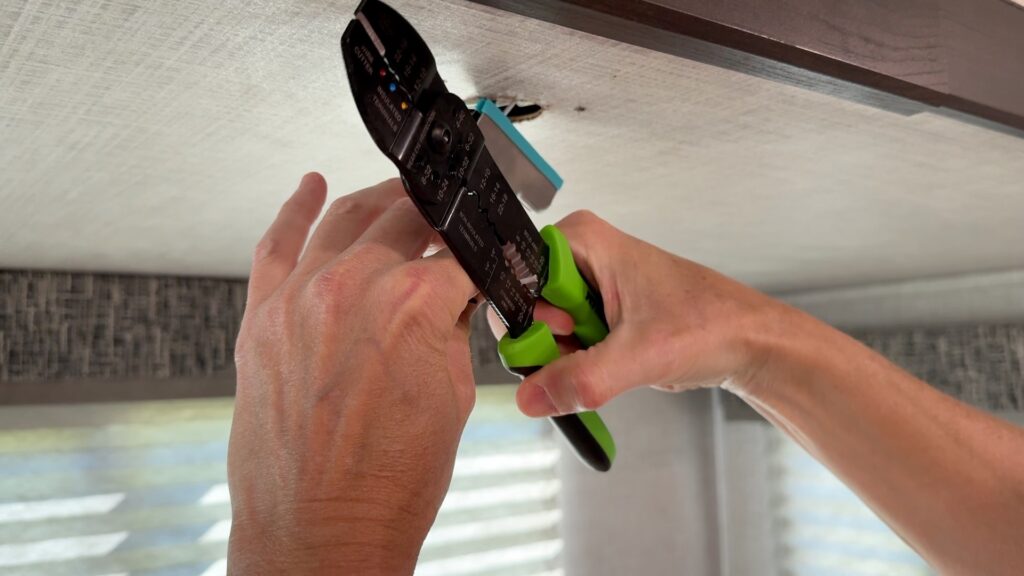
Step 3 is to remove the existing light and attach the new light fixture to the existing wiring:
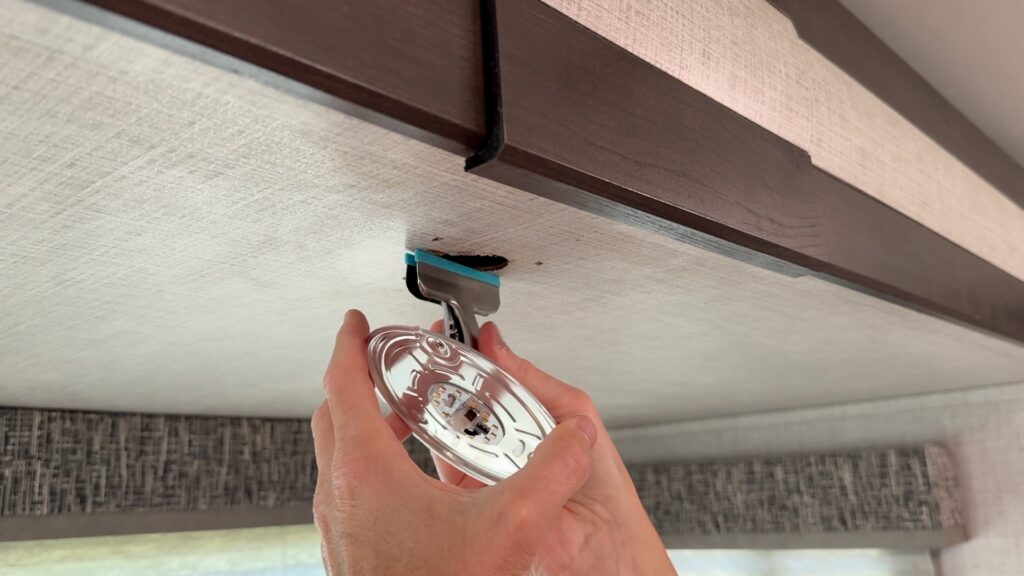
First is to use the stripper/crimping tool and cut both white and black wires close to the existing light fixture
Next, strip the casing from the white and black wires coming from the ceiling using the wire stripping tool. Strip the wire to expose 3/8 – 1/2” of raw wire visible.
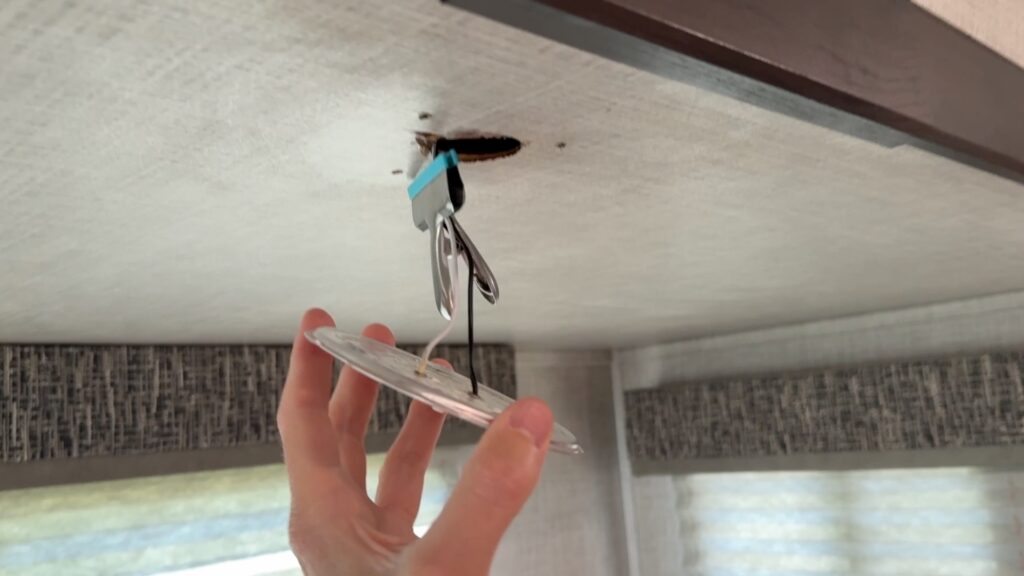
Next, remove the lens from the new light fixture and hold the new light fixture up to the ceiling where the two 12-volt stripped wires are, and insert the white ceiling wire into the matching butt connector on the new light fixture—white wire to white wire.
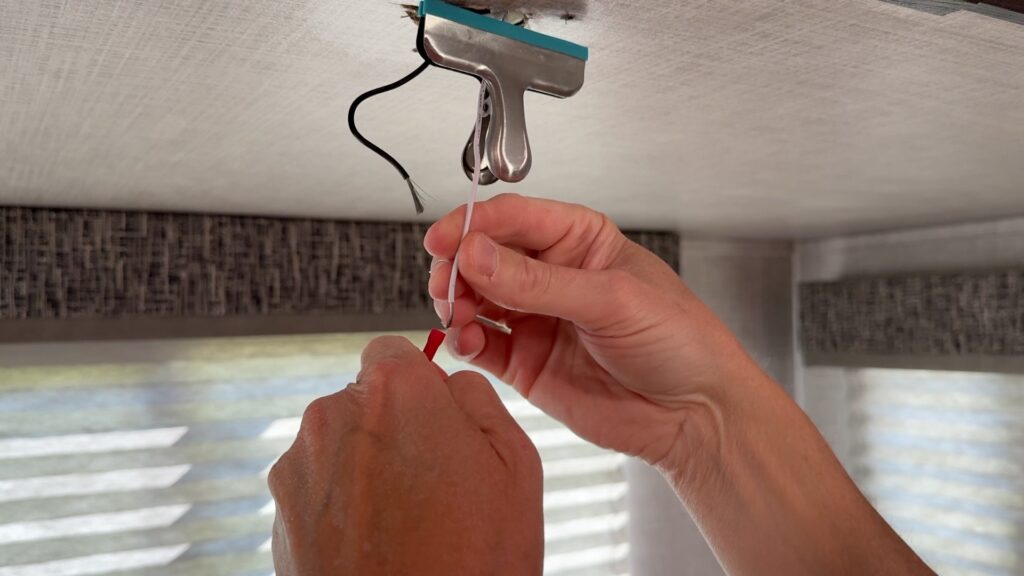
Next, use the crimping tool and crimp the ceiling wire into the butt connector
Next, repeat the crimping process with the black wire, inserting the black ceiling wire into the corresponding black wire butt connector from the light fixture
Next, stop and test that the crimps for both white and black ceiling wires are tight. A slight tug on the wires should suffice.
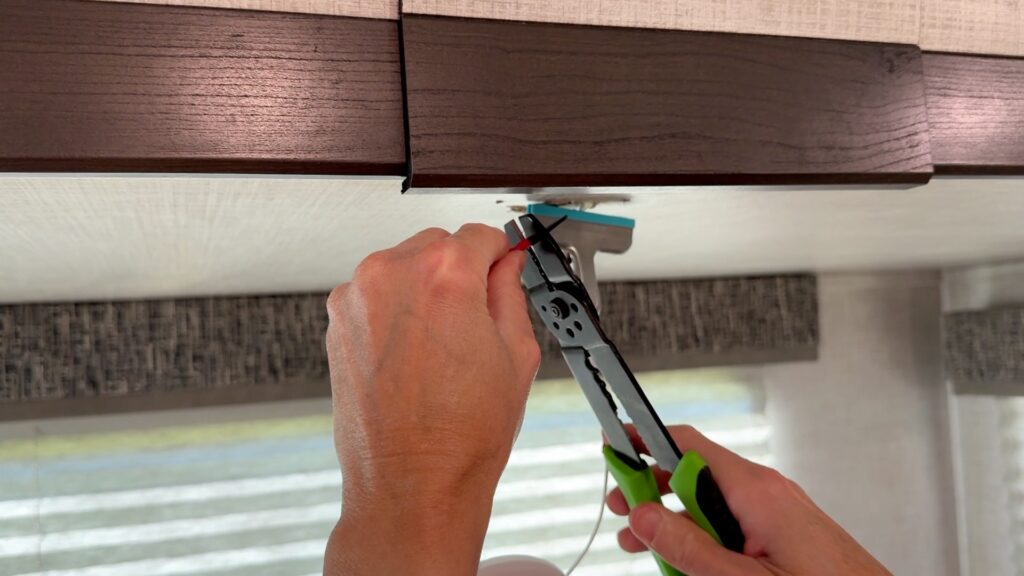
Next, attach electrical tape in a spiral direction around both butt connectors, ensuring some of the electrical tape is sticking to both wires and covering the butt connectors fully.
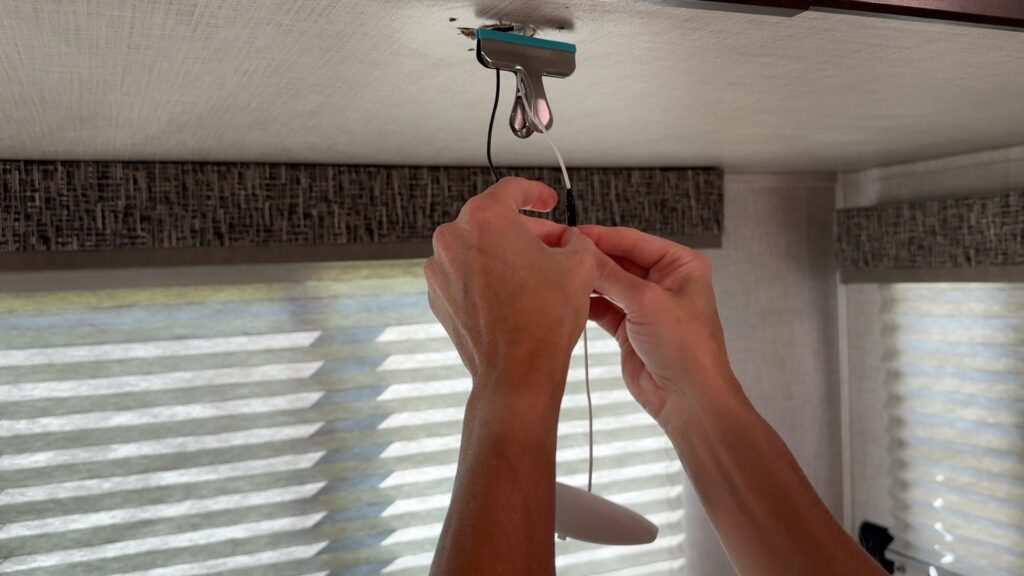
Next, remove the wire clamp or tape from the ceiling wires and push the newly connected butt connectors and wires into the ceiling opening while positioning the new light fixture to its original position
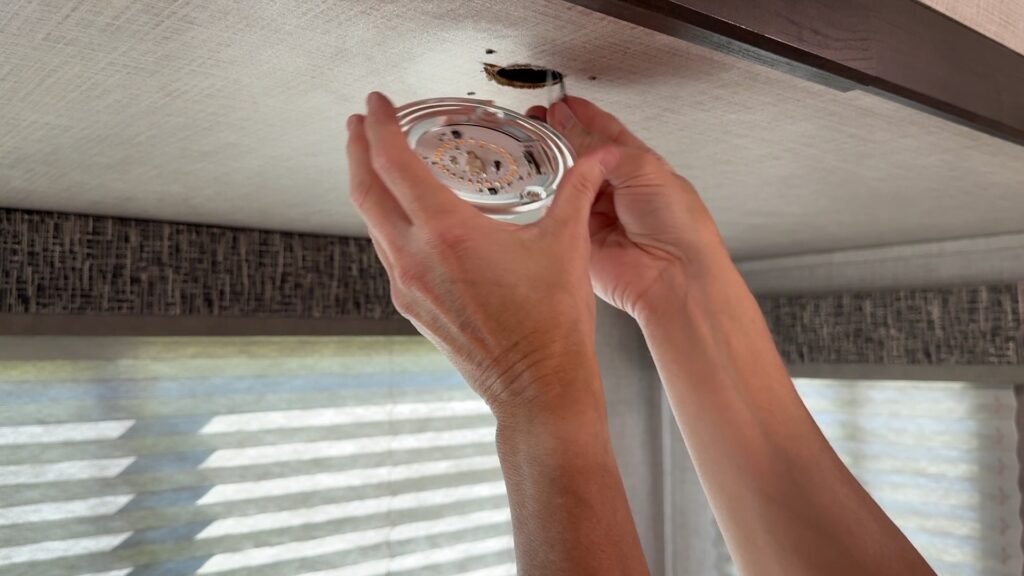
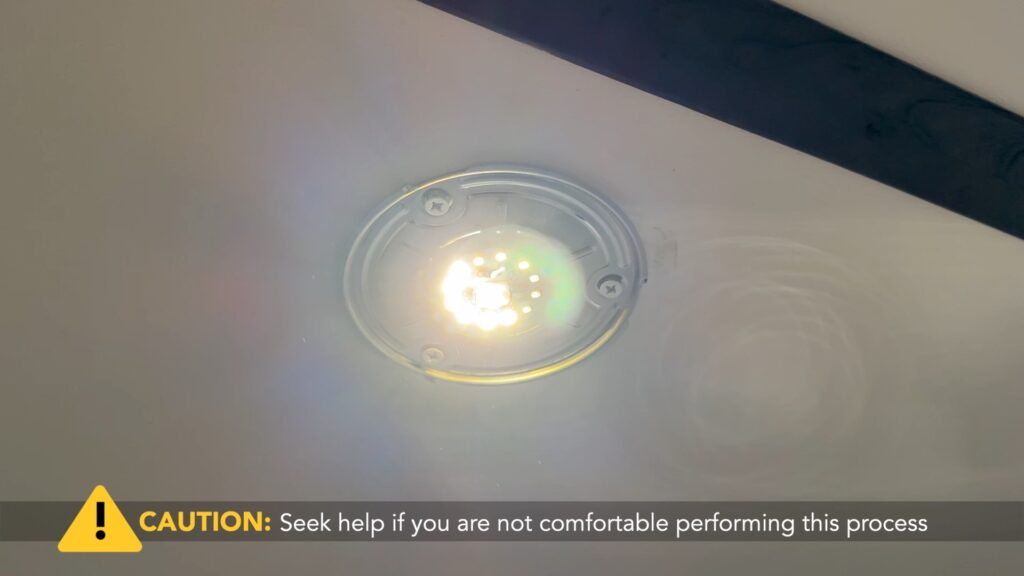
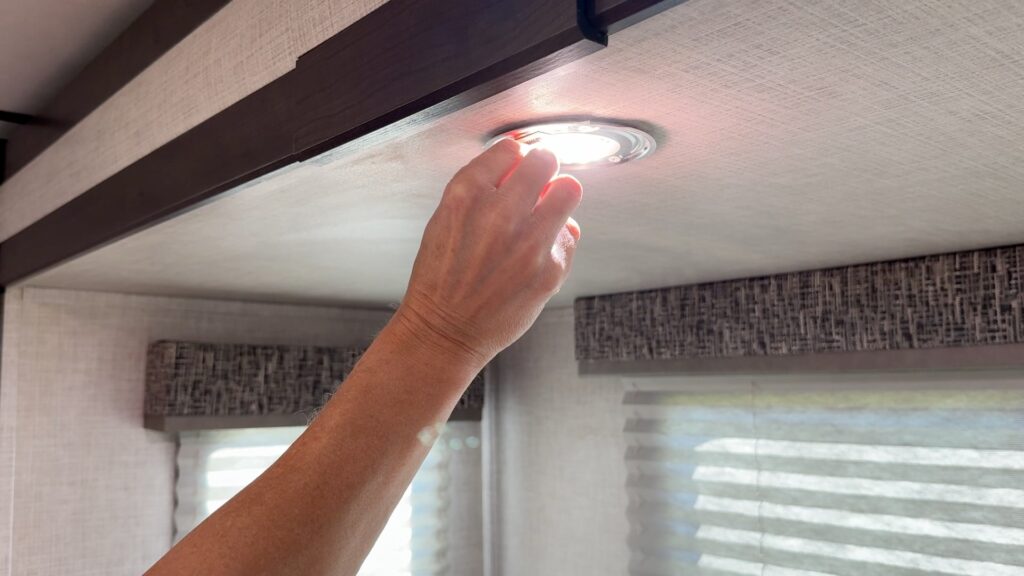
Next, attach the new light to the ceiling using the original screws
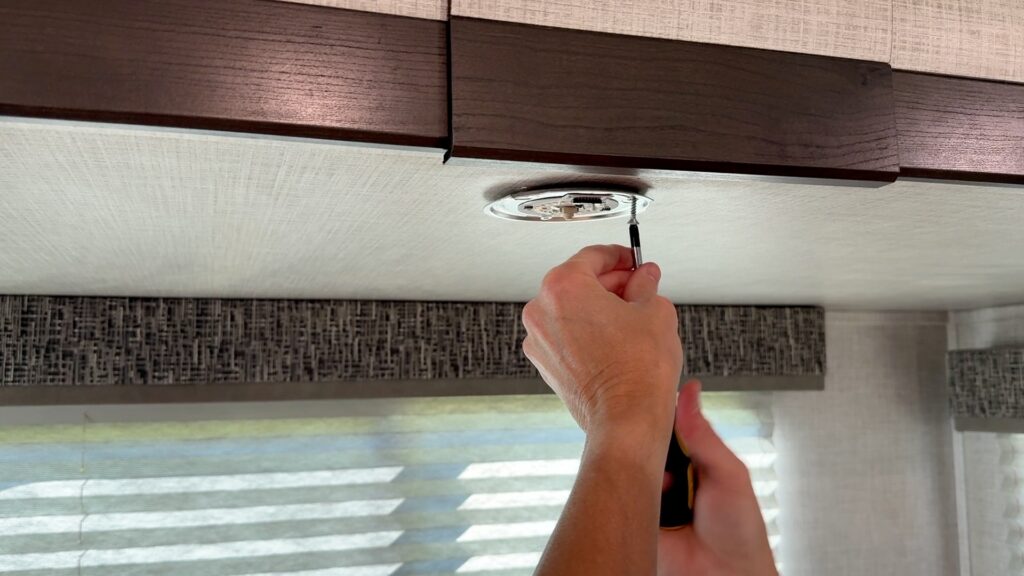
Next, turn on 12-volt power to the light fixture to test that the light is working
Finally, set the desired color temperature of the light, put the lens on the new light, and celebrate a job well done!
That should do it. All the best in your camping adventures!
You can watch the corresponding video here.
As always, thanks to our fans who support our efforts by starting their shopping from our Amazon Storefront and their generous financial support by using the THANKS feature located under each YouTube video ($ within the Heart icon). Your support is greatly appreciated!