
Click here to sign up for reminders when new blogs are posted.
It can be fairly irritating if while camping your water pump cycles on every 15 seconds or so. This recently happened on two separate camping trips in my Keystone Bullet 243BHS. Besides being annoying, the pump is cycling on and off so much that it likely will shorten the life of the pump. In this blog, we will cover how we worked to troubleshoot this issue and look at some things to be aware of if this happens to you.
I have to admit that having my water pump cycle on and off every fifteen seconds while camping got very annoying. It gets old having to turn the water pump switch on and off to avoid the noise irritation. After a recent camping trip with this going on, we decided to get into the issue and troubleshoot it.
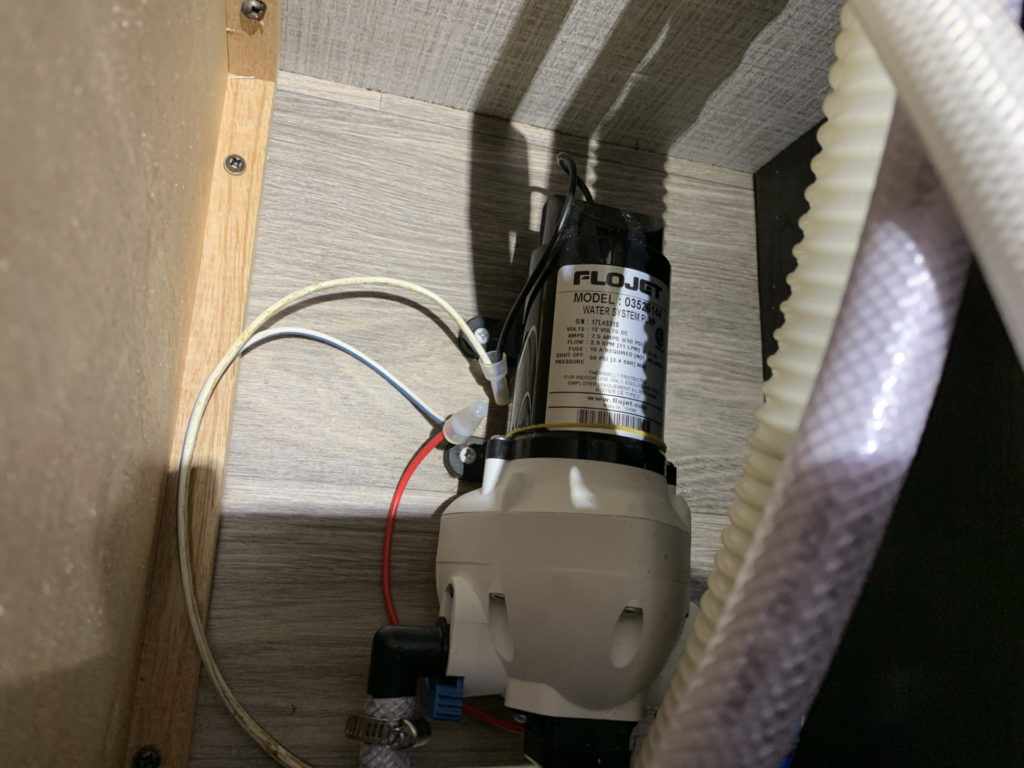
The water pump in my 2020 Keystone Bullet 243BHS is a Flojet model (03526144) that can push 2.9 gallons of water per minute. One issue I noticed about the unit is that the factory install did not include a filter on the intake line.
Generally speaking, if your water pump is cycling on while you are not using water, then there is either air getting into the pressurized plumbing system or water leaking somewhere. An air or water leak would cause the system to lose pressure resulting in the water pump needing to cycle to restore the proper pressure. The length of time between cycles pretty much tells you the severity of the leak.
In my case, we timed the interval and it was just about 15 seconds between the pump cycling with all the faucets closed. So where was the leak? As with most troubleshooting, it is a good idea to do some research. In this instance, I posted the issue on the Keystone Bullet Facebook group, since my water pump would be similar with other owners. I received several responses to the post fairly quickly.
There were three leads gleaned from different responders to the post. The first suggestion was to check that the caps on the low-point drains weren’t loose and allowing water to leak. The second suggestion was to check the outdoor shower for a similar water leak. The third suggestion was to clean out the check valve in the water pump itself.
In light of this, we can break down our troubleshooting into two parts: first, water leaks, and second, air leaks.
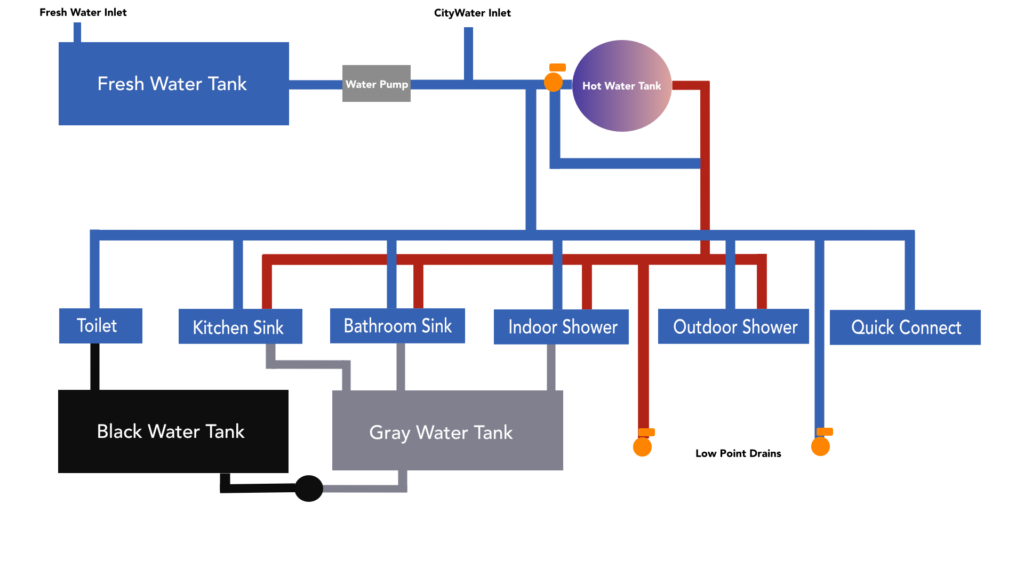
The way to go about checking for water leaks in the plumping system is to check every plumbing outlet in your RV while the water pump is turned on and the system is fully pressurized. This would include all faucet, like the kitchen and bathroom sink, the indoor and outdoor shower, as well as any outdoor water quick connect. You also need to check the low-point drains to ensure they are not leaking water under pressure.
In terms of checking non-faucet areas, checking the area under the sinks, near the hot water heater and tank, and the fittings around the water pump should also be inspected. In my case, there were no leaks anywhere.
Once you rule out water leaks with the water pump on and the system pressurized, the next area to focus on is air leaks. Generally, an air leak would be at or before the water pump in the system. If there is a loose fitting, cut in a line before the pump, or an issue with a gasket or valve in the pump, air can be pulled into the system. This will cause the system to leak pressure.
A good first step to check for an air leak is to listen for it. Think about a slow leak in a bicycle tire – often times you can hear it before you see it. Since, any air leak would be at or before the water pump, the water pump is a good place to point your ears. To do this, locate your water pump. If you don’t already know where this is in your RV, listen for it when it cycles. Remove any covering to the pump. Make sure the pump is on and then try to quiet any noise in the RV. This can help you hear a potential air hiss at or near the pump.
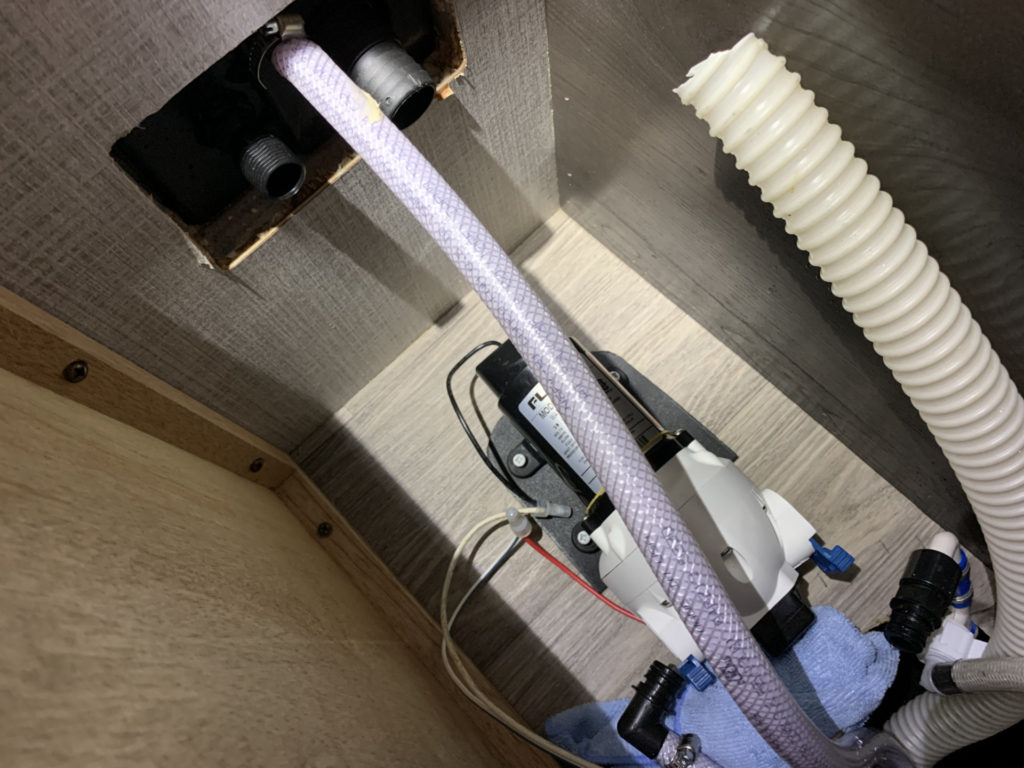
When I removed the cover over the water pump and quieted everything down with the pump on and system pressurized, I immediately heard an air hiss at the pump. With all the tubing and connections, it was a bit difficult to isolate it, but I was onto where the issue was. This is where one of the Facebook replies came in handy. Someone mentioned that they had plastic shavings caught inside the check valve of the pump and also added pictures of the issue.
This made sense to me, mainly because the water pump didn’t have a filter on the intake line and also because most freshwater tanks are not free of debris from the factory. My R-Pod 179 had plastic shavings in the filter early on, so this could easily be the problem. These small plastic shavings seem to be from the freshwater tank being drilled for the water pump line.
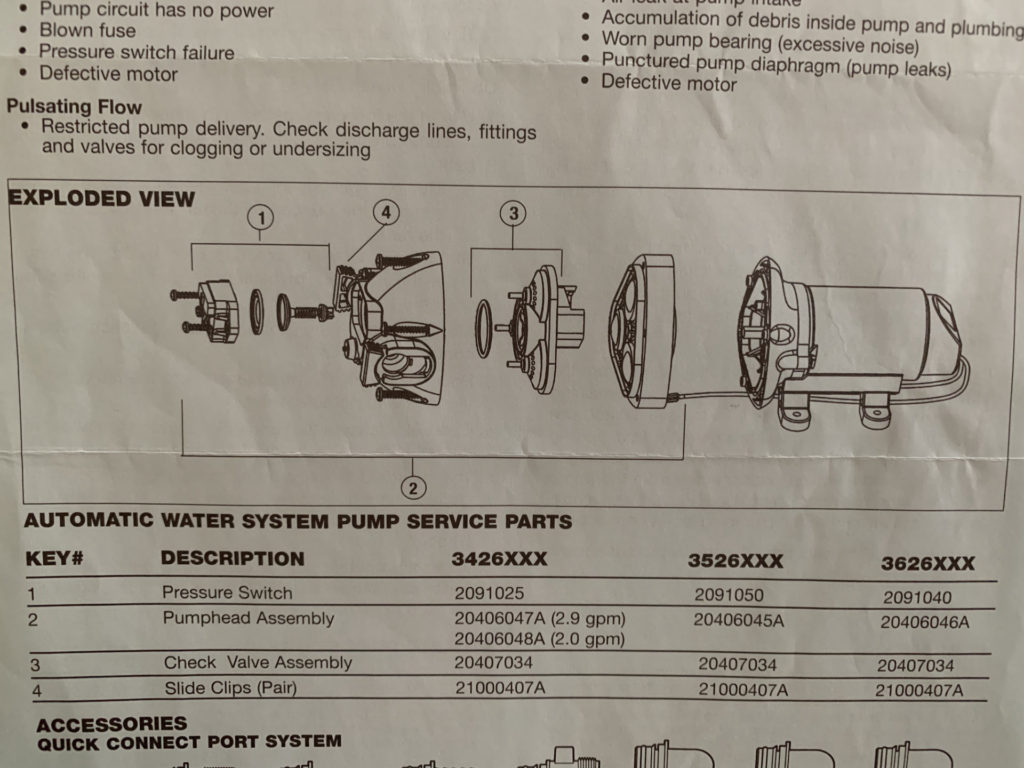
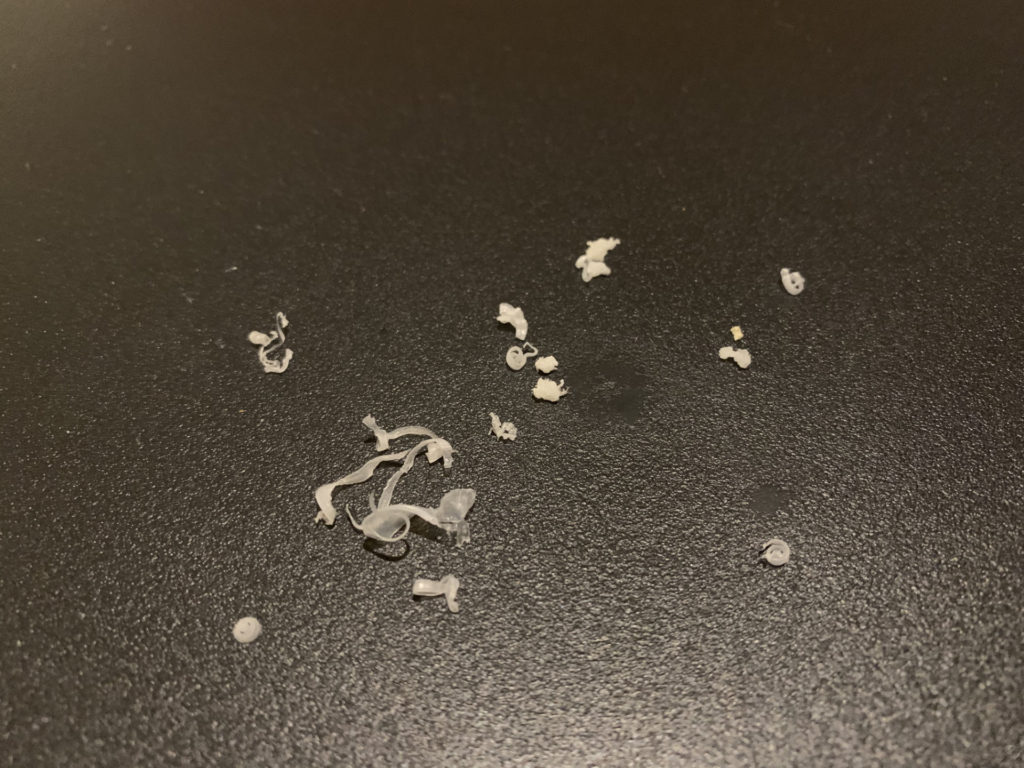
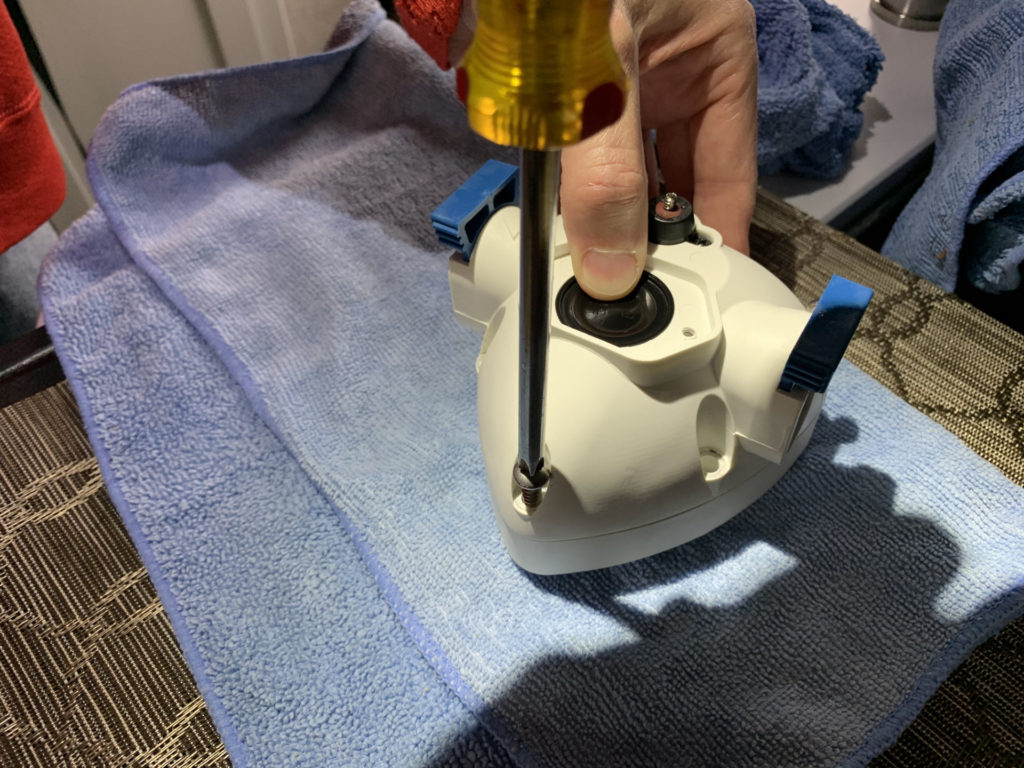
In light of this, we found the water pump manual and studied the housing. It looked straight forward to remove the six screws to get at the check valve. After disconnecting the battery so no power was getting to the pump, we used some microfiber towels and a small bucket to collect any water as we disconnected the water pump. Once we disassembled the housing, sure enough, we found small plastic shavings were lodged throughout the check valve!
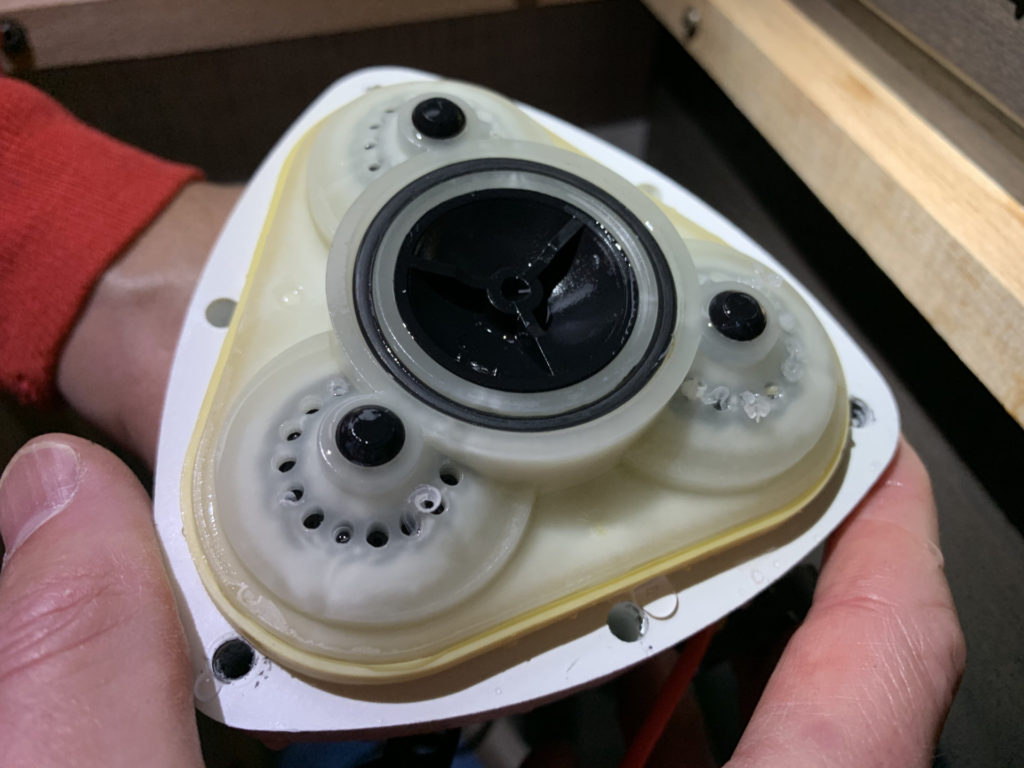
Cleaning out the plastic shavings (obviously from the freshwater tank) was a simple but detailed job using a pair of tweezers. After a short time, we had cleaned the valve, reassembled the housing, and had reinstalled the water pump. After reconnecting the battery, it was time to turn the water pump on and see what would happen. To our delight, the pump cycled for a few seconds, pressurized the system and stopped. It didn’t cycle without a faucet on and promptly turned off when the faucets were turned off after use. Also, with the water pump turned off, pressure still remained in the system, meaning it had no leaks.
I think this entire annoying issue would go down on my list of weak manufacturing processes that cause customers unnecessary problems to deal with. Removing debris from the freshwater tank before assembly and adding a filter to the intake line of the water pump are two simple solutions that would likely keep this from happening to the customer. I suppose this is yet another issue that goes under the category of an ounce of prevention being better than a pound of cure!
Hopefully this troubleshooting walk-through has been helpful for those having a similar problem or if you ever do run into this in your RV travels. I’m glad my water pump runs the way it is supposed to now!
All the best in your camping endeavors!
We’d love for you to join the On The Road Team by subscribing to the YouTube channel. If you want to dive deeper, we put more content and photos on Instagram and Twitter @JohnMarucci. You can also follow John on Facebook @JohnMarucciOnTheRoad.
As always, thanks to our teammates who support the channel by watching the YouTube Ads and by starting their shopping from the On The Road Amazon Storefront at: amazon.com/shop/johnmarucci. Your support is greatly appreciated!
Watch the more than 100 videos from John Marucci – On The Road!