
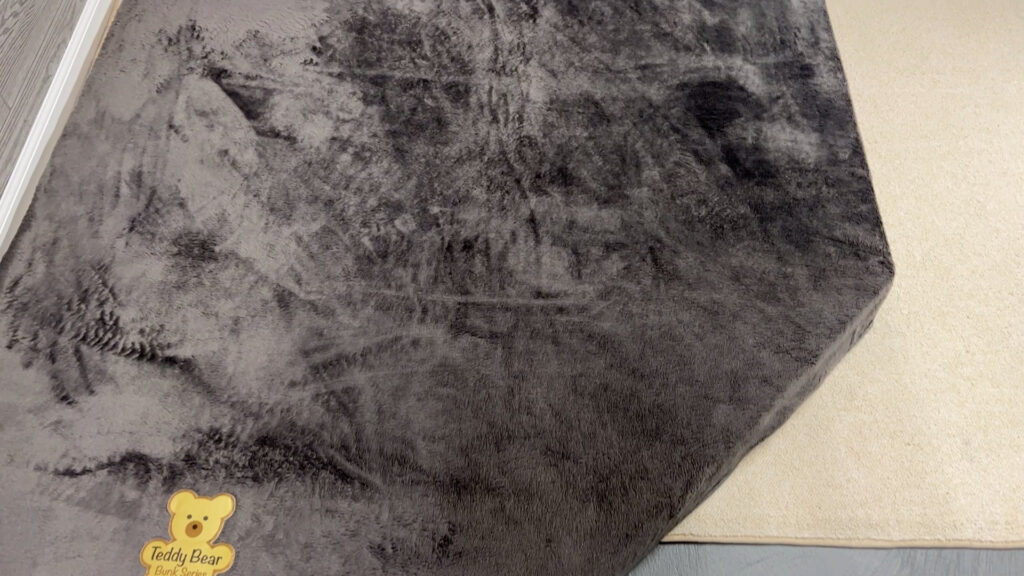
In this blog, we’ll walk through the process of replacing the foam in a Teddy Bear mattress in my 2020 Keystone Bullet BHS. The lower bunk in my Keystone Bullet had significant use over the past several years, and the original foam in the mattress had deteriorated and needed replacement. We again opted to use foam from the Foam Factory to create a much better sleeping experience. By the end of the video, you should know if this task is something you would want to tackle for yourself or not.

Sleeping in an RV can be tough, especially when sleeping on an original equipment mattress for longer outings. While the Teddy Bear mattress seems well made, with lots of use, it will need to be replaced at some point. When it is time, your choice is to buy a brand-new or replace and upgrade the foam. With another new Teddy Bear mattress, you still have the same quality foam that will perform similarly. With a high-quality foam replacement, you get better foam and, thus, better performance. The trade-off is the time and skills needed to do the foam replacement.
Tools & Skills Required
Electric Knife, Seam Ripper, Scissors, Large Needle, Upholstery Thread, Basic Sewing Skills
Skills and Safety Disclaimer
As a heads up, this project involves a lot of sewing, so if you lack the confidence to sew seams back together, make sure you find someone who can or opt for buying a new mattress. Also, the process can be a bit dangerous in terms of cuts from the seam ripper, sewing needle, scissors, or electric knife. So please be aware of the difficulty before engaging in this project. Also, by replacing the original foam, you are removing the flammability rating of the mattress, as shown on the mattress tag.
With that said, let’s get into the process.
Part 1 – Measure the Teddy Bear Mattress and Order the New Foam
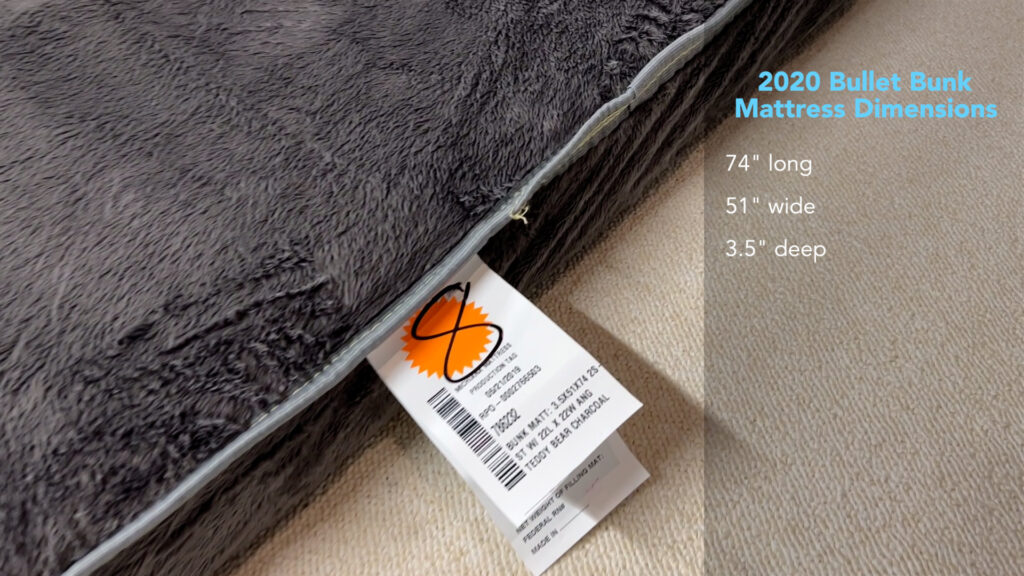
First – Measure the existing mattress accurately.
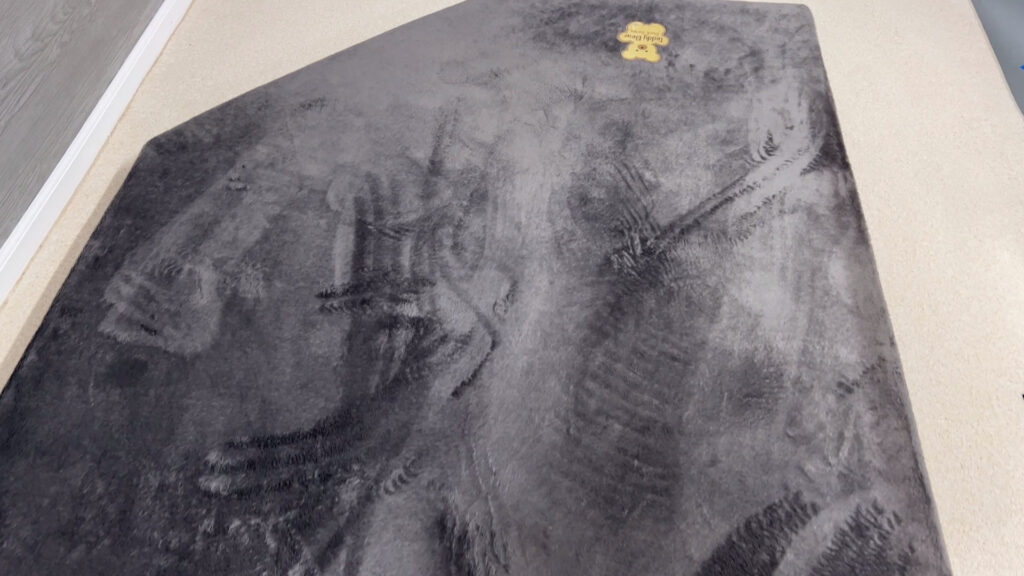
Most Teddy Bear mattresses used in RV bunkhouse models have an angle cut. Before ordering, you need to measure your mattress’s width, length, and depth, ignoring the angle cut. The dimensions of the mattress in my 2020 Keystone Bullet are 74” long X 51” wide X 3.5” deep. You can also find the mattress’s dimensions on the tag on the back cover. We’ll cover the angle cut later.
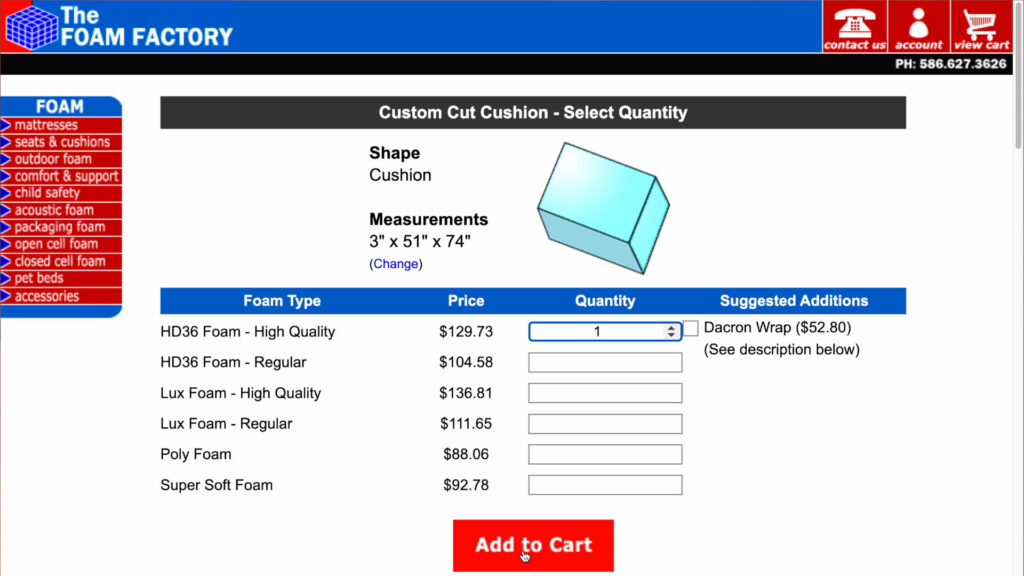
Next – Order the replacement foam.
With the accurate dimensions in hand, go to the Foam Factory website using the link in the description.[1] Please note that I have no affiliation with the Foam Factory and recommend them only because I have used them several times in the past with excellent results and quality service. I have always purchased the firm Lux Foam from the Foam Factory to redo dinette cushions. The Foam Factory does not recommend Lux Foam for bedding, so in this case, I ordered the next level down in terms of firmness, High Density (HD36), and High-Quality foam. In my case, I ordered the size on my label (74” x 51” x 3.5”), except I only ordered it in 3” thickness. This proved to be a good move.
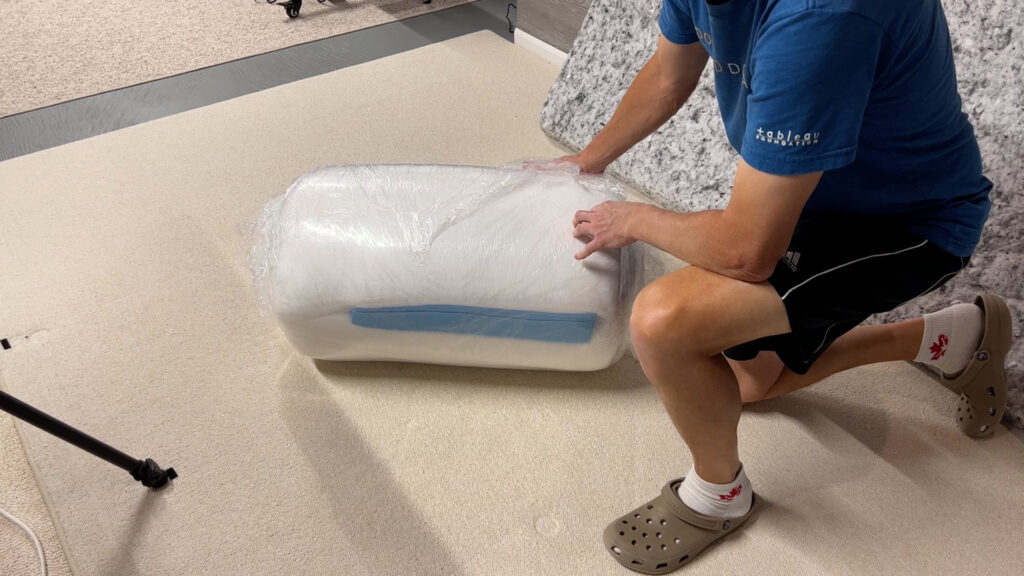
To level-set expectations, my order took about a week to arrive, but I am in Michigan, and so is the Foam Factory. The order will come vacuum sealed, so be aware and do not open the seal until you are ready to install the new foam. The foam will expand quickly once the vacuum seal is broken.
Part 2 – Remove the Existing Foam from the Teddy Bear Mattress
Next – Find a location where you can lay out the entire mattress.
The mattress can quickly become difficult to maneuver as you progress through this process, so make sure you do not have breakables nearby. As I worked to install the new foam, you will see that it was a difficult procedure that required constantly moving the mattress.
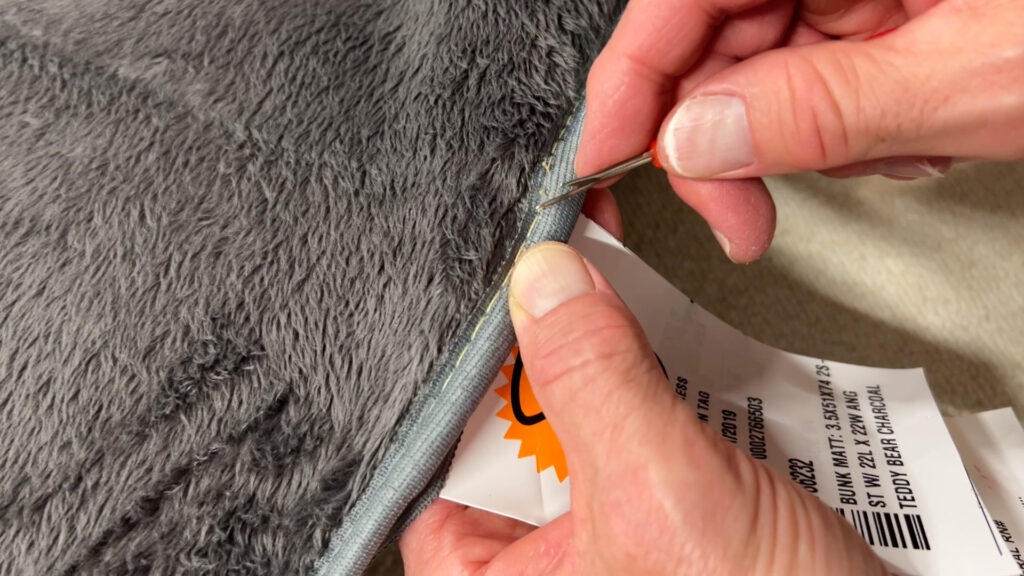
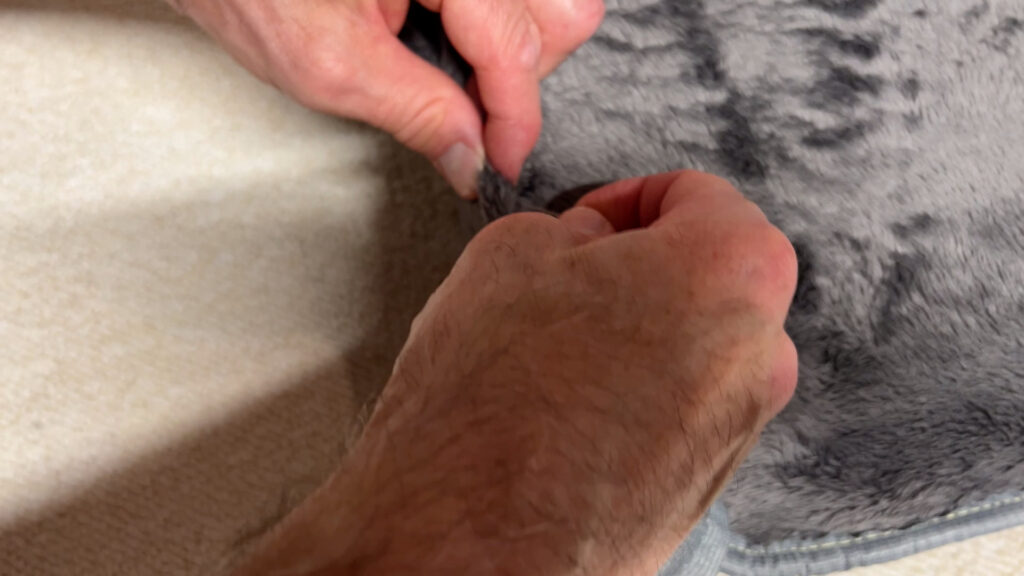
Next – Remove the stitching on the bottom seam of the mattress.
Using your seam ripper, begin removing the stitching along the back seam of the mattress. I should preface this by reiterating that this process requires basic sewing skills, so if you cannot re-sew the seam, don’t rip the seam. The seams are not too difficult to remove, and with them, the outer cording should come off as well. Let’s let this clip roll for a bit to see the details.
Next – Remove the existing mattress foam.
Once the seam and cording are removed, you should be able to reach into the mattress cover and fold the existing mattress in order to remove it from the mattress cover. This isn’t the easiest thing to do solo, so if you have a helper, this is an excellent time to ask for help. You’ll need to fold and pull the existing foam out of the mattress cover. If you do have a helper, have them hold the mattress cover while you fold and pull the foam out.
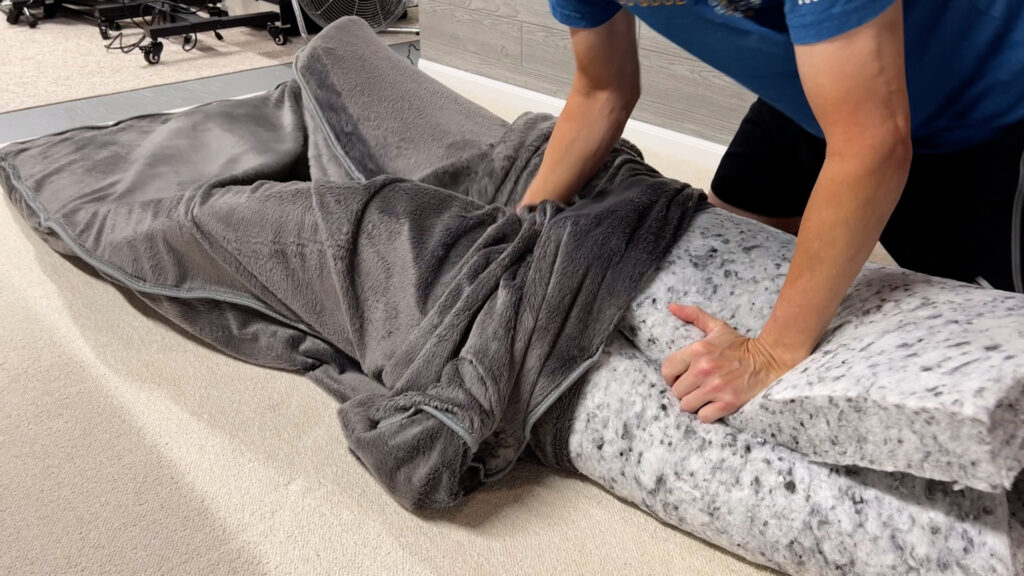
You can learn from my mistake here, as I didn’t want to remove all the back stitching. I thought I could fold and remove the mattress foam with only about 2/3rds of the seam removed. What happened was the foam was challenging to handle, and some of the mattress cover ripped. It would have been better to remove all the back stitching before removing the mattress foam. It took extra time later to fix the torn cover.
Part 3 – Trace the dimensions onto the new foam and cut the new foam to size.
Next – Open the new foam.
Open and lay out the new foam flat, remembering that the new foam is vacuum sealed. It will expand rapidly, so ensure you have plenty of space for the foam to expand.
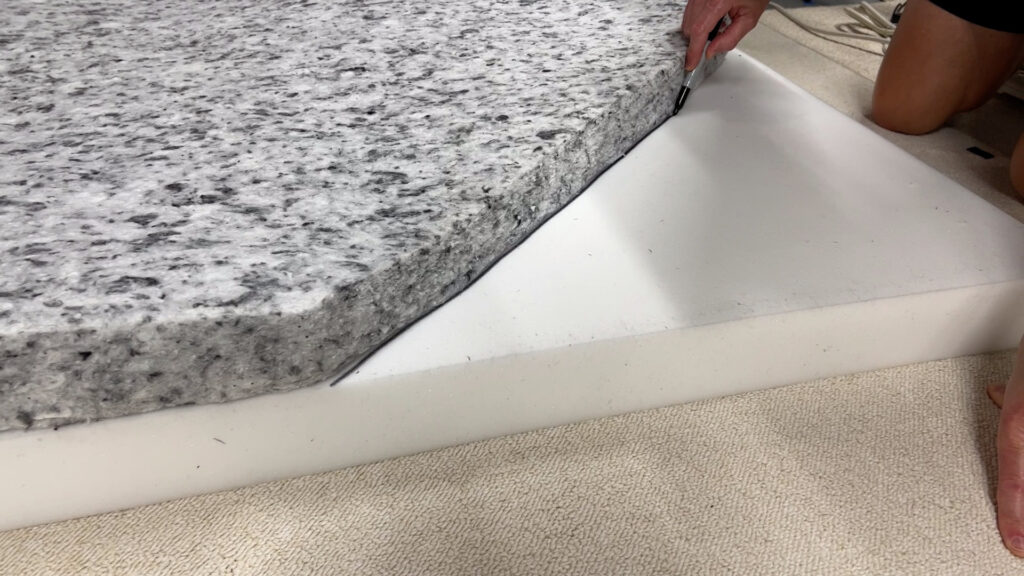
Next – Place the old mattress foam on the new foam to trace the form.
Put the original mattress foam on top of the new piece of foam. Line up the old foam and new foam along the long sides.
Next – Trace the outline of the old foam onto the new foam.
Using a sharpie or good magic marker, trace the shape of the old foam onto the new foam. Take your time and tackle the angled side first, then the rest of the side of the foam. Try to keep the sharpie or magic marker at the same angle as the foam throughout the entire trace.
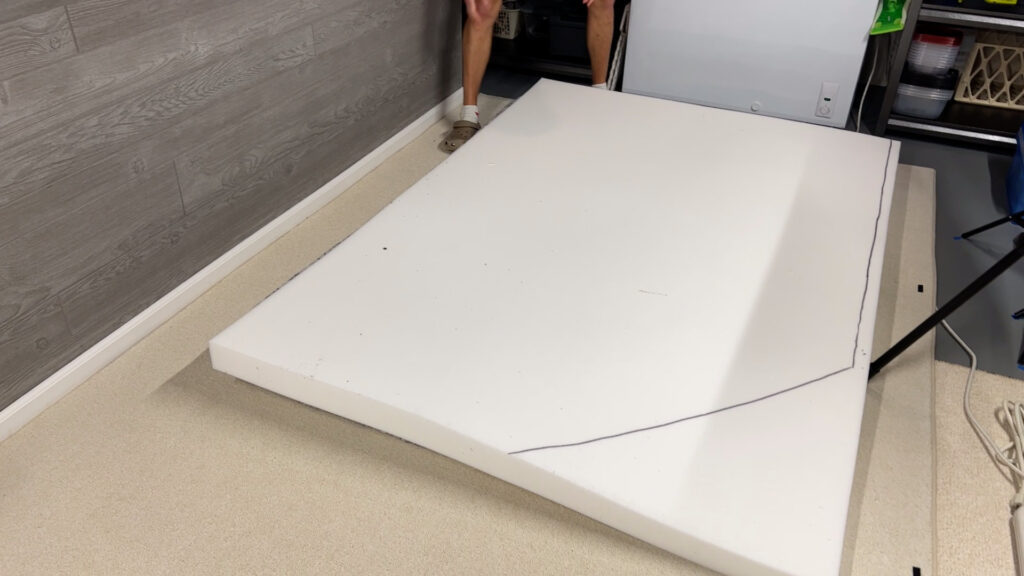
Next – Raise the new foam for cutting.
It’s important to raise new foam before cutting. This means placing something under the new foam while cutting it. I used the old mattress foam as the primary support and added some other foam pieces to raise the new foam off the ground. The purpose is to use the electric knife without hindrance or hitting the floor.
Next – Cut down the new foam to the exact dimensions.
Use the electric knife and cut the new foam along the traced lines drawn onto the new foam. Here, we are cutting the angled piece. It is crucial that you hold the electric knife perpendicular to the surface of the new foam and cut slowly; otherwise, the cut will become angled. Cut slowly and keep the electric knife’s cord out of your cutting path. By the way, a utility knife makes this a difficult task. The best way to go, I know of, is to invest in a good electric knife. Please see our Amazon store for a recommended product.[2]
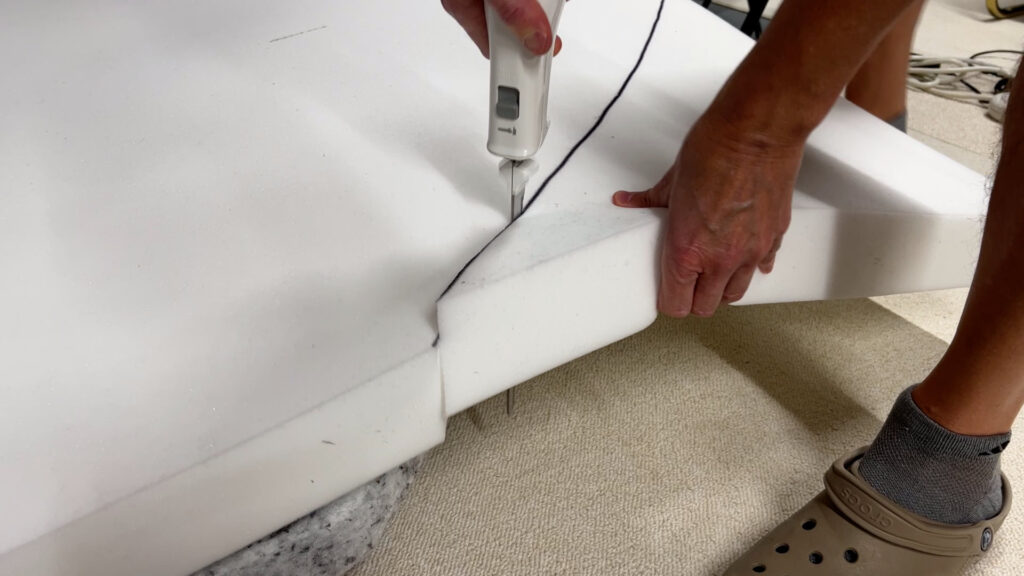
I tried to keep my head and eyes directly over the electric knife as I moved along so I could see precisely where the blades were in reference to the trace line. My left hand is holding the discarded foam piece up from the floor and away from the knife.
Cutting the longer straight piece was a bit more difficult. It could have been avoided if I had ordered the foam an inch narrower. You’ll first want to recheck that you have proper support for the new foam and clearance for the travel of the electric knife for the entire length of the cut.
Part 4 – Install the new foam into the mattress cover.
Next – Lay out the mattress cover and position the new foam.
Lay out the mattress cover with the open seam toward you. You’ll notice that since we ripped the fabric, we opened the bottom seam the rest of the way to make it easier to insert the new foam.
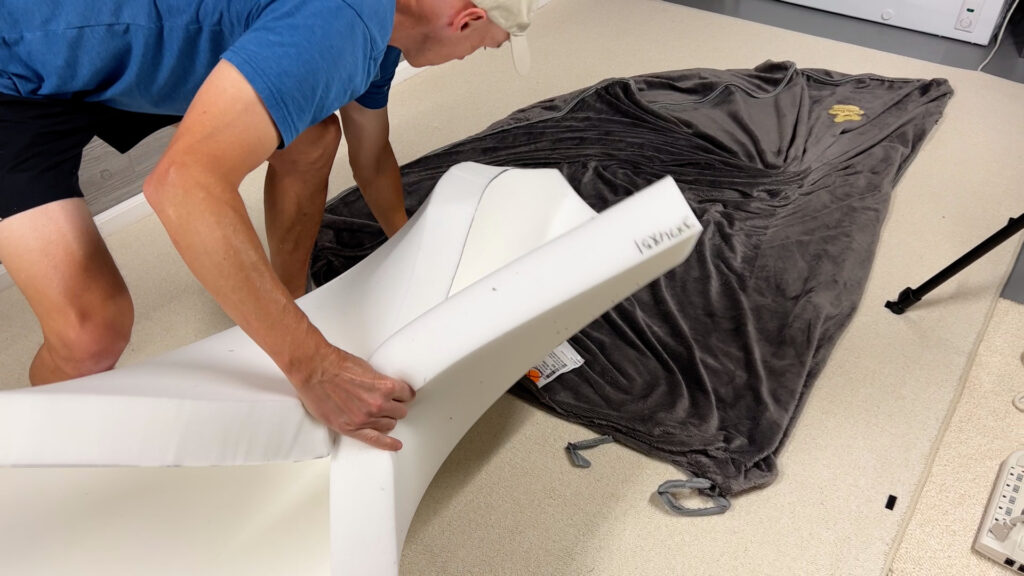
Next – Insert the new foam into the mattress cover.
Take hold of the new foam and insert it into the mattress cover. If you have a helper, this is a great time to get assistance, as it was challenging for one person. There isn’t an easy way to insert the foam, having had to remove it from its shipping seal and cut it first. It was difficult to do alone while holding the foam folded in half. My strong counsel is to have someone help feed the cover over the new foam while you hold the folded foam.
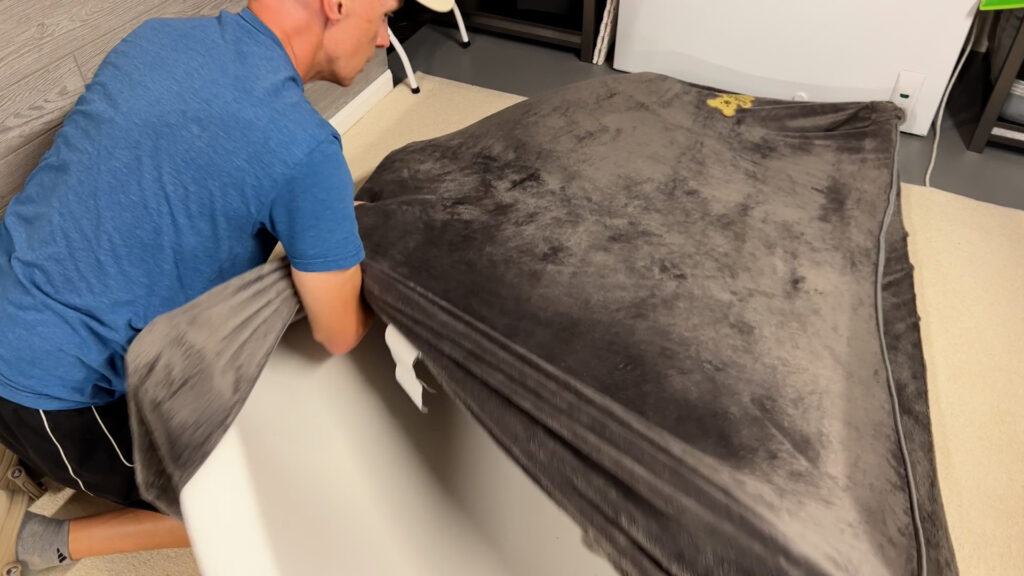
Next – Maneuver the foam within the mattress to ensure proper fit.
Use your hands to reach in and position the foam into the corners of the mattress cover. Be careful not to rip the mattress cover fabric. This requires some strength and reach to accomplish. The concern is not getting hurried or frustrated with the physical process. It would have been easy to rip the material at any stage.
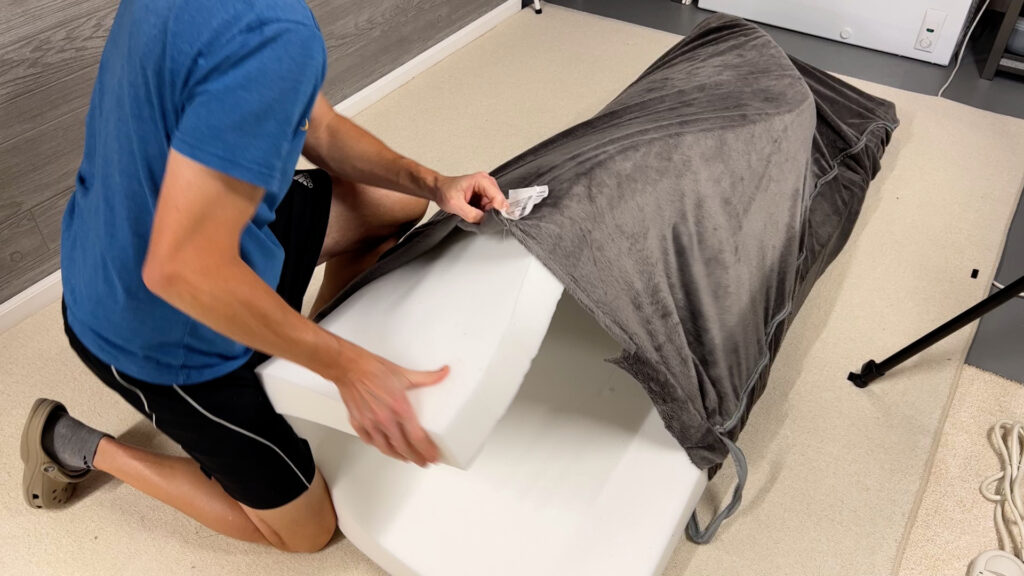
It took several minutes of hard work to get the new foam flat into the mattress cover and several more minutes to align the cover. Yet, with persistence, I was able to get the new foam in without ripping the mattress cover. At one point, I stood the mattress up to try and get the foam to align better with the cover, which worked well. From there, it was the tedious work of shaking the fabric to get the foam into the right places.
Part 5 – Sew up the bottom seam of the mattress cover.
Next – Pin the length of the open seam.
Fold the open seam fabric together and insert a straight pin about every 3-4 inches. This will hold the material together as you sew the seam. Ensure the straight pin goes through both pieces of the thick seam fabric and feed it back through again. Be careful with the straight pin, as you can get poked easily. FYI, we did remove the mattress tag as its information about the flammability of materials no longer applied. Please understand that the new foam does not carry the same flammability standards.
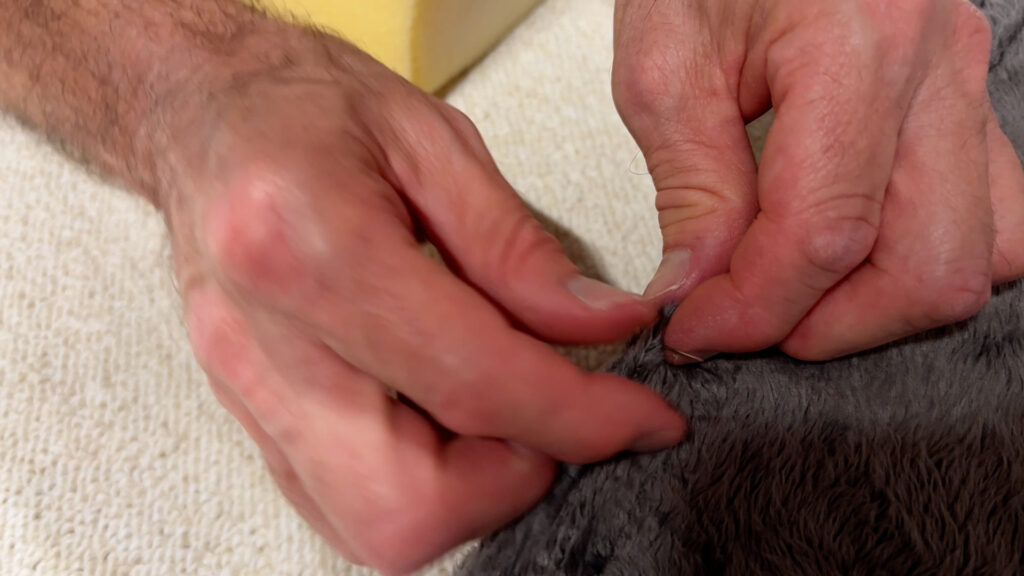
Next – Sew the seam with a large sewing needle and upholstery thread.
Using needle and thread, sew the seam material together. This is done using a basic sewing pattern and will take considerable time to complete the entire length of the seam. After sewing the seam, remove the straight pins from the fabric.
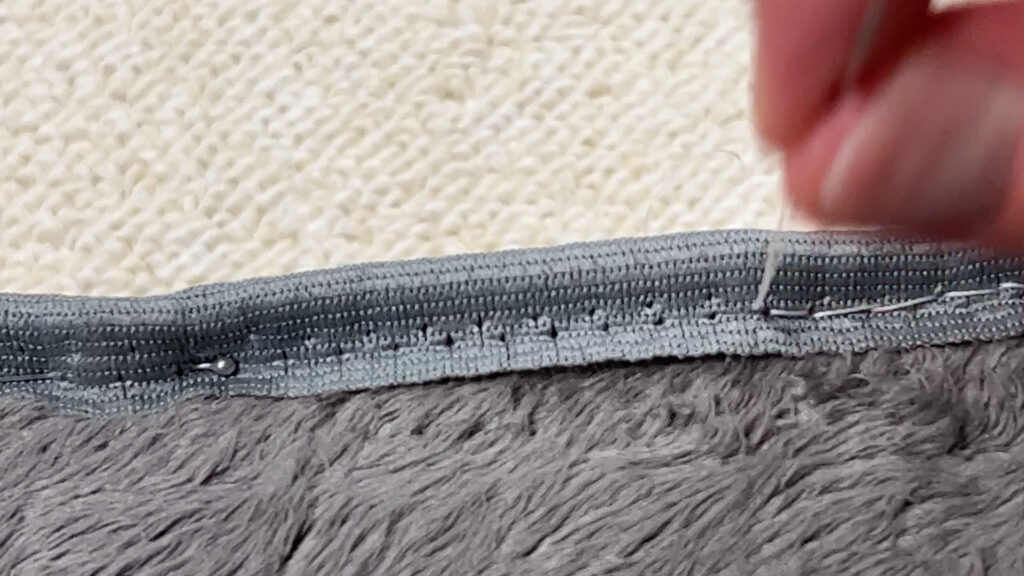
Next – Sew the cording onto the seam.
First, place the cording on the newly sewn seam and add straight pins every 2-3 inches to keep the cording in place. Next, sew the cording onto the seam using the pattern above. This is a long process that requires accuracy and patience to complete.
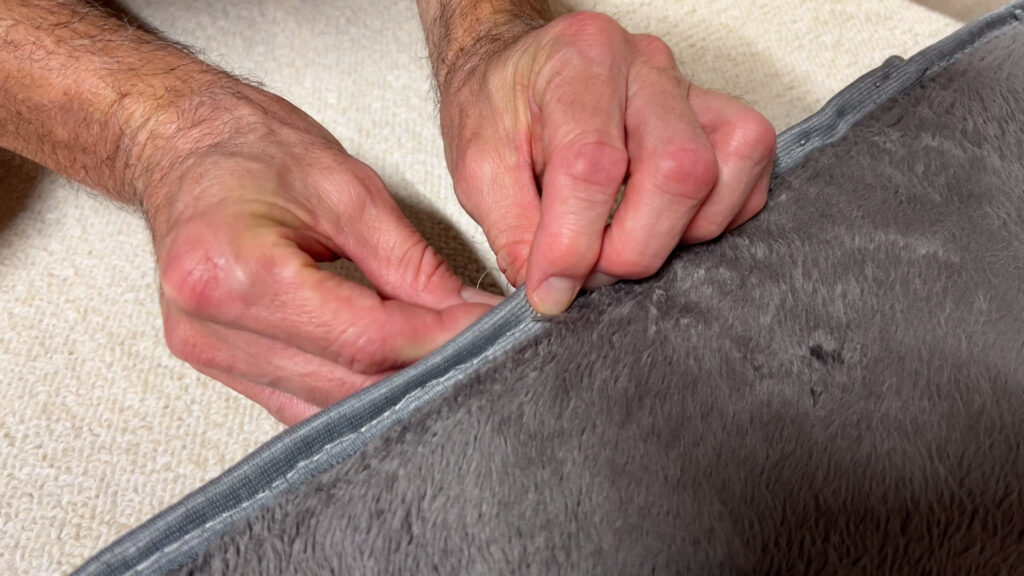
We needed to deal with a bit of overlapping cording to finalize the project. We could have cut the cord short but decided to sew it on top of the existing cording. It was a bit difficult because now we were going through two layers of cording and the dual overlapping fabric. Overall, it worked well, felt strong, and looked good.
Hopefully, this process helped you see the effort, tools, and skills needed to do this upgrade. We’ll be testing the new mattress out shortly and will likely report back with an update. Laying on the new foam after we installed it was much nicer than the old used foam. We’ll see how it holds up over time. It was a time-consuming yet inexpensive upgrade worth considering.
That’ll do it for this step-by-step process of replacing your Teddy Bear mattress foam. Hopefully, this video will help you tackle this task more confidently. Remember that the process document for this task is on johnmarucci.com in the Resources area.
As always, thanks to our fans who support our efforts by starting their shopping from our Amazon Storefront and their generous financial support by using the THANKS feature located under each YouTube video ($ within the Heart icon). Your support is greatly appreciated!