
Click here to sign up for reminders when new blogs are posted.
This blog corresponds to the YouTube video RV Window Shade Restringing, please see the video for visual help with the process. A step-by-step process doc is available here: Docs & Downloads. The Pleated Shade First Aid Kits are available on our Amazon store.
In all of the RVs I’ve owned each has had pleated compression window shades that have spring-loaded tension strings. Over time these strings fray and end up breaking with use. This can be especially frustrating if you are on a long trip away from home and would like to close or open the shade without worrying that the string on the shade will break. This came to a head recently while on a trip and we decided to learn how to fix these ourselves. In this blog we’ll go over the step-by-step process of restringing one of these shades.
Before we get going, here are the tools and supplies you will need to complete the task successfully:
Properly Colored Pleated Shade First Aid Kit
Handheld or Powered Phillips Screwdriver
Very Small Flat-Head Screwdriver
Small Flat-Head Screwdriver
Medium Towel
Small Cutting Board
Household scissors
Scotch Tape

Part 1 – Remove the Broken Shade
1. Identify the screw locations inside the window shade valance. These may be different for different window shades within the RV.
2. Using your Phillips screwdriver or power driver, remove the screws that attach the valance to the wall.

3. Remove the valance from the wall.
4. Using your Phillips screwdriver or power driver, remove the screws that attach the shade to the wall.
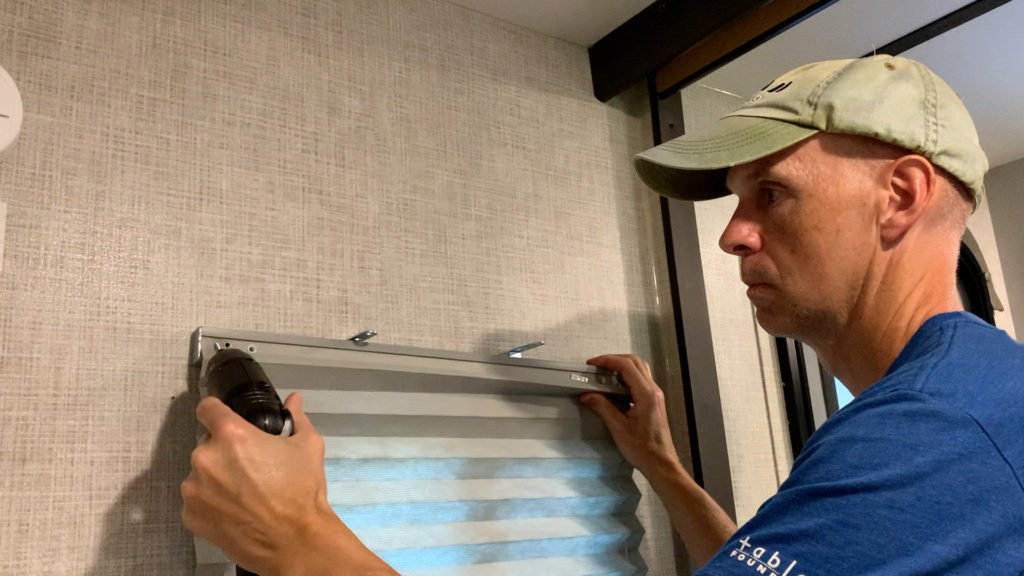
5. Remove the tensioner screws from the wall at both sides at the bottom of the shade.
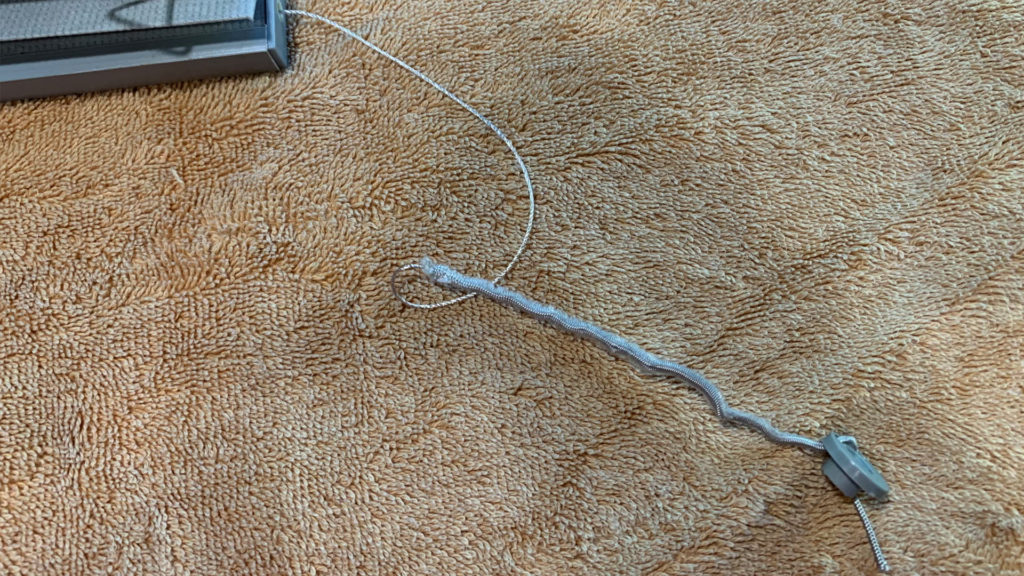
6. As you can see from this picture, the string is completely frayed.
Part 2 – Restring the Shade
7. Lay the broken shade on a flat surface and on a medium sized towel. You can also place a small cutting board under the shade to ensure you do not damage the surface you are working on.
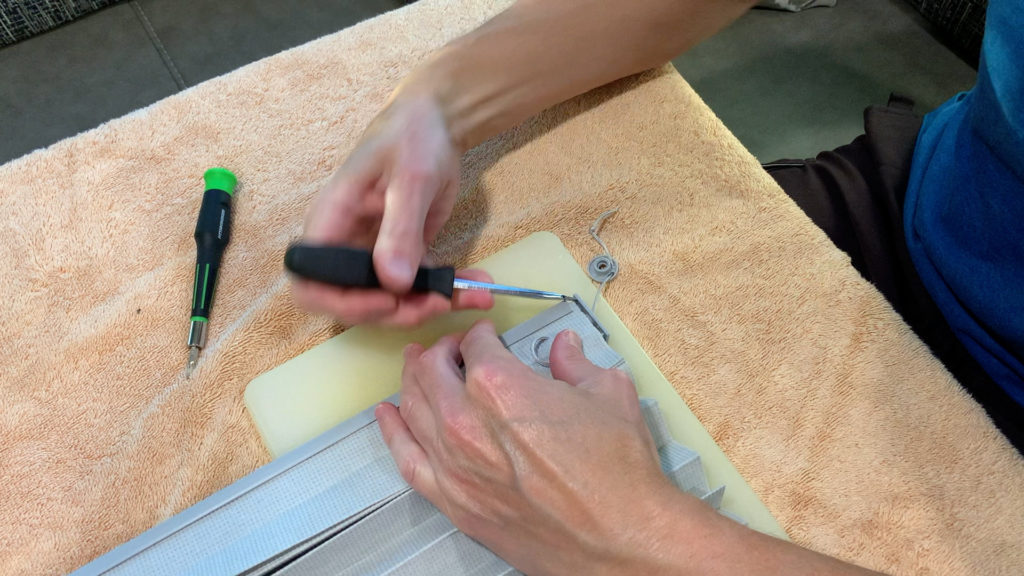
8. Using a small or very small flat-head screwdriver, pry off the four end caps from the frames of the window shade. Be aware that these are plastic and can be broken. Try to gently pry the cap off. Sometimes more pressure may be required. As you can see from this attempt, the end caps can be stubborn at times. Some end caps may be really tight, and you may need a smaller screwdriver to pry it loose.
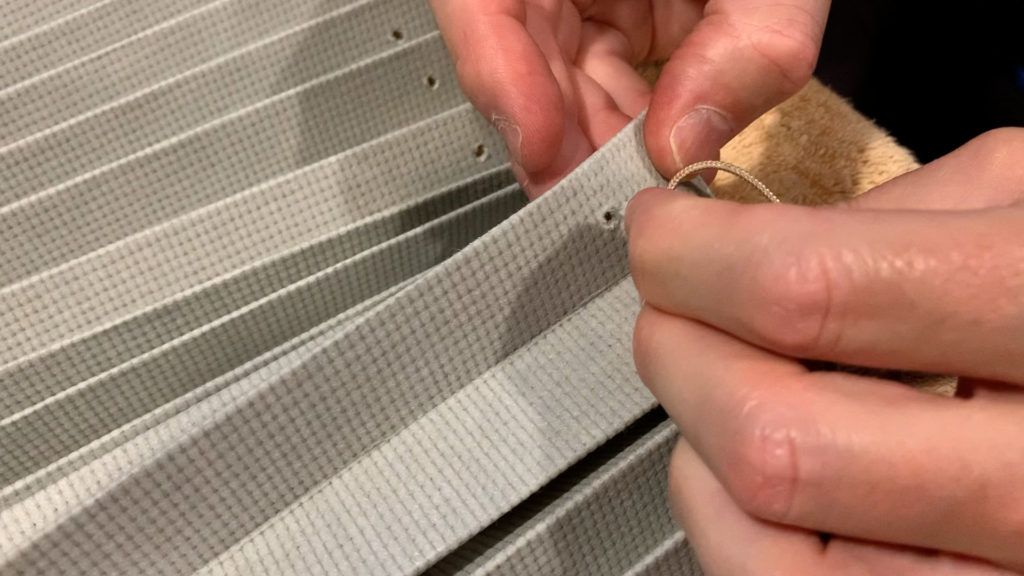
9. Next, use your scissors to cut the string in front of the knots near the tensioner. This will allow you to feed the old string out of the tensioner. Do this on both tensioners and pull the string out of the end caps (on bottom end caps only). At this point you should have four end caps and two tensioners free from the shade.
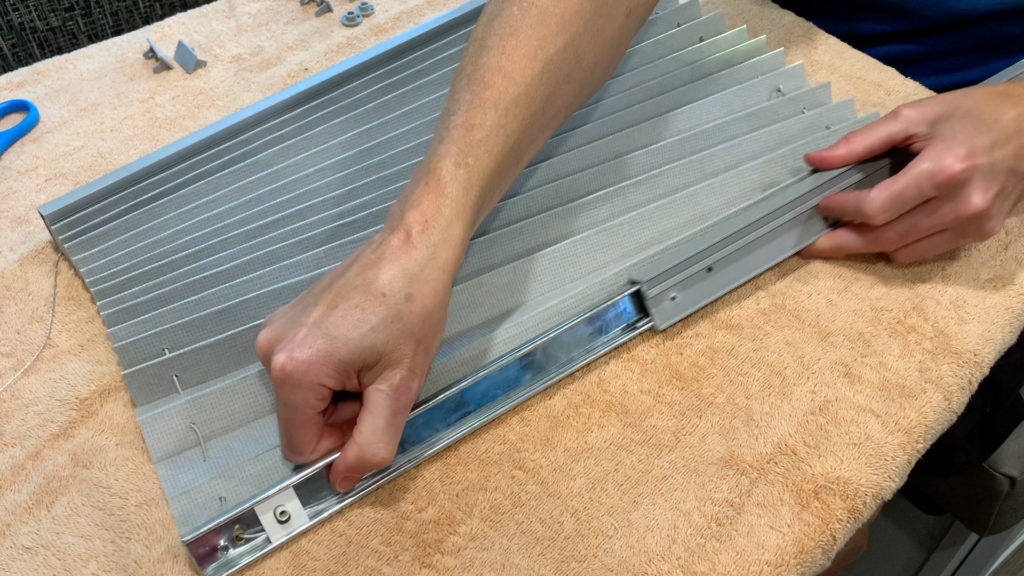
10. Slide off the top frame cover. Hold firmly to the shade while pulling the cover off. The covers should slide off relatively easily.
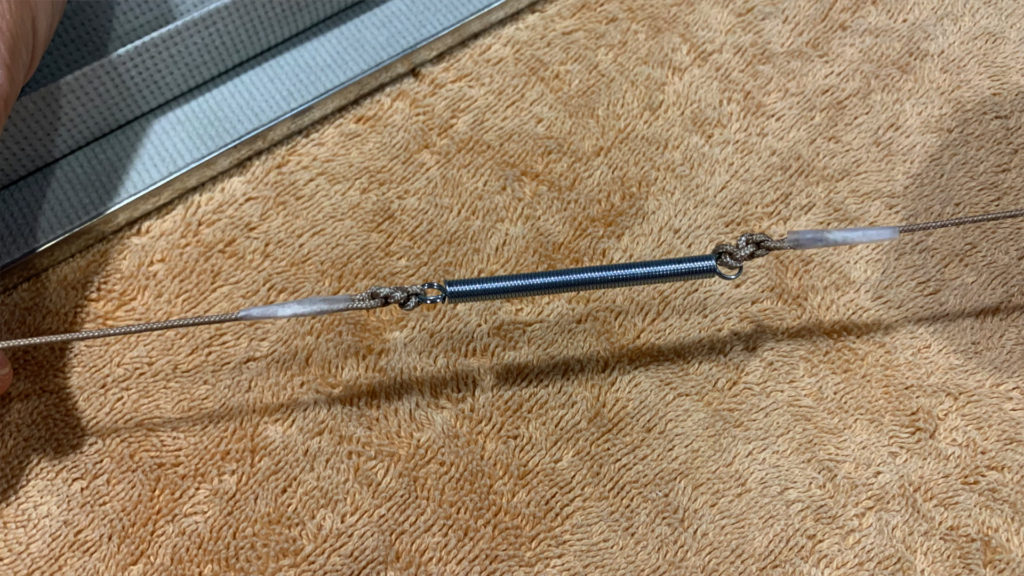
11. Cut the string where the spring and crimp come together. Remove the string from this side of the spring.
12. Attach the new string to the side of the spring. Double knot the string to the spring.
13. Slide off the bottom frame cover. Pull the old string out of one side of the shade from the top side. The string should come out fairly easily as you hold the shade and pull.
14. Cut the string on the other side of the spring and attach the new string with a double knot.
15. Use a small piece of scotch tape and wrap the end of the new string before feeding it through the shade. Feed the string by compressing the shade and pushing the new string through the holes. You may be able to feed the string through two or three folds at a time. Repeat on the other side of the shade.
16. Wrap scotch tape around the string ends near the spring so it doesn’t come unraveled over time. Tighten the tension so minimal string sits on the top frame.
17. Slide the top frame cover back on carefully so that the new string remains fully inside the cover. Make sure the string does not stick out of the cover.
18. Crisscross the string at the bottom frame so that the excess hangs out of the frame on the opposite side of where you feed the string through the shade.
19. Slide the bottom frame cover back on the frame being careful to not bind the crisscrossed strings. Make sure the string is coming out only on the sides of the frame.
20. Feed the string through end caps on both sides of the bottom frame. Secure the end caps to the frame.
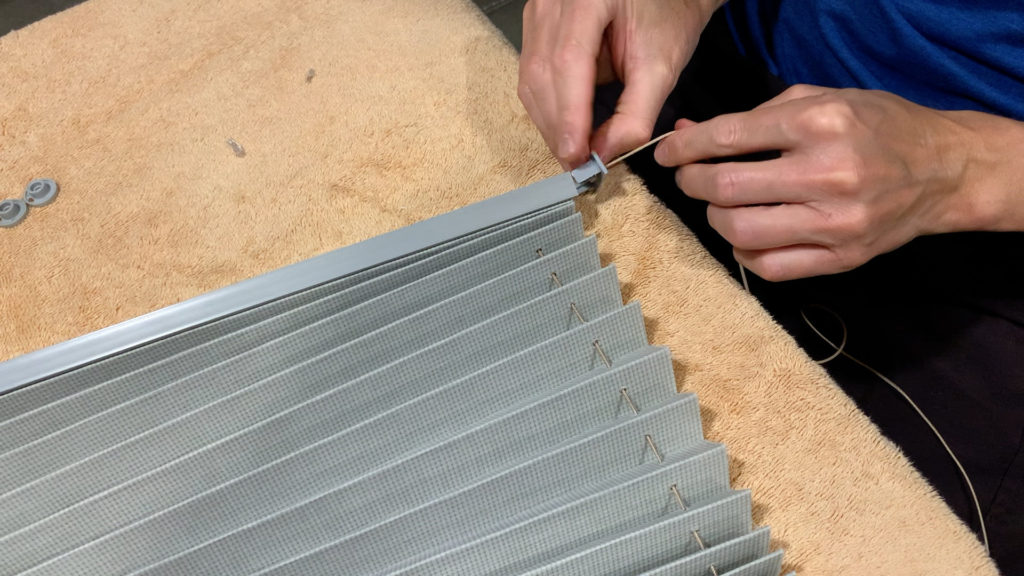
21. Put the end caps back on the top of the frame.
Part 3 – Reattach the Fixed Shade
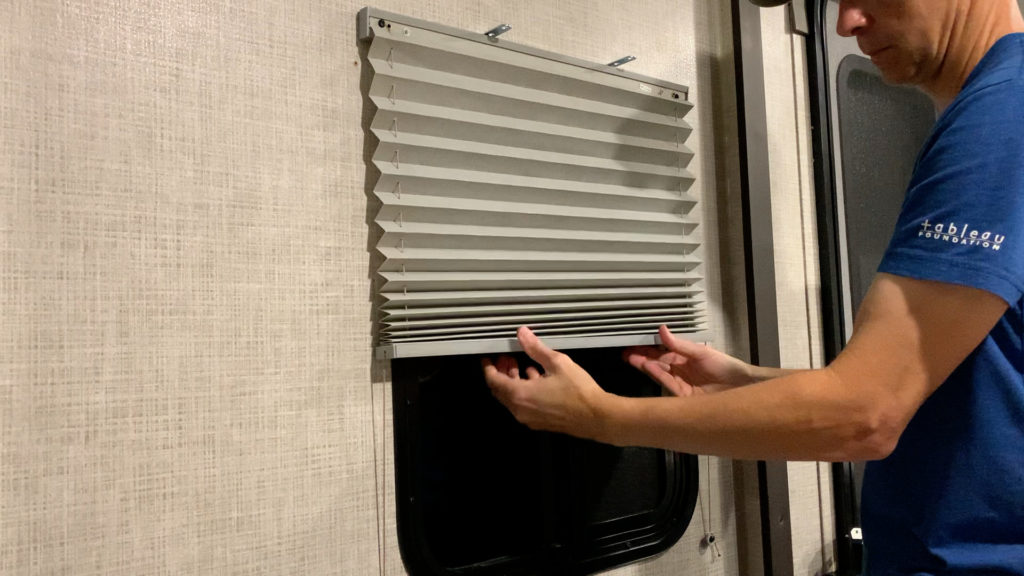
22. Attach the window shade frame to the wall using the Phillips screwdriver.
23. Feed the loose string at the bottom of the shade through the tensioners on one side of the shade. Tie a knot so the string doesn’t pull back through. Attach the tensioner to the wall at the same location where you removed it from. Before doing so, ensure the opposite side tensioner has plenty of loose string to work with.
24. Pull the loose string through the tensioner on the opposite side of the shade while manually placing the tensioner back on the location you removed it from. Pull more string through to tighten the tension. Do not overtighten the tensioner. You may have to move the shade up and down while holding the string taunt to get the right tension. Once you have the proper tension, tie a double knot in the string on the low side of the tensioner so the string can’t fall back through the tensioner.
25. Reattach the tensioner to the wall in the same location. If the tension is correct the window shade should be able to stop mid-way up the window without falling back down. Too much tension and it will be difficult to move the shade. Also, if you have too much tension, it will cause the string to fray more quickly and you’ll have to do this process again, likely much sooner than planned!
26. Reattach the window valance and on both sides using your Philips screwdriver and the project should be complete!
For a written version of these steps, the process doc is available here: Docs & Downloads.
All the best in your camping endeavors!
We’d love for you to join the On The Road Team by subscribing to the YouTube channel. If you want to dive deeper, we put more content and photos on Instagram and Twitter @JohnMarucci. You can also follow John on Facebook @JohnMarucciOnTheRoad.
As always, thanks to our teammates who support the channel by watching the YouTube Ads and by starting their shopping from the On The Road Amazon Storefront at: amazon.com/shop/johnmarucci. Your support is greatly appreciated!
Watch the more than 100 videos from John Marucci – On The Road!