
Click here to sign up for reminders when new blogs are posted.
In this blog I’ll walk through a solution for an RV bathroom faucet leak. I was having a strange, random leak under the bathroom sink in my Keystone Bullet 243BHS. This had shown up on occasion when it hadn’t rained, and we simply couldn’t recreate the issue when using the faucet or the black tank flush inlet that was in the same general area. Every so often we would see a small amount of water on the floor under the sink for no apparent reason.
This past winter while camping in Florida, we decided to try to tackle the issue. After some research, we did find a video from The Wandering Wagners who walked through a similar issue and solution. Here is a link to their video if interested. After watching the video, we noticed that they also had the original plastic bathroom sink faucet with the plastic threads. Apparently, some of these threads tend to leak. The Wagner’s solution was to replace the faucet and some of the PEX pipes. This seemed like a good idea.
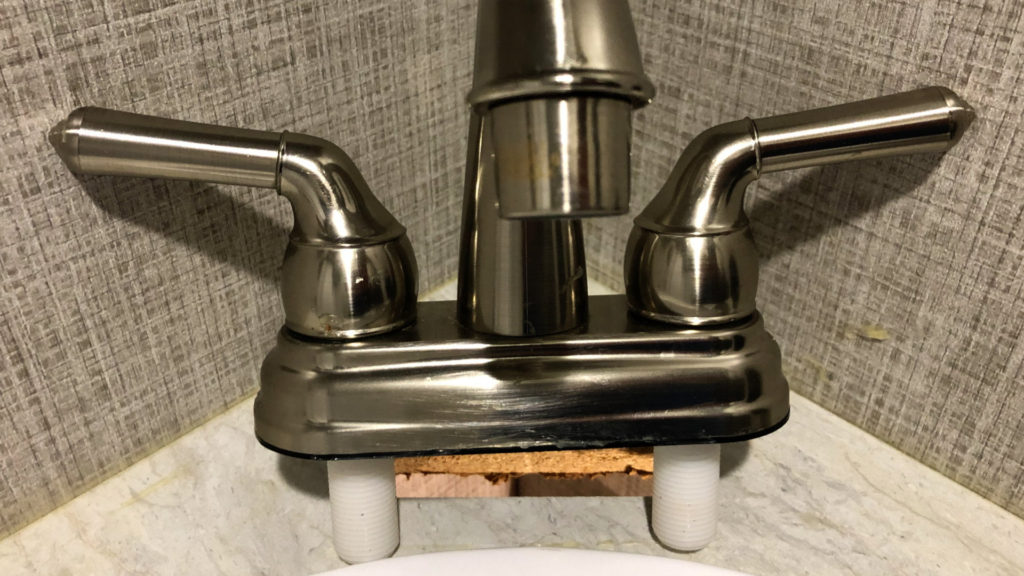
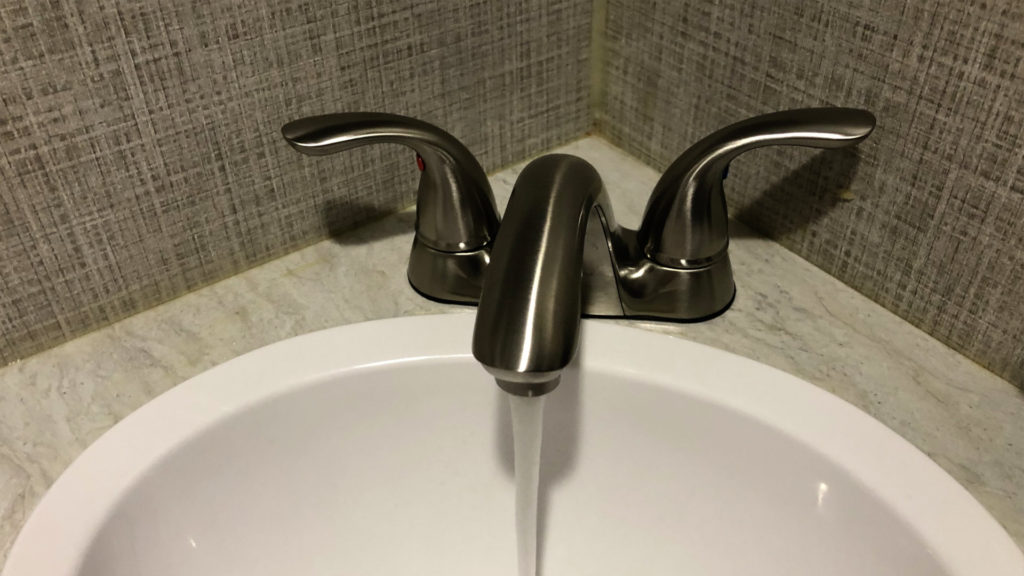
I tend to think that the best RV mods are the ones that should have been done at the factory. This bathroom sink replacement would be included in this statement, since you can pick up a very nice metal faucet at a big-box home improvement store for not all that much money.
Even if your RV bathroom faucet isn’t leaking on occasion, you may still want to do this upgrade for the big jump in quality from a plastic faucet to a nicer metal one with a solid feel. With that said, let’s get into the steps taken to do this faucet replacement. You can find a printable pdf of the steps on the website here. For visual cues, see our corresponding YouTube video here.
Tools and Supplies
Here are the tools and supplies needed to do the job properly. Some of the tools are fairly expensive but can be reused on other RV plumbing projects at a future date. They are a good investment in your toolkit. You can find these tools and supplies at a local hardware store or on our Amazon storefront. Be aware that the length of the flex hose is based on how much PEX pipe you have under your bathroom sink. The below is for my Keystone Bullet 243BHS. Your supply needs may vary.
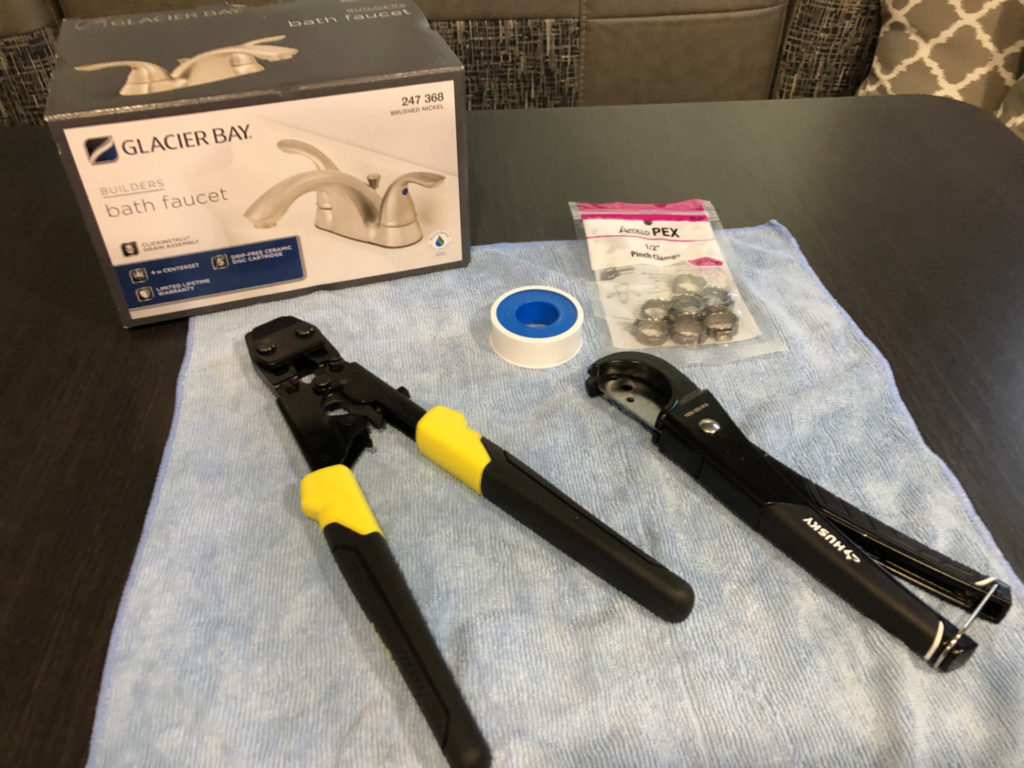
2. PEX Pinch Clamps
3. PEX Pipe Cutter
4. Teflon Plumbing Tape
5. Tape Measure
6. New Bathroom Faucet
7. 2 ½” PEX crimp x ½” MNPT brass male adapters
8. 2 – 12” Flex Hoses with female connections
Here are the steps:
1. Turn off water to the RV.
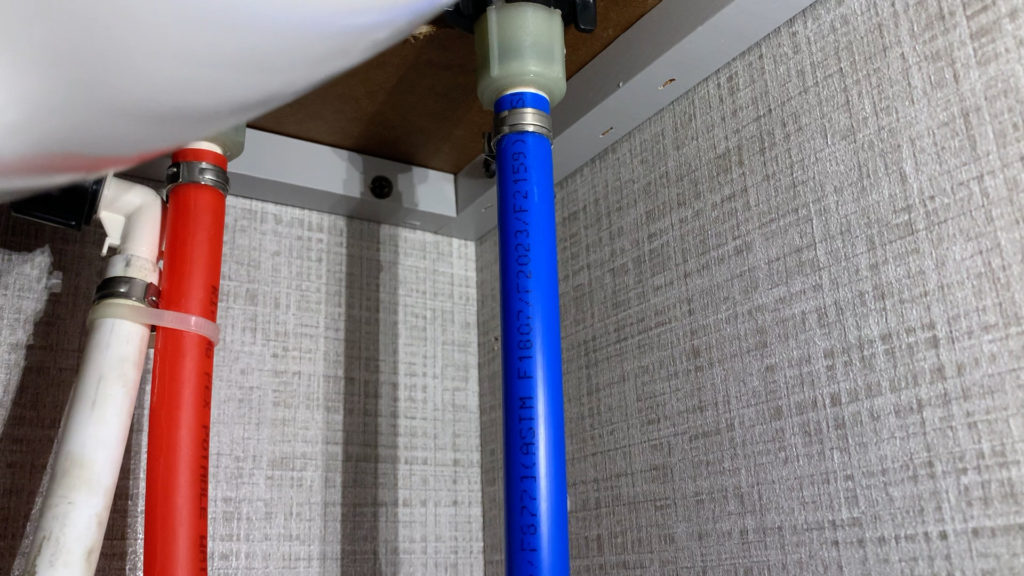
2. Unscrew the existing hot and cold PEX pipes from the original faucet.
3. Remove the old faucet and set it aside. Remember there will likely be some water still in the faucet.
4. Measure the length of flex hose against the disconnected original PEX pipe.

5. Mark the original hot and cold PEX pipe from the threaded side to needed length (my Keystone RV it was roughly 10 ¾”). Measure twice and mark the PEX pipes accordingly.
6. Use the PEX cutting tool and cut the original PEX pipes at the marks on both the hot and cold pipes.
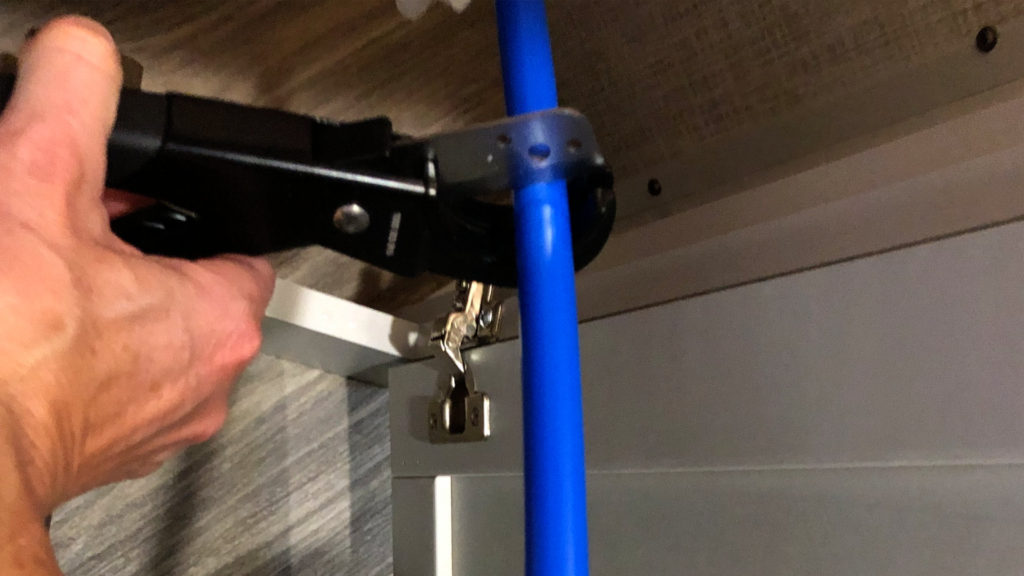
7. Insert new PEX pinch clamps on the newly cut PEX pipes – one on the hot side and one on the cold side.

8. Insert an adapter in each cut pipe and snug the pinch clamp up to the adapter.
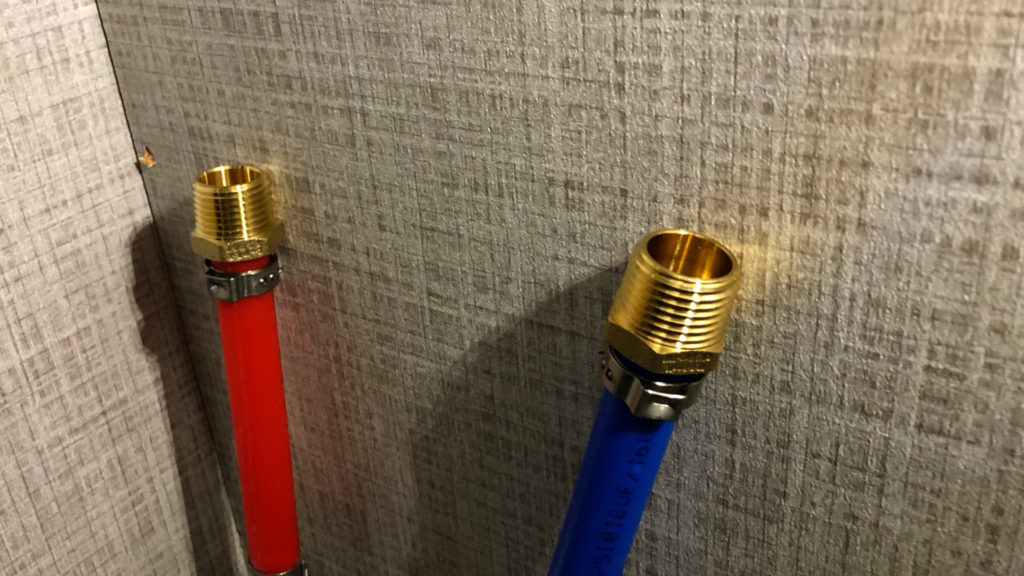
9. Put Teflon plumber’s tape on each of the adapter threads.
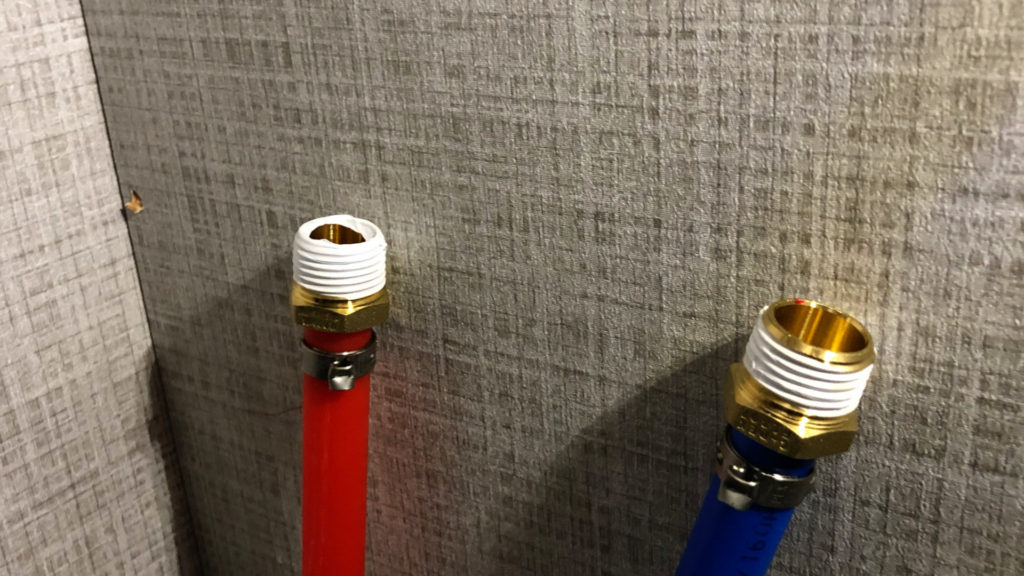
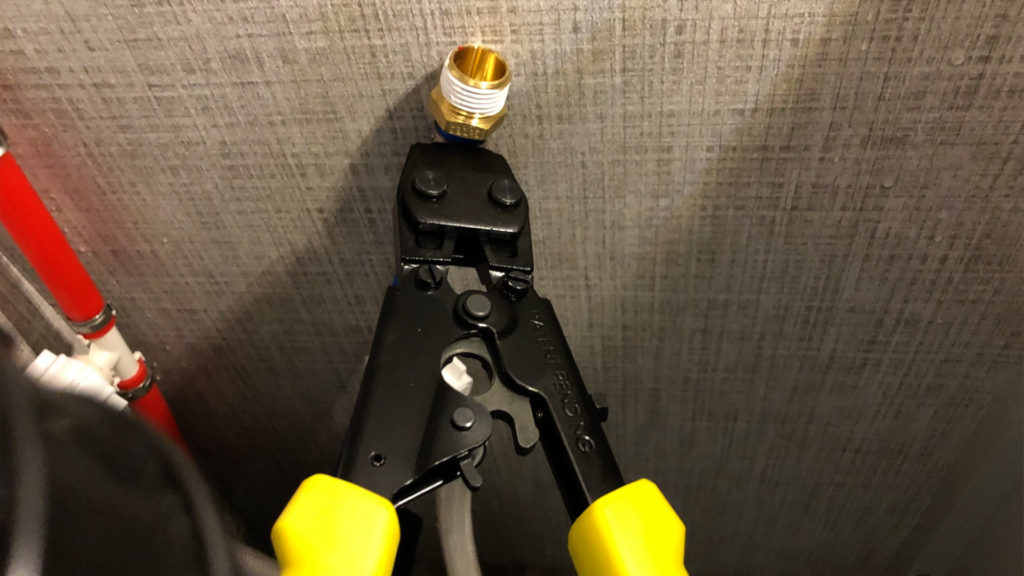
10. Using the pinch clamp tool, tighten the pinch clamps on the PEX tube and adapter.
11. Remove the new faucet from its packaging and put Teflon tape onto the threads of faucet.

12. Insert the new faucet into the sink cut out so that it lays flat on the sink.

13. Thread the flex hoses hand-tight on to the new faucet threads on the hot and cold sides.
14. Thread the flex hoses hand-tight on to the adapters on the hot and cold side. Make sure you keep straight the proper hot or cold hose to connect to the hot or cold side of the plumbing lines.
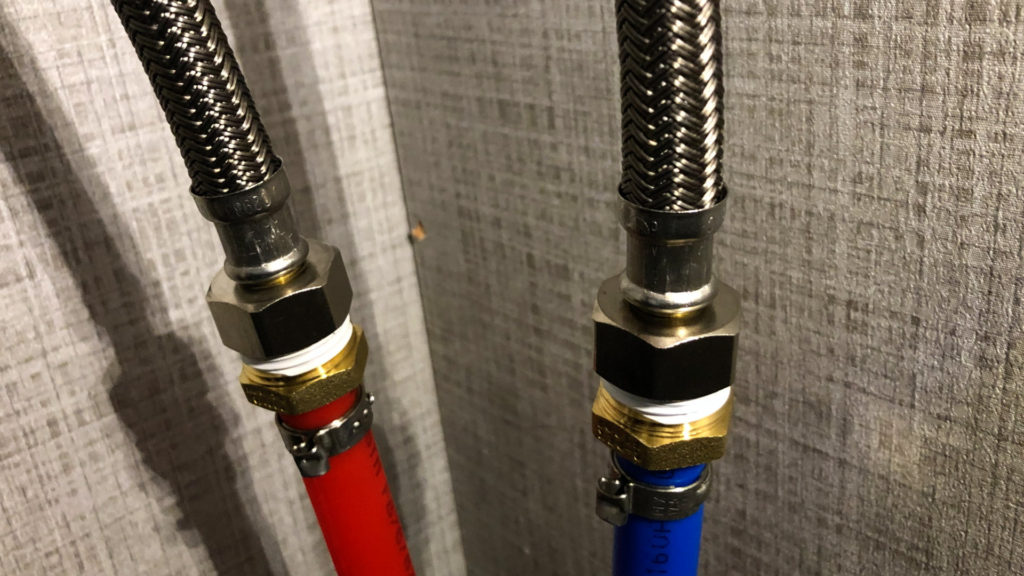
15. If all looks correct, tighten the flex hose slightly more (1/4 turn) with a wrench to ensure a good seal. Do not over tighten.
16. Turn the water on for the RV and inspect the connections for leaks.
17. If no leaks are seen under the faucet at the new connections, test the water flow from the new faucet.
That should do it on replacing your bathroom faucet. We have enjoyed this new faucet very much and would recommend it to anyone who is interested.
All the best in your camping endeavors!
Remember to sign-up for blog reminders so you don’t miss when new blogs are posted.
We’d love for you to join the On The Road Team by subscribing to the YouTube channel. If you want to dive deeper, we put more content and photos on Instagram and Twitter @JohnMarucci. You can also follow John on Facebook @JohnMarucciOnTheRoad.
As always, thanks to our teammates who support the channel by watching the YouTube Ads and by starting their shopping from the On The Road Amazon Storefront at: amazon.com/shop/johnmarucci. Your support is greatly appreciated!
Watch the more than 100 videos from John Marucci – On The Road!
*We earn a commission on Amazon sales.