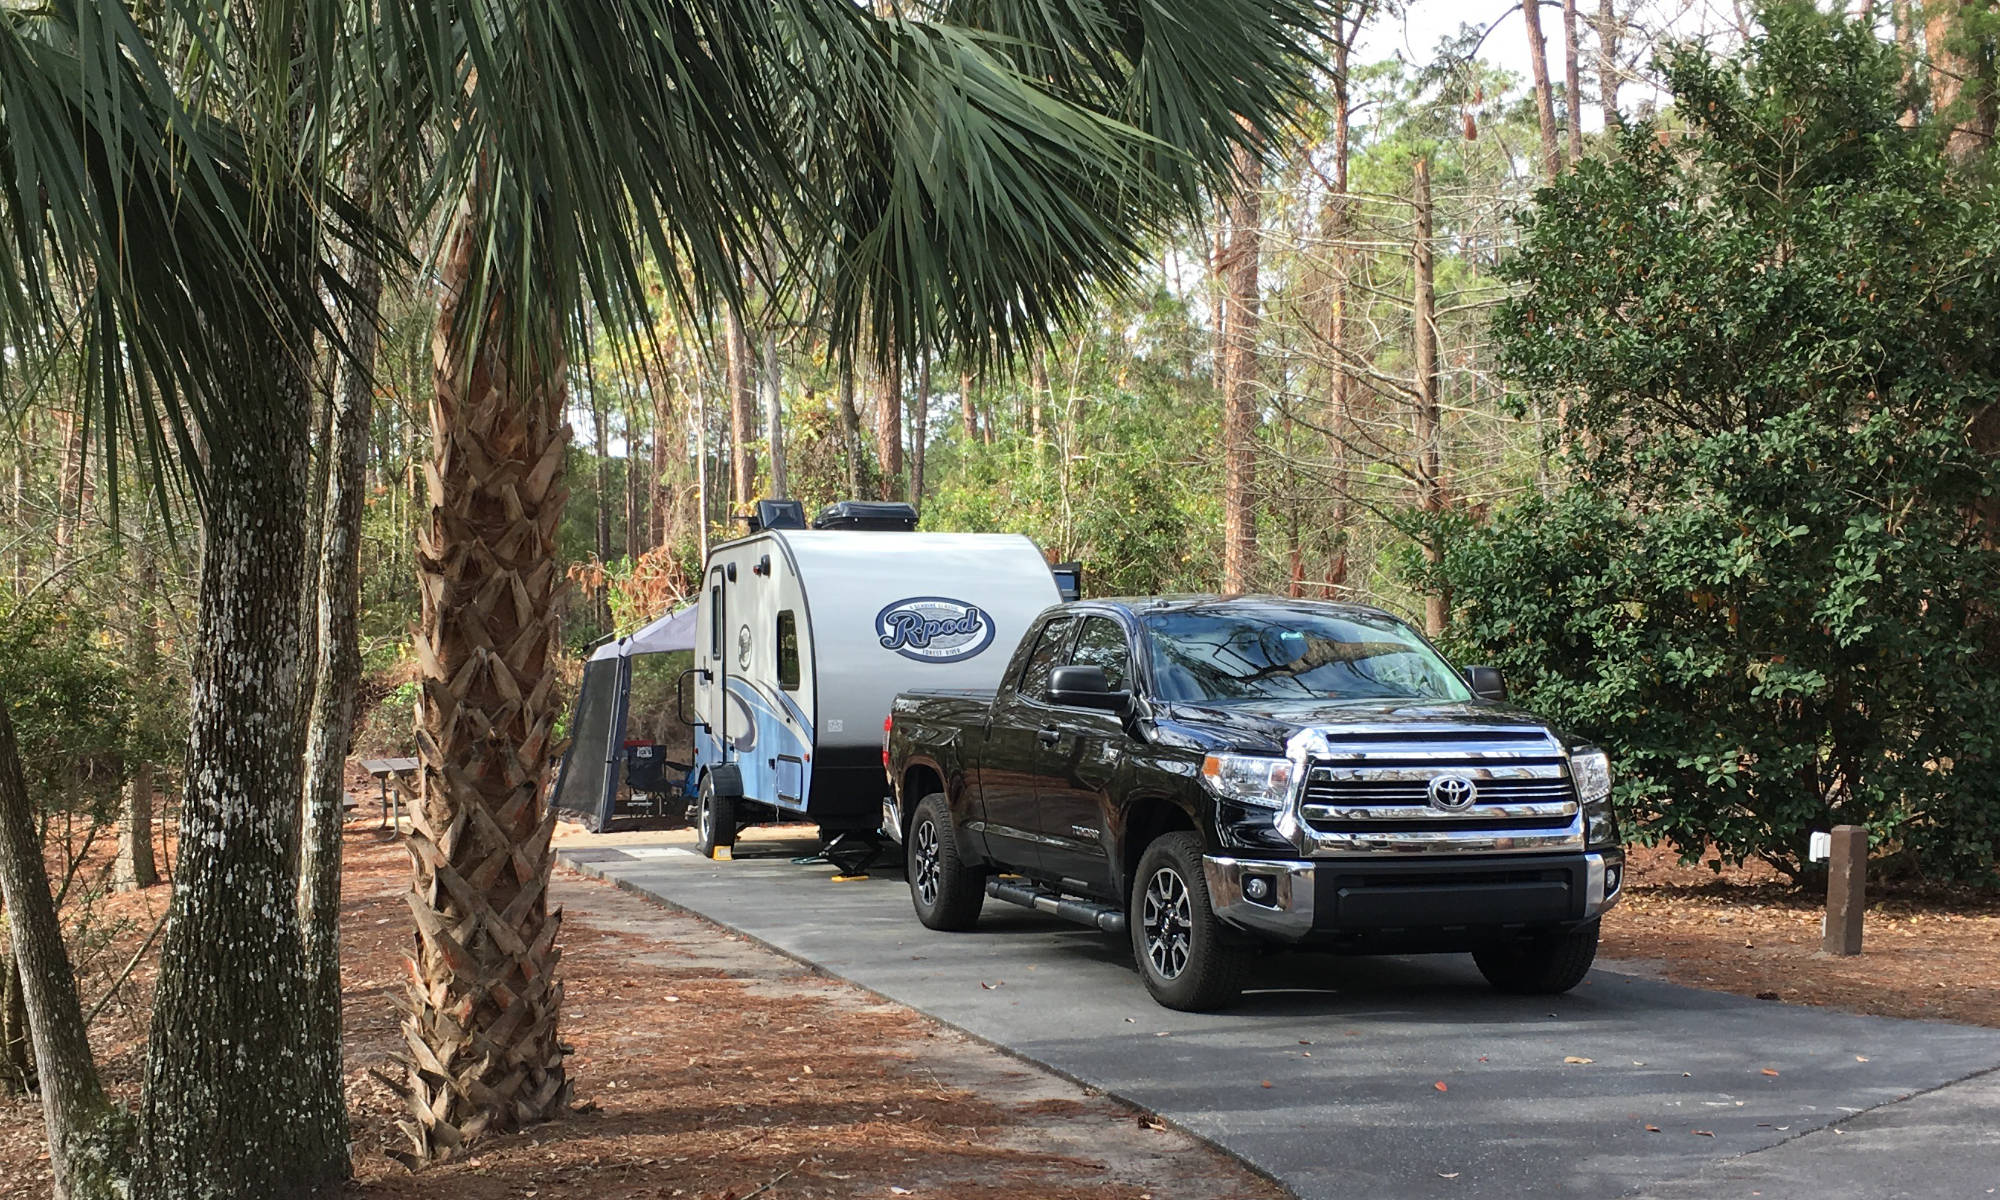

In this blog, we’ll walk through the full replacement of the RV water heater in my 2020 Keystone Bullet travel trailer. After a deep freeze this winter, the existing aluminum water heater tank failed due to a significant crack in the tank. I discovered this when waking up the trailer this spring, quickly recognized the severity of the issue, and the need for a full replacement.
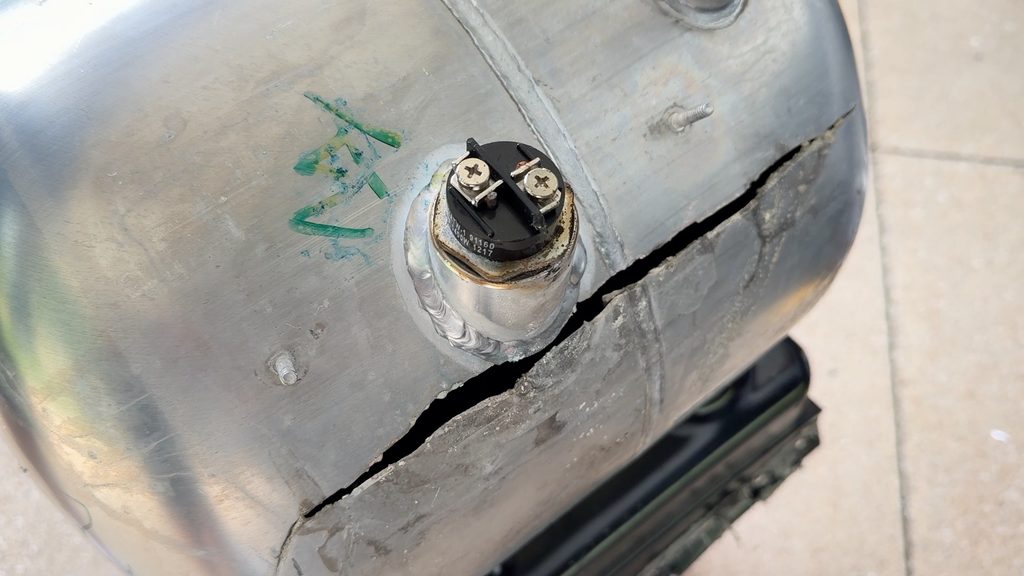
I was pretty surprised this spring when waking up my travel trailer. While dewinterizing the RV, I decided to remove the water heater tank plug and rinse the tank out since it had sat a while this winter. This was a Dometic aluminum tank with no anode rod. When I started rinsing the tank, in very short order, water was flowing inside the cab and cascading out of the trailer!
Identification of Problem and Replacement Unit
If you know that your water heater needs to be replaced, you’ll want to research a suitable replacement unit. I have a water heater troubleshooting video you will want to watch before assuming your unit needs to be replaced. In my case, the tank was cracked badly, but I did have a control board fail in the past, which was an easy fix.
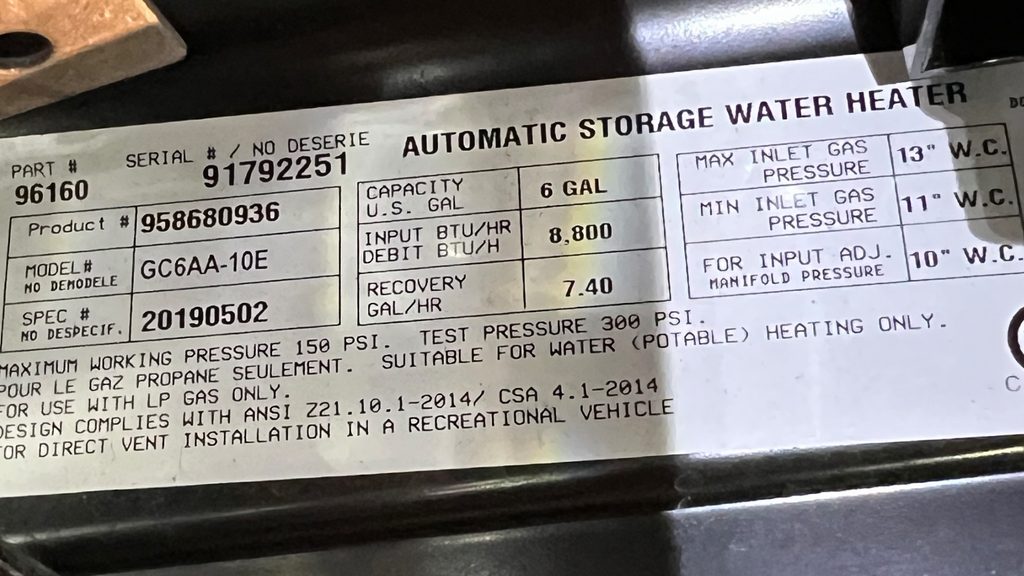
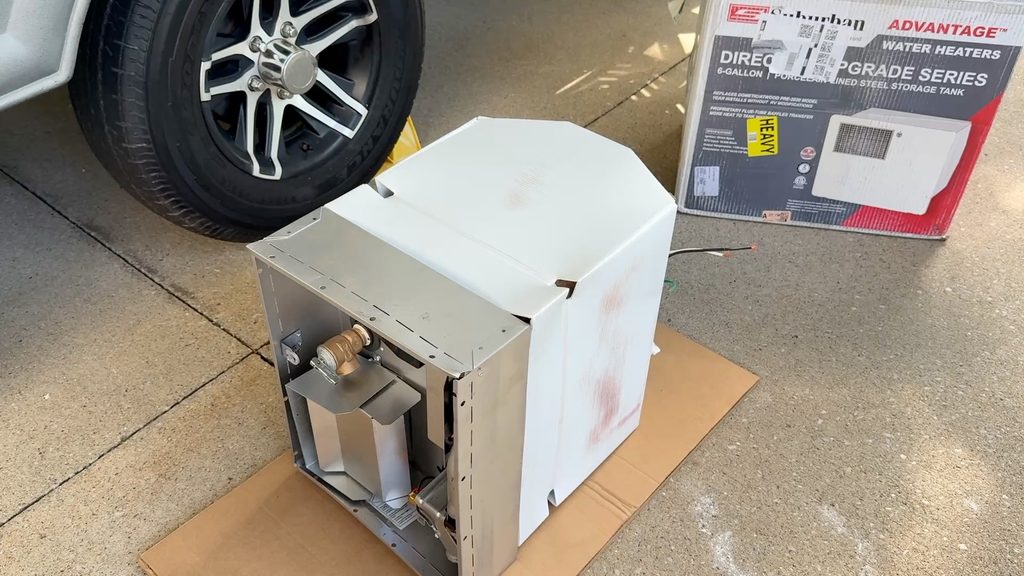
For my unit, there was not a direct replacement, but there was a Suburban 6-gallon water heater with a steal tank and an anode rod that was a close replacement for the Dometic aluminum tank unit. I used the Dometic’s model number for researching a proper replacement and found the Suburban unit on Amazon for around $600 at the time of filming. This compared to a local dealer asking just under 3x this amount to do the job.
Safety Disclosure
So, let’s go over the step-by-step process of doing this full replacement. Please be aware that this job is not for everyone, and you need to review this process carefully before deciding to take on this task. Propane is involved, and if the job isn’t done correctly, it can be very dangerous for you and your RV. If you are uncomfortable with any step in this process, please consult a professional RV mobile tech or your local RV service center. This process walks through how I tackled the issue and should not be considered complete or professional advice. We will also have the written process document with a complete tool list published on johnmarucci.com in the Resources area.
Replacement Process
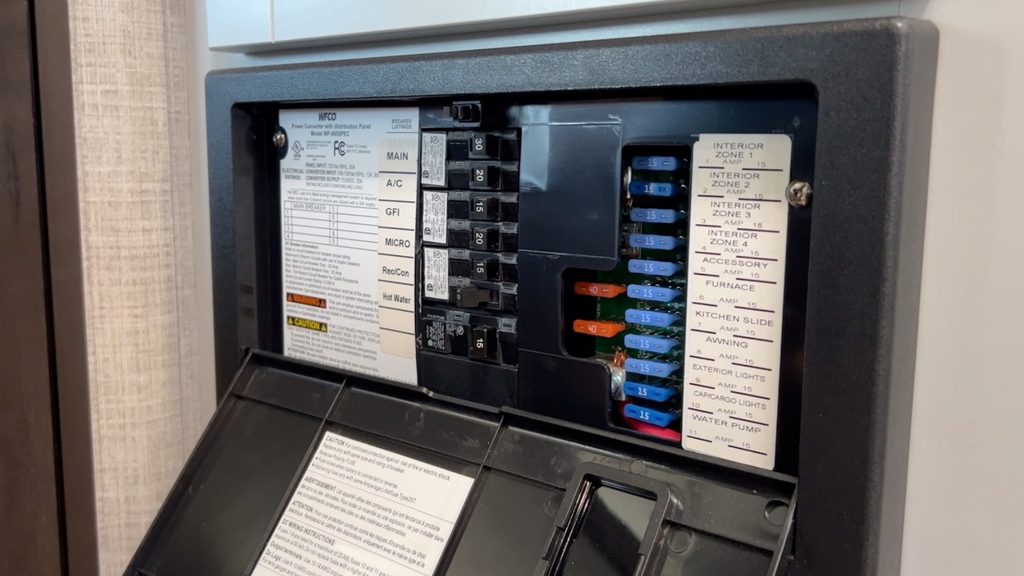
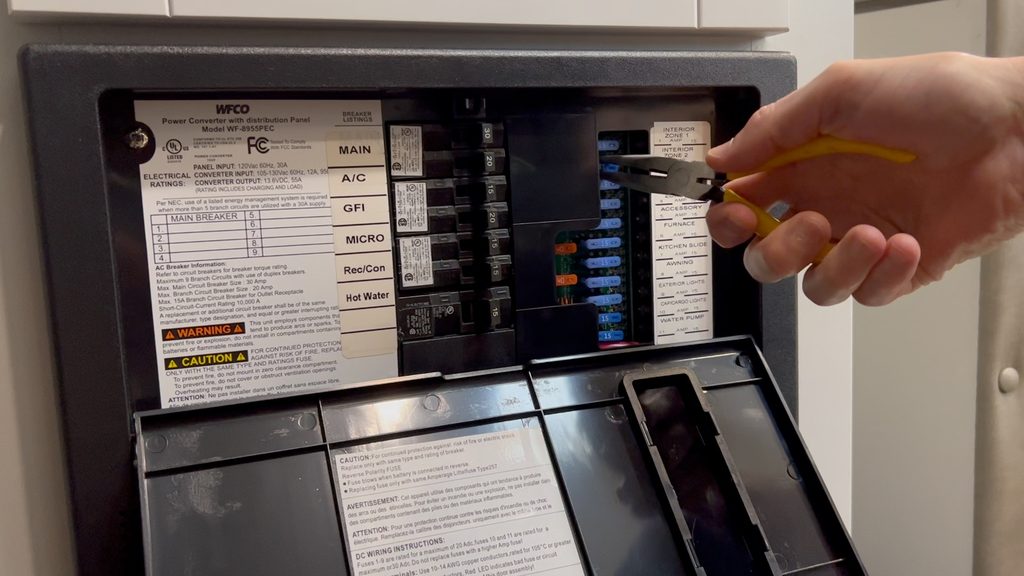
First, flip the circuit breaker to the unit and pull the fuse to the water heater. Ensure any control panel switches for the water heater are off. The fuse is in the electrical panel in your RV. Your fuses should be labeled from the factory, yet I did not have a fuse labeled for the water heater. If this is your situation, you’ll want to disconnect the battery to the RV. If you do have a labeled fuse, use a pair of needle nose pliers to remove the proper fuse. Store it somewhere easy to find to reinsert at the end of the process.
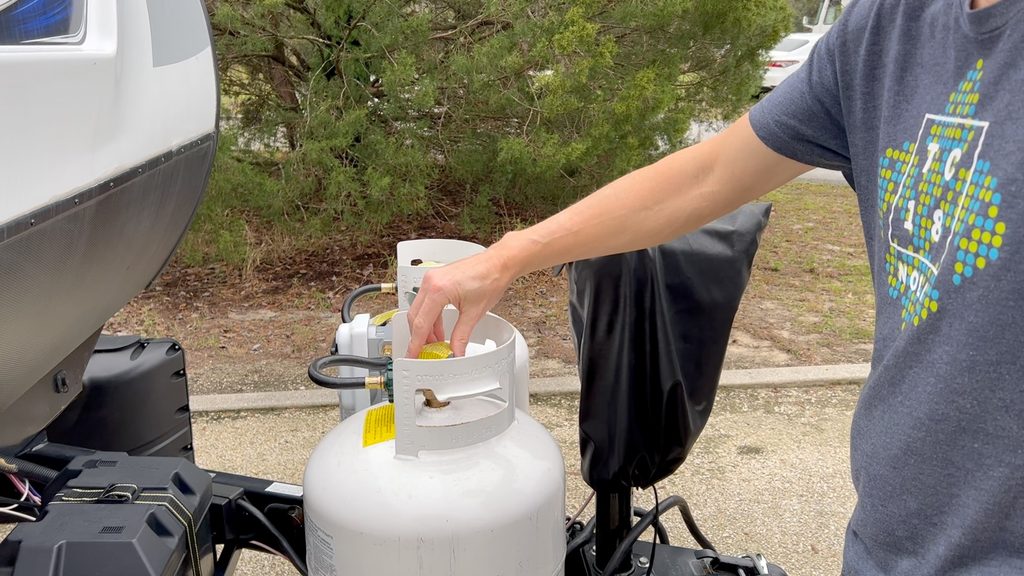
Next, close your propane tank valves. Go to the area where your propane tanks are located in or on your RV and turn off all valves on the tanks. You want zero pressurized propane from the tanks to the RV during the process. Again, if you don’t feel comfortable dealing with propane, please contact your dealer or a certified RV tech to help with this work.
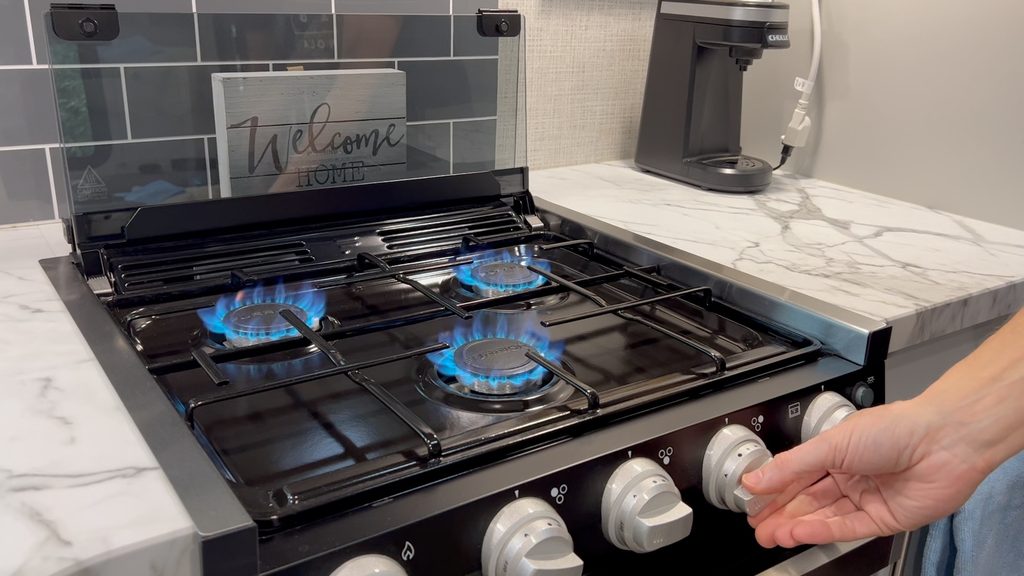
Next, bleed all propane out of your lines. You’ll need to light your stove in your kitchen and let it run on every burner until the flame dies. Do the same thing with any outside kitchen propane stove. All propane must be properly bled out of the lines.
Next, remove any city water connection to the RV and ensure the water pump is off. There should be no water pressure in any of the water lines in the RV.
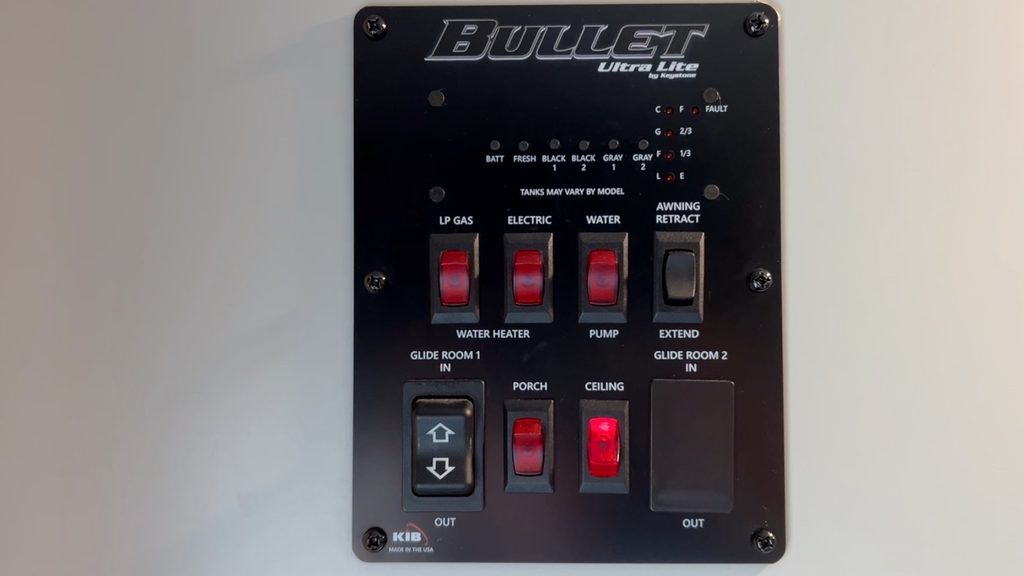
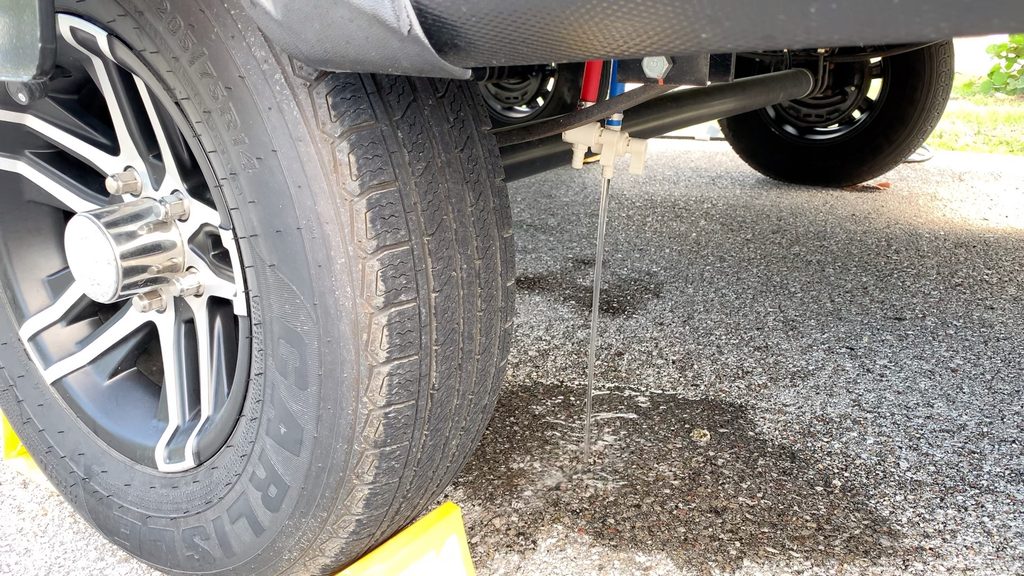
Next, drain water from the hot water tank. You should open the tank’s drain plug or remove the anode rod and open a faucet in the unit to drain the tank. You can also open the RV’s low point drains and open a faucet to drain the tank.
Removing the Existing Water Heater
After ensuring no power, propane and water are connected, begin disconnecting the existing water heater.
Let’s begin on the inside of the trailer
First, open any access area to the water heater and examine the layout.
Take pictures and a video of everything on and around the water heater for future reference. If by chance you need to reinstall the existing unit, having photos and video will be a lifesaver.
Next, begin removing the wiring from the water heater’s electrical box. There should be a small box at the back of the water heater where the electrical heating element is connected. Disconnect any power cord to this box and disconnect the wires inside this box after photographing the connections. These wires will need to be removed so the unit can be fully removed from the area.
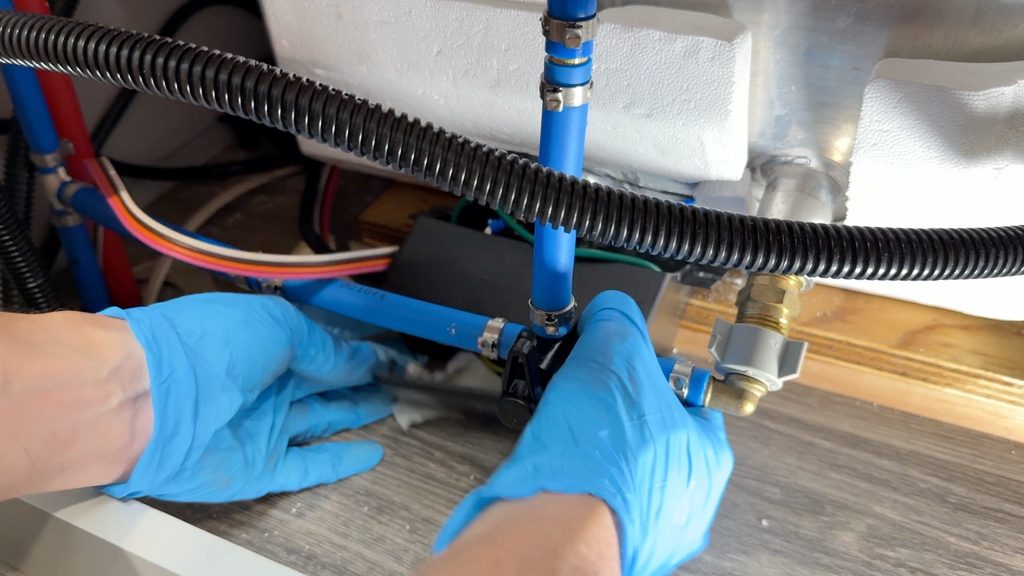
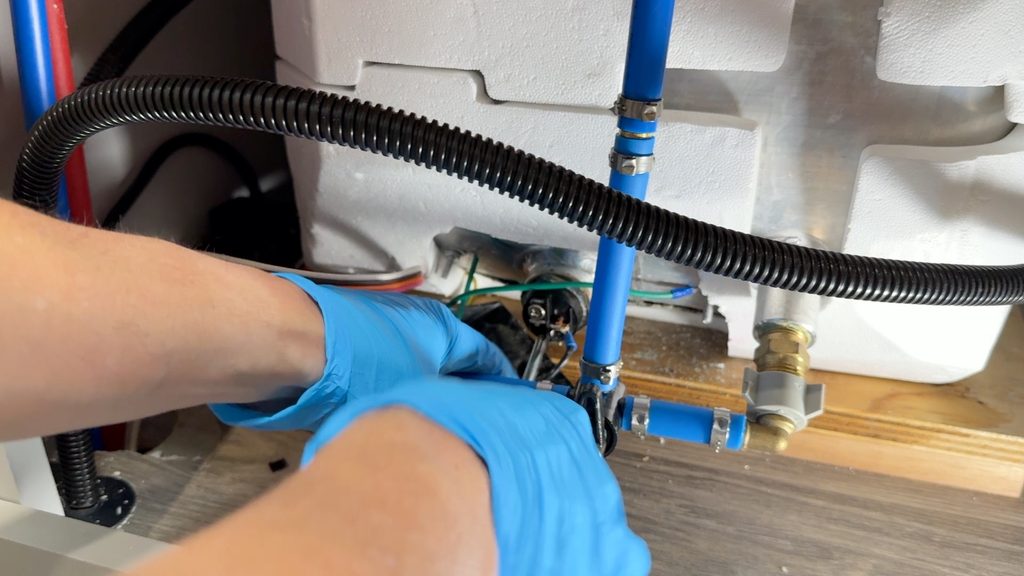
Next, disconnect the water lines to the water tank. Lay down a towel or two below the unit to catch any water dripping from the lines while removing them. If needed, use a pair of channel lock pliers to loosen the hot and cold-water lines attached to the water tank.
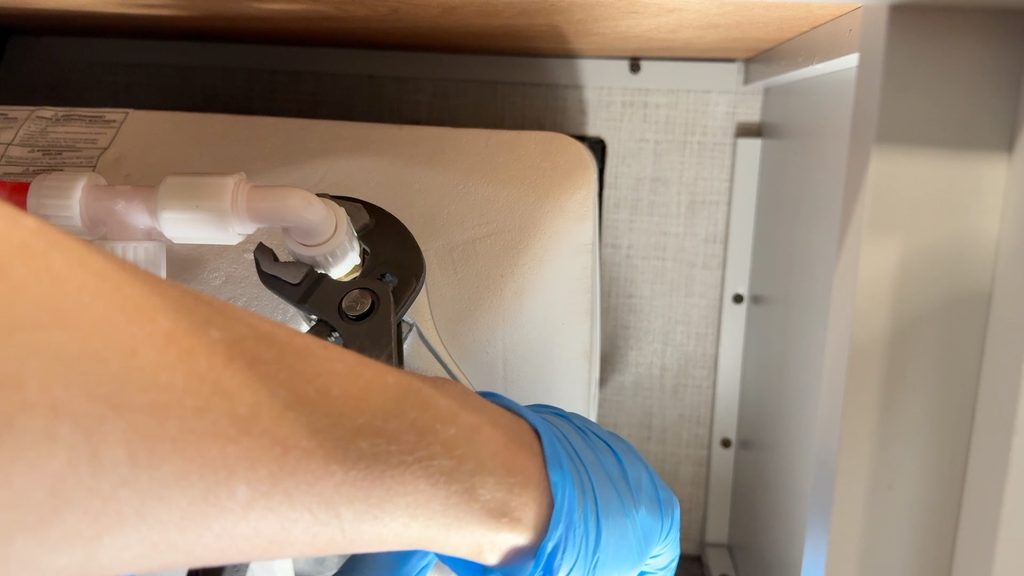
Let’s now look at what we need to do outside of the trailer
First, remove the water heater door. There are two hinge clips at the bottom of the water heater door that the door is attached to. Simply slide the door to one side until the door slips from the hinge clip, then move the door to the opposite side to remove the door fully.
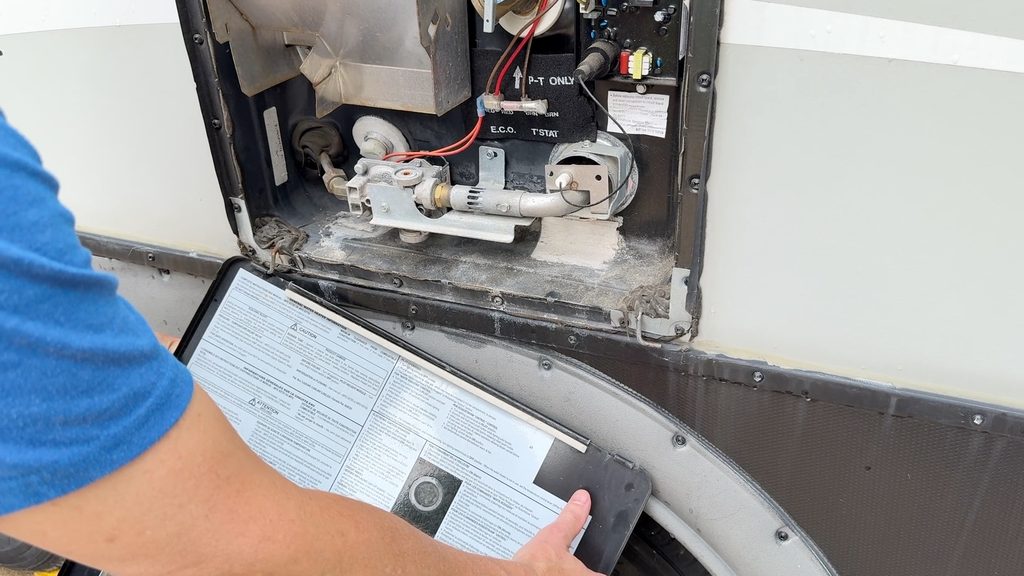
Next, disconnect the propane line from the water heater. With no propane in the lines, use two wrenches to carefully disconnect the propane line from the water heater. You will need to use one wrench to steady the housing and one to loosen the tapered nut that connects the propane line to the inlet. I’d recommend wearing gloves as a slip here would likely result in a cut to your hand or fingers.
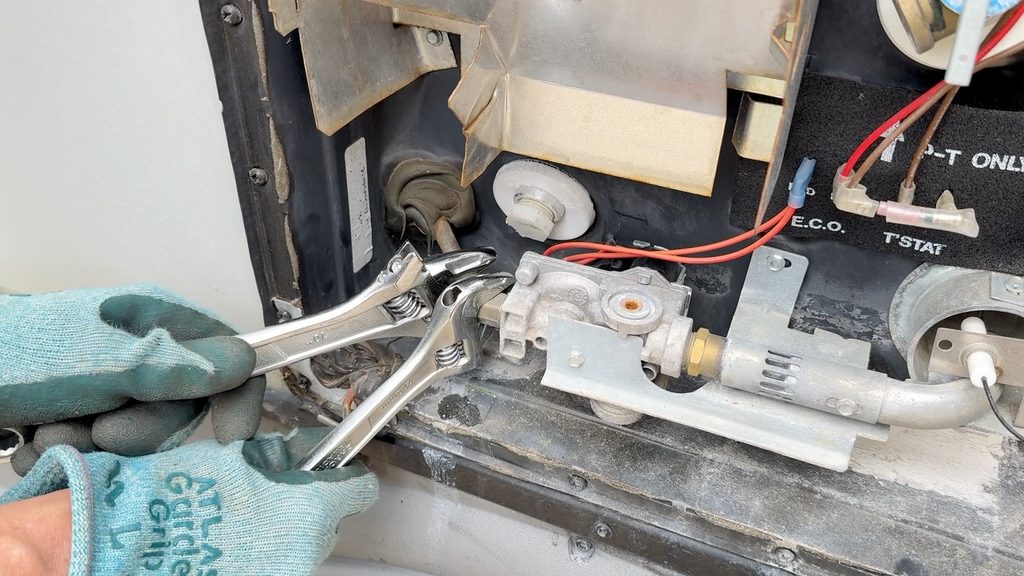
Next, remove the propane line sealant. There was factory sealant put onto the opening where the propane line runs through the water heater housing which now needed to be removed. Carefully use a utility knife to cut the sealant out and remove it by hand. This needs to be removed so that the propane line can be removed from the housing. After trying with gloves and needle nose pliers, I had to carefully use my bare hands to pull pieces off, which took some time.
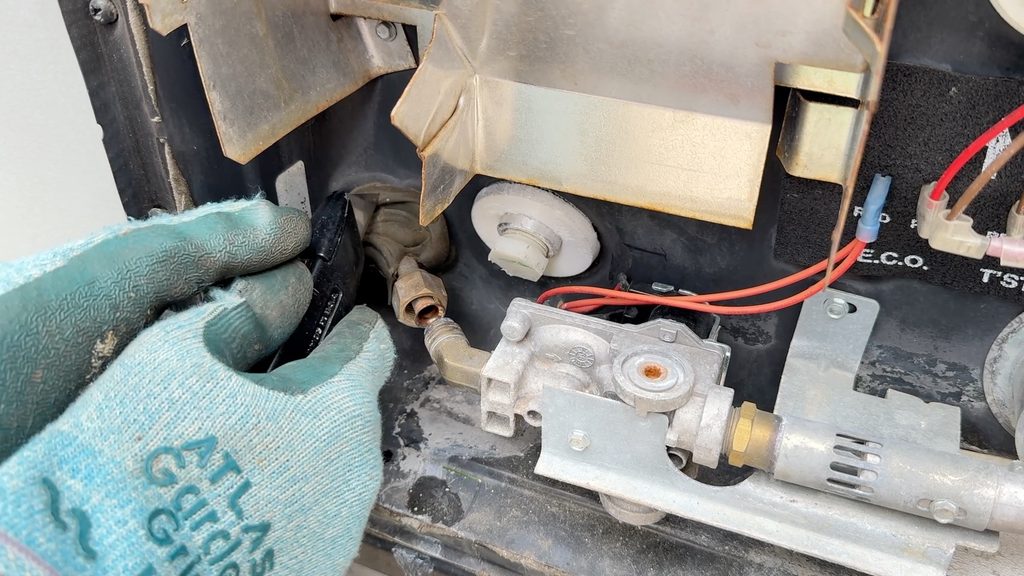
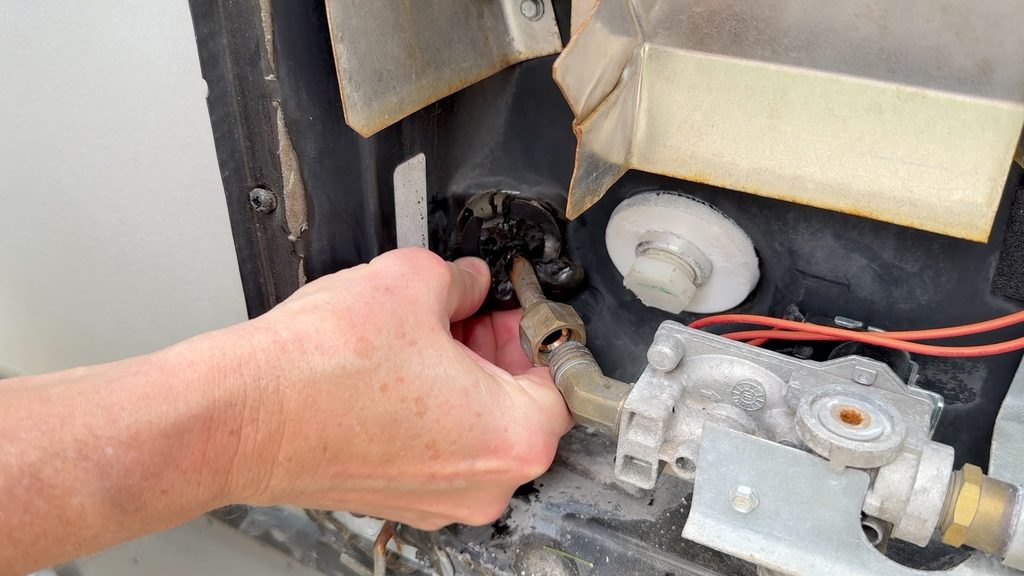
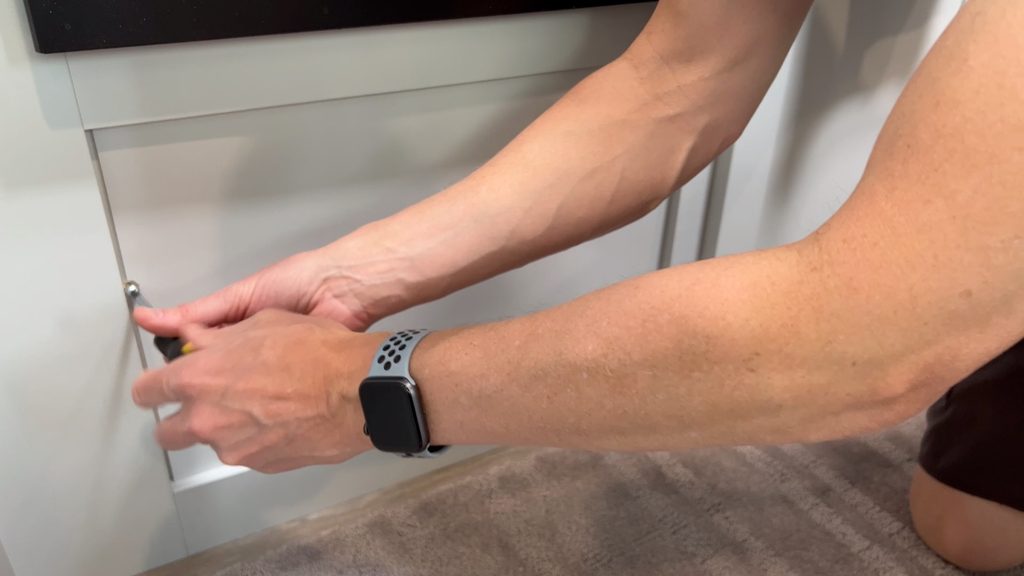
Next, detach the water heater frame. Use a Philips screwdriver to remove the water heater frame screws. This will take some time as there are many screws and corner braces that need to be removed. Be very careful to set aside these screws in a jar or basin to be reused later during installation of the new water heater.
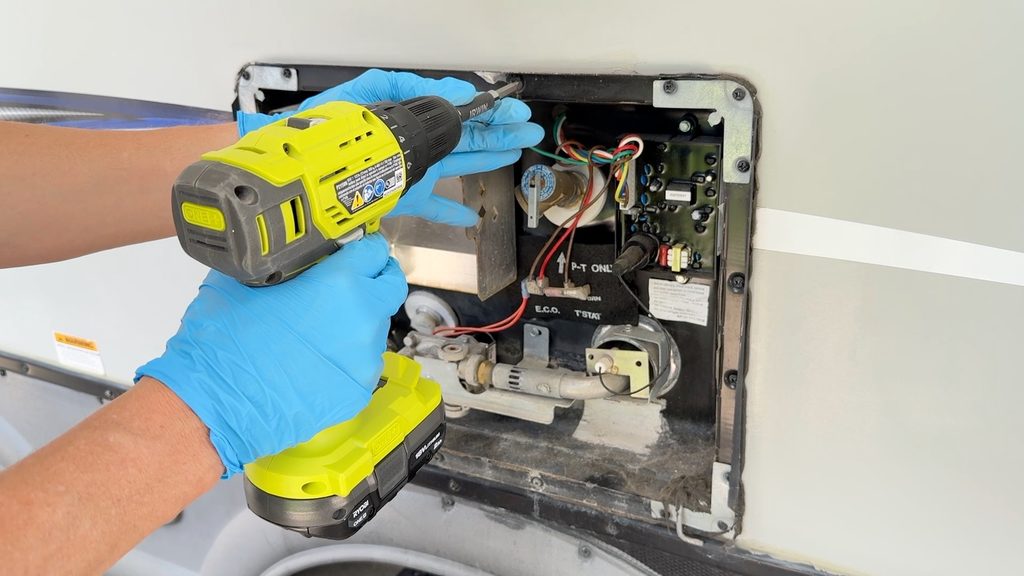
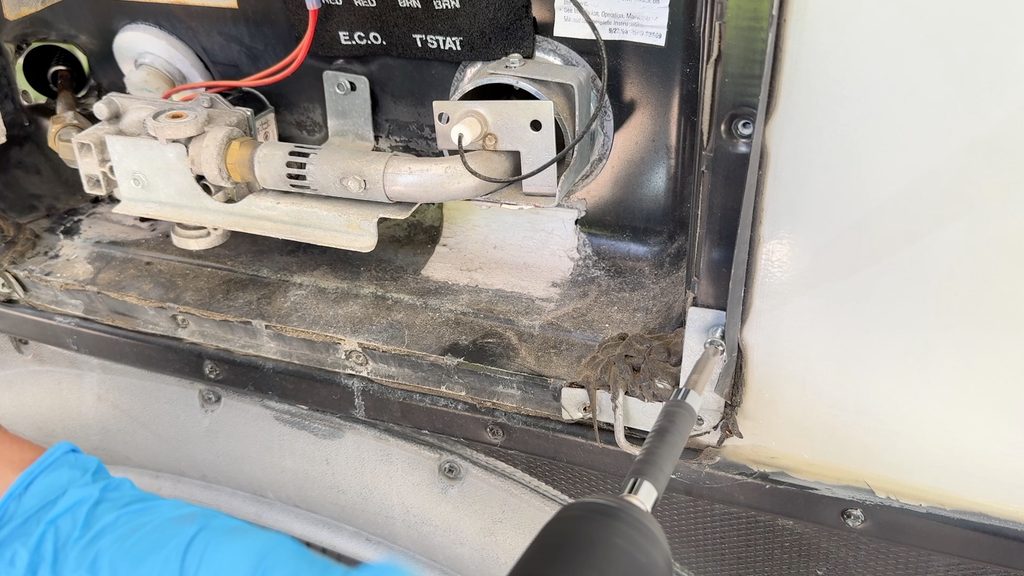
Next, separate the water heater frame from the existing butyl tape on the RV’s surface. Carefully bend the existing water heater frame to 90 degrees by sliding a small putty knife between the metal frame and the butyl tape. Be careful not to damage the RV’s surface. This took some time but yielded good results. At the end, the frame of the unit should be free from the surface of the RV.
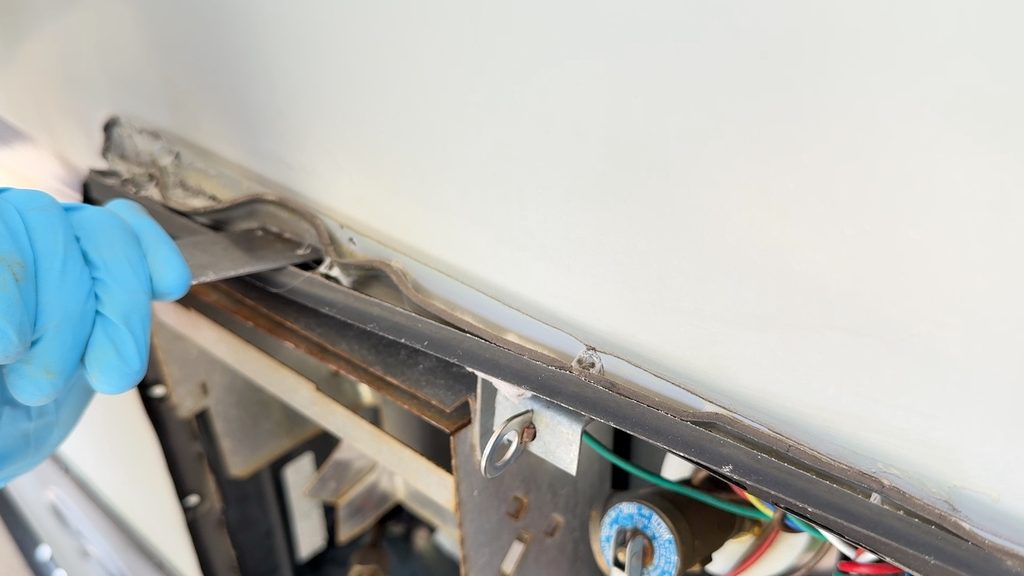
Next, remove the existing water heater from the RV’s cutout. Wiggle the water heater frame loose to remove the existing unit. Ensure the propane line is not impeding the movement of the unit. There may be some wiring that will need to be disconnected to remove the unit. If there is Styrofoam insulation on the unit’s tank, the unit may not want to come out, in which case you may need to remove some of the Styrofoam to remove the tank.
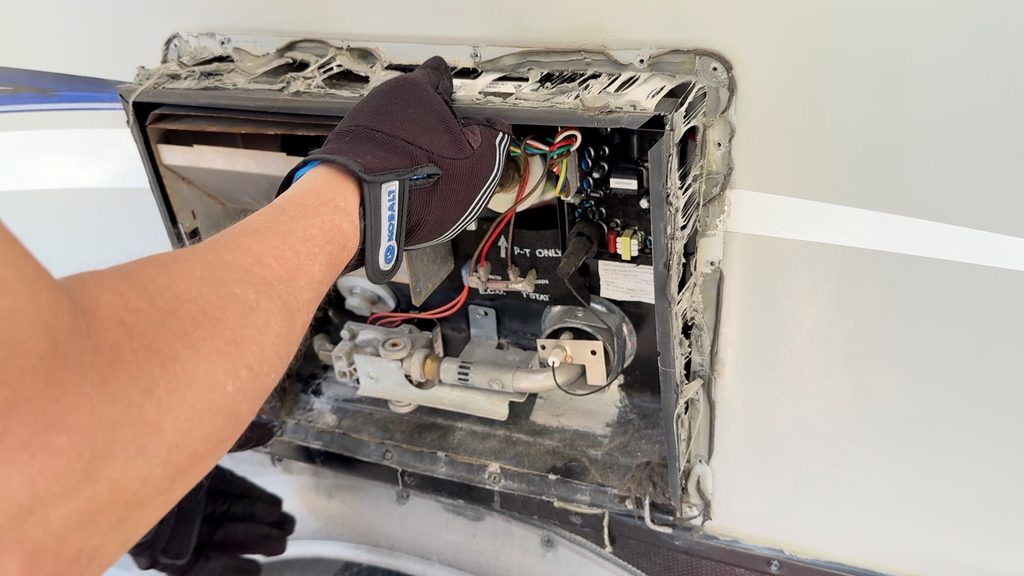
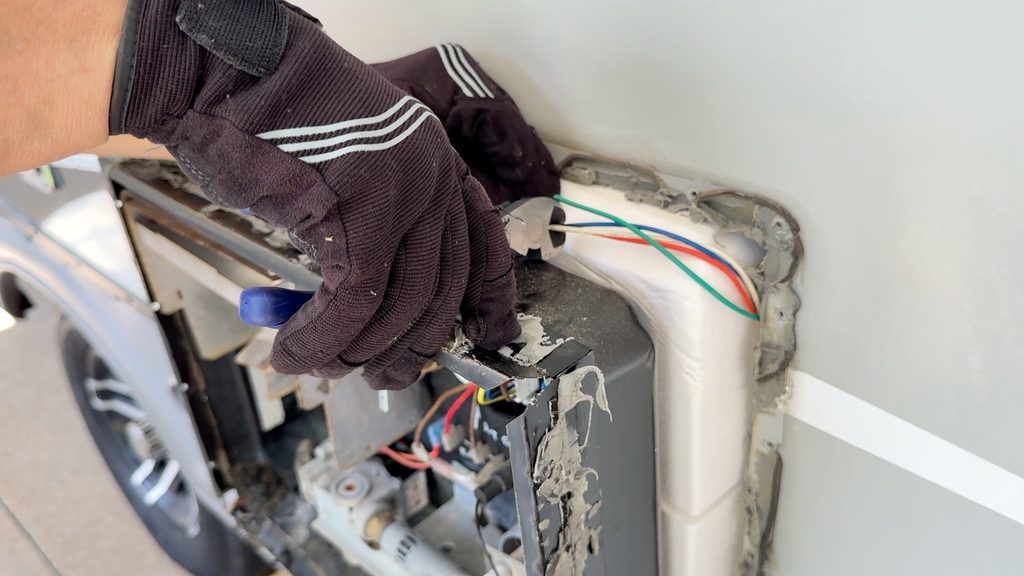
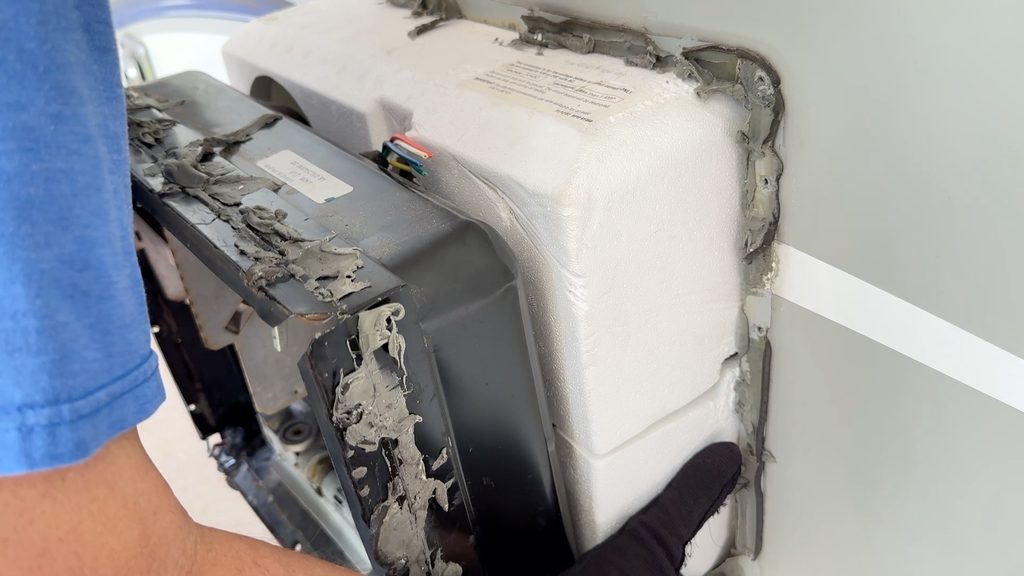
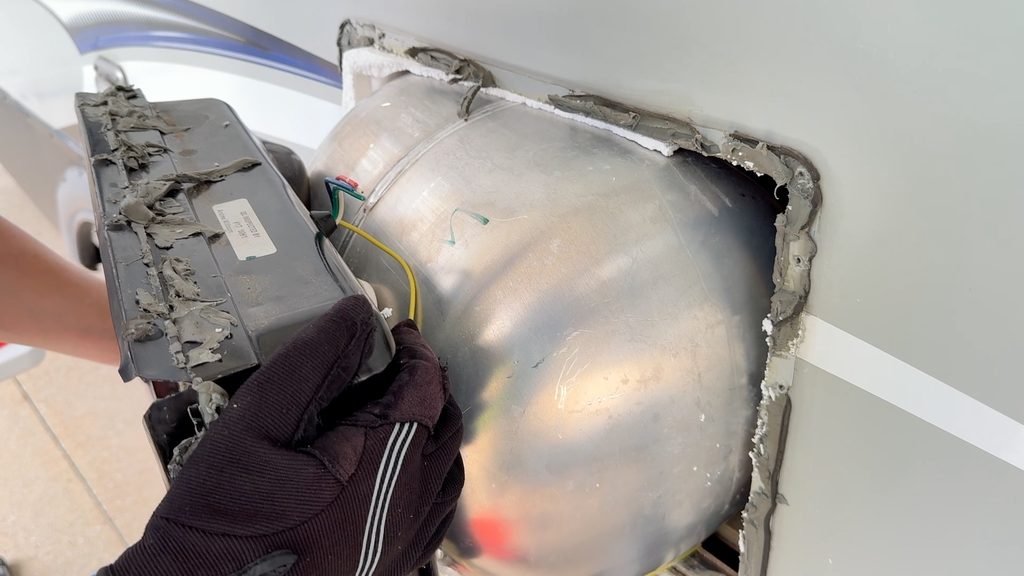
Next, scrape the butyl tape from the fiberglass and remove the residue. Use a plastic putty knife and scrape the butyl tape from the fiberglass of the RV. The majority of the tape should come off fairly easily. You may need to go over the area a few times to remove the tape. After scraping, there will still be some tape residue to remove. Use a small piece of butyl tape to dab off much of the residue. This will take some time to finish. Follow this by using Goo Gone and a paper towel or microfiber towel to remove the rest of the tape’s residue from the fiberglass opening.
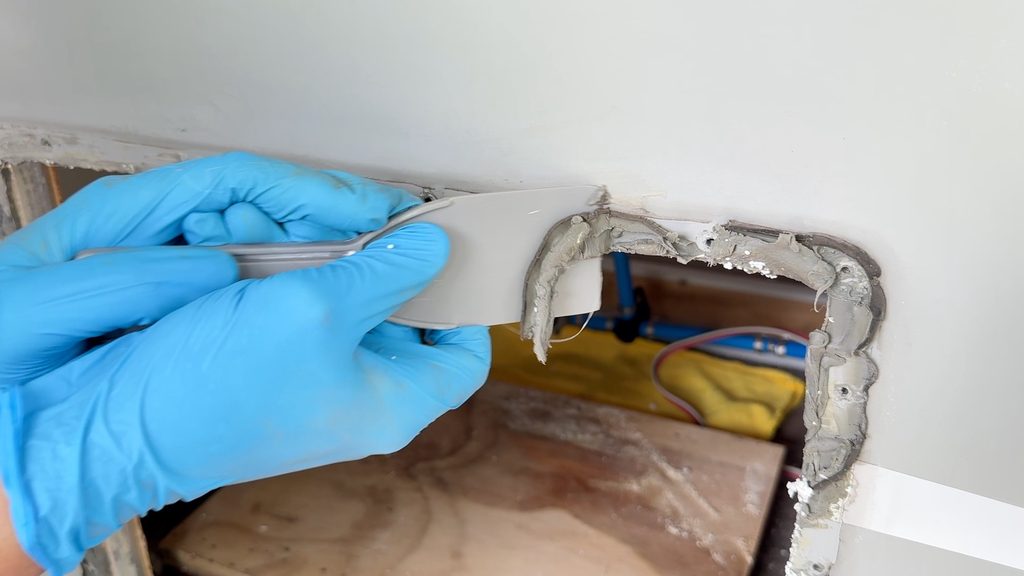
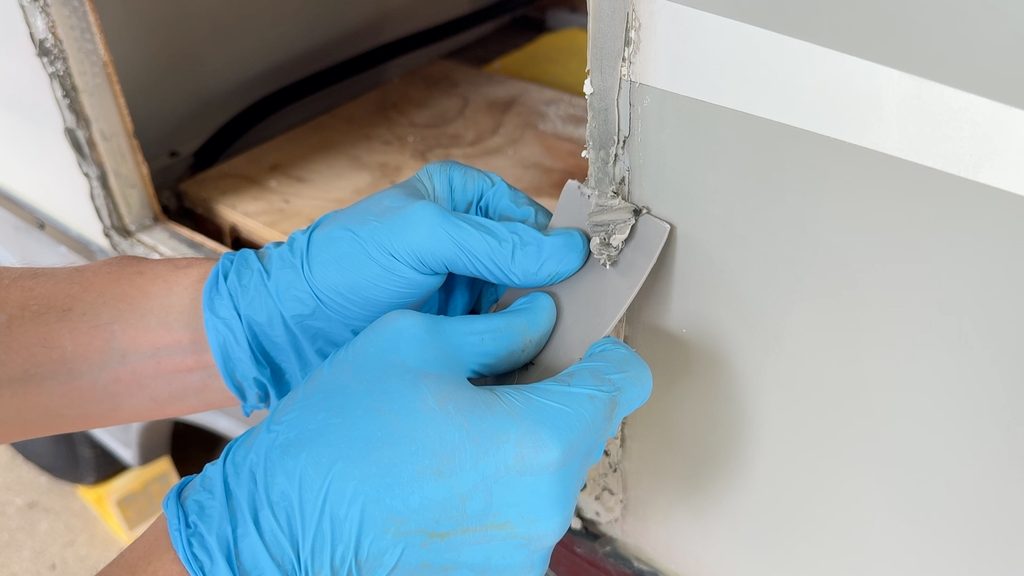
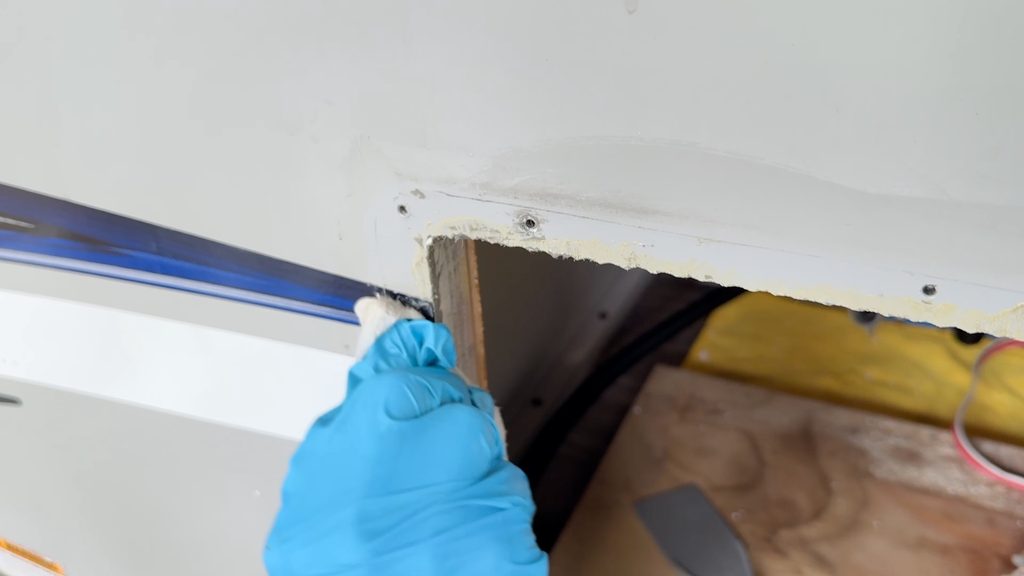
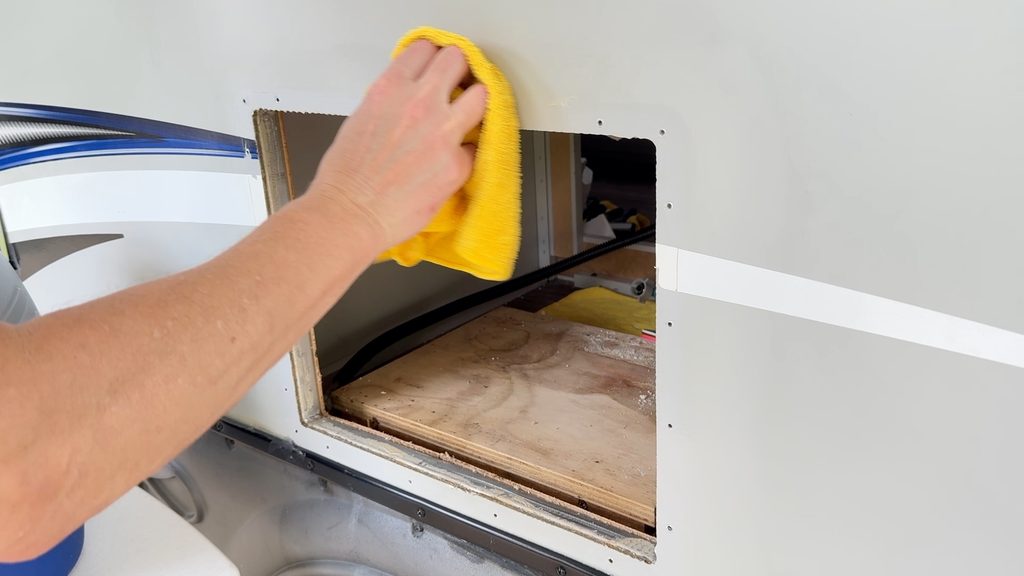
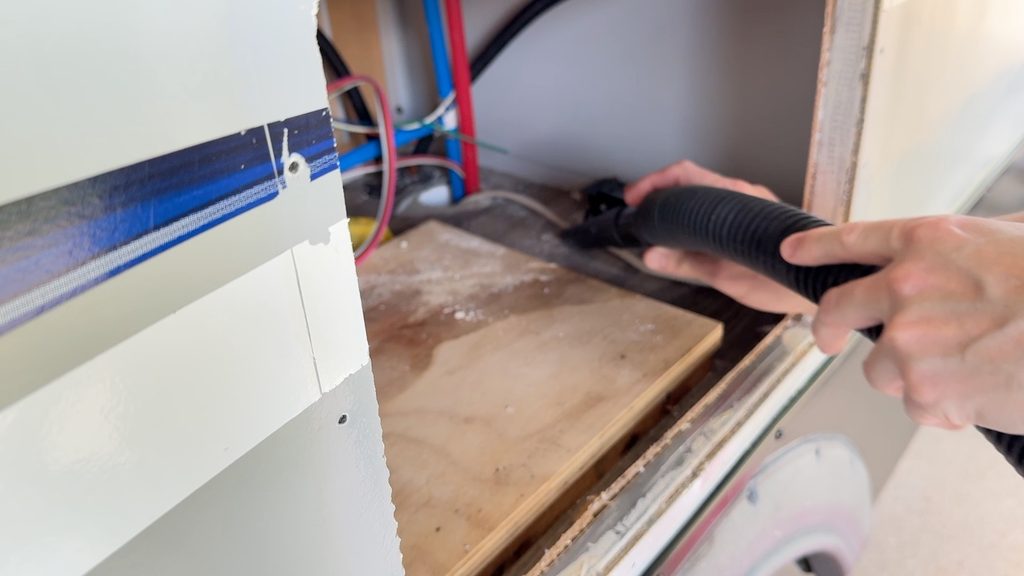
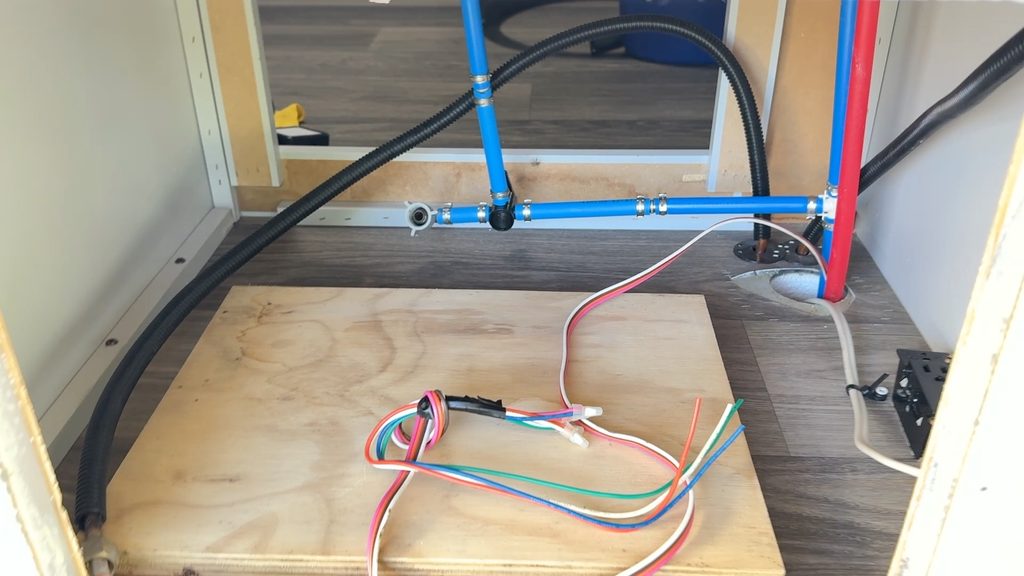
Next, vacuum out the water heater area. Before installing the new water heater, use a shop vac and crevasse attachment to fully vacuum out the area where the new water heater will sit. This is a rare opportunity to get the area fully clean prior to installing the new water heater. In my case there was significant calcification in the opening from when I sprayed out the tank. After vacuuming, I also wiped down the area with a damp microfiber towel. Here is what the cleaned compartment looked like prior to installing the new water heater.
Installing the New Water Heater
We are now ready to install the new water heater. My new unit was a Suburban 6-gallon heater that came without a cover, even though the picture on the box has a cover. It was a direct fit upgrade for the existing Dometic unit in my trailer. Unlike the Dometic, the Suburban did not have Styrofoam surrounding the tank, otherwise, the dimensions of the unit were an exact match in size.
Let’s start with the steps outside of the RV
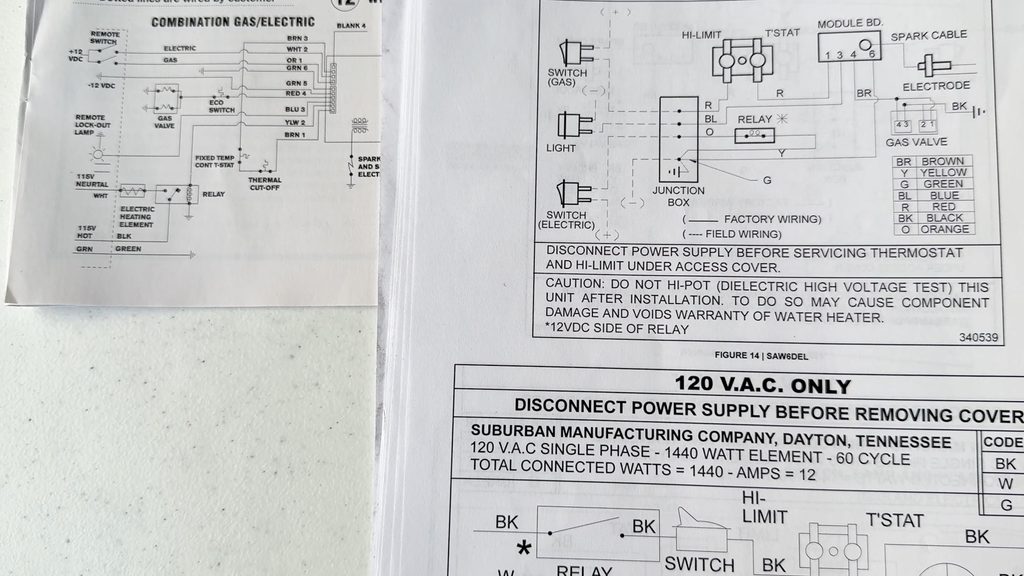
First, find and examine the new unit’s wiring diagram. You will need to locate the wiring diagram for the new water heater. This should be in or with the unit’s owner’s manual. Take time to understand the colors of the various wires and what wire feeds what process. I also happened to have kept my Dometic unit’s wiring diagram, as it would be needed to properly match the wires from the existing RV wiring harness to the new unit’s wiring.
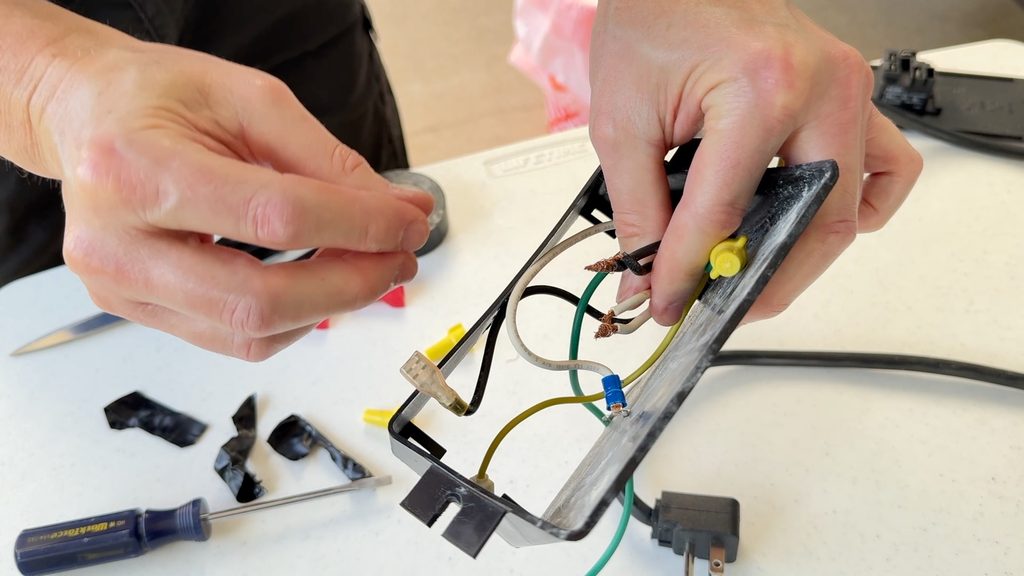
Next, remove the 120V power cord from the existing unit. My new unit did not have a power cord, so l needed to remove the existing unit’s power cord and install it to the new unit’s 120V connectors. Find and remove the existing power cord. You may need to untie existing twist nut connectors to loosen the power cord from its box. Mine were factory taped with electrical tape that needed to be removed prior to unscrewing the twist nut connectors.
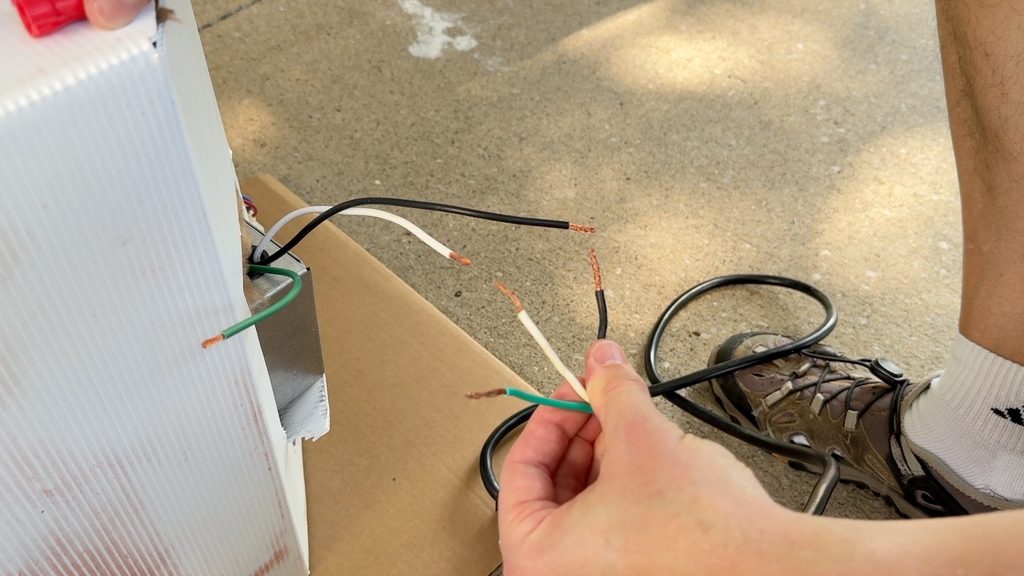
Next, connect the power cord to the 120V wiring on the new water heater. Match the wiring between the power cord and new water heater wiring. There should be matching black, white and green wires on the power cord that match to the same color wires coming from the new unit. Twist these wires together, then secure them with the twist nut connectors and seal them with electrical tape. I found this much easier to do without gloves.
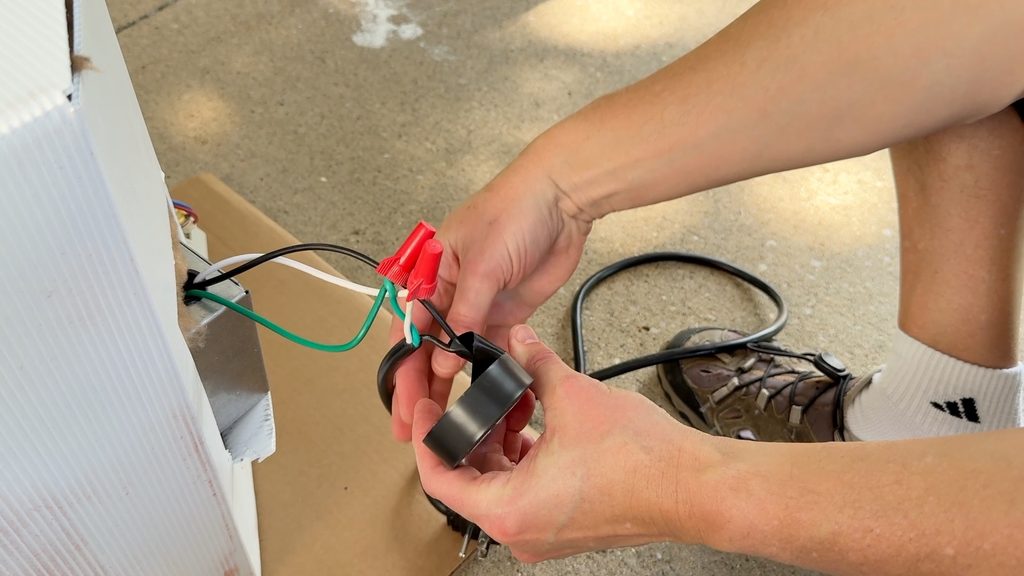
Make sure the twist nuts are secure before taping them with electrical tape. If there is room, rotate the electrical tape around the wire and nut connector keeping the tape tight. Otherwise, cut a 3-4” piece of tape to wrap around the wire and nut connector. Press the tape tight with your hands and again check to see that the connections are tight.
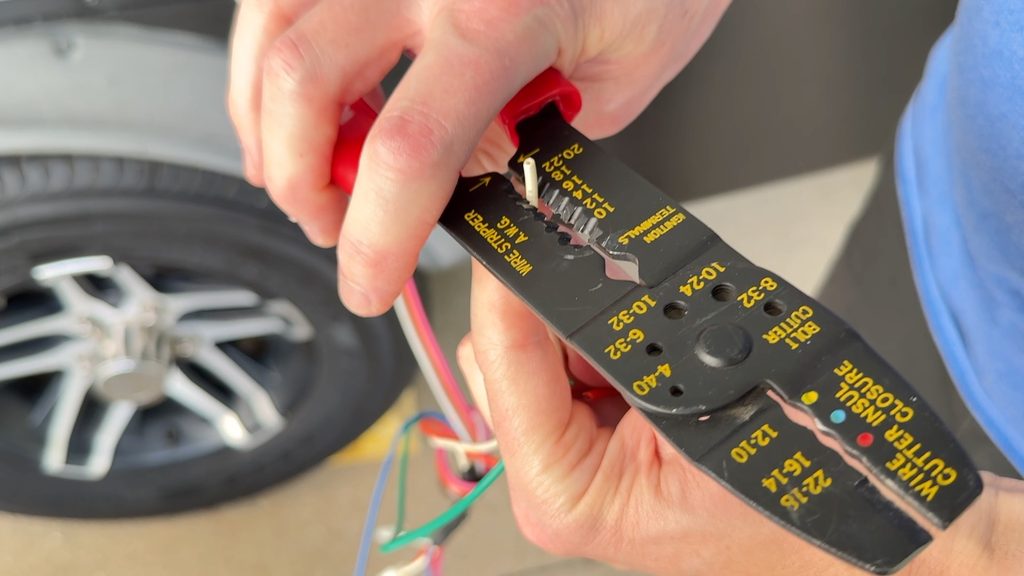
Next, connect the wiring control harness wires from the RV to the new unit. Using wire strippers, strip about ½” to ¾” of wire sheathing from the RV’s four control wires, exposing the wires. Examine both 12V wiring diagrams, looking for the color of wires from the gas and electric switches and to the remote lockout lamp. Taking the electrical switch first, trace the colors of the wires on both diagrams and notate it. For my existing Dometic, the wire color was WHT 2 or White going to the electrical switch, while on the Suburban the color was O or Orange. So, the White wire from the RV needed to be connected to the Orange wire on the new water heater.
Tracing the wires to the Gas switch, I noticed that my existing Dometic had the color of the wire as OR1 or Orange, while the Suburban had the color as R or Red. So, the Orange wire from the RV needed to be connected to the Red wire on the new water heater. In both diagrams, the propane lockout light wiring was colored Blue and the grounds on both were colored Green.
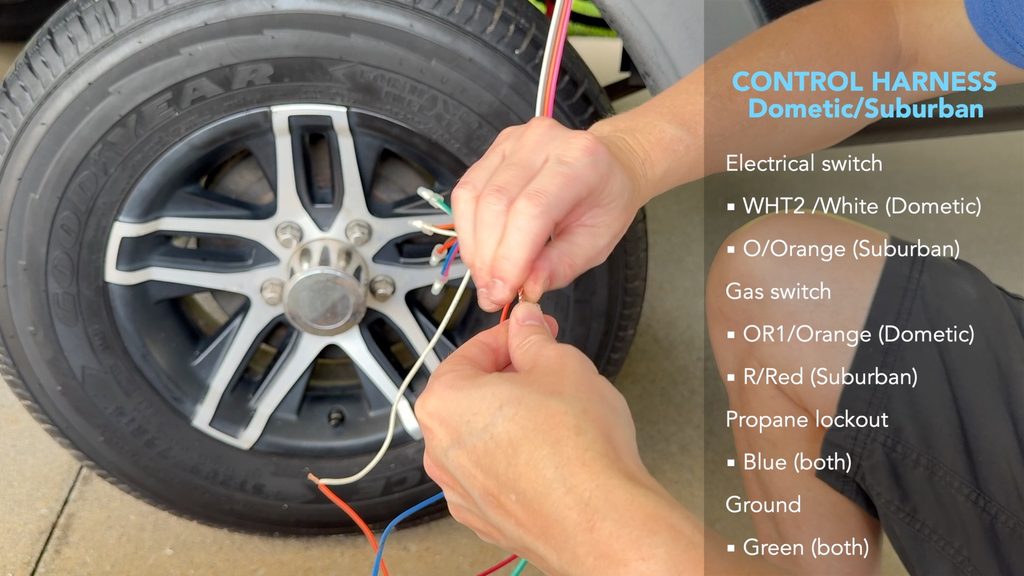
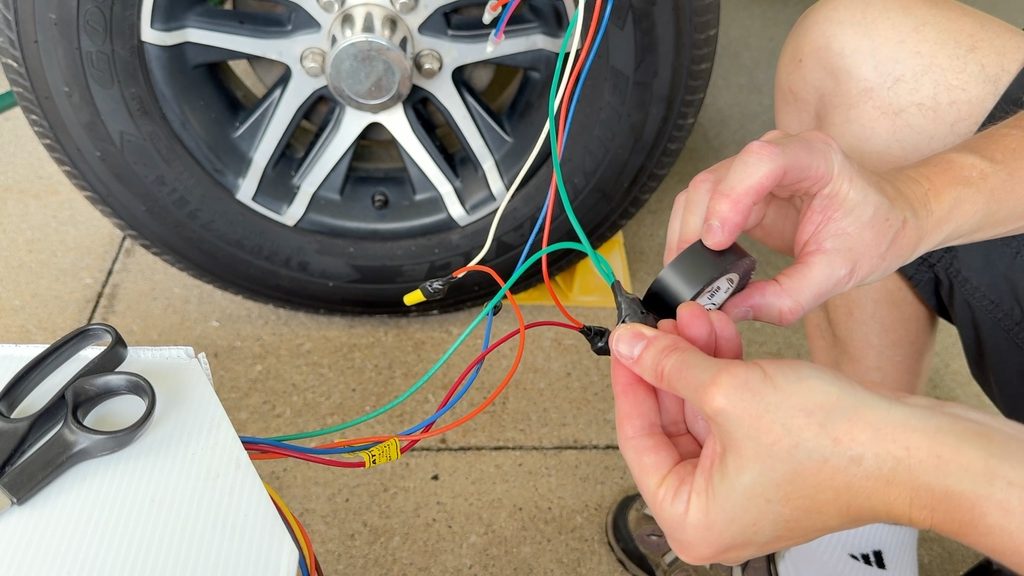
Twist the appropriate wires together based on the proper color matches and secure them with twist nuts. Make sure that the wires are secure to each other and tighten the twist nuts completely until snug, continuing for all four wire sets. Take your time doing this and make sure all connections are tight as it will be difficult to redo this after the new water heater is inserted into the RV. Secure the twist nuts and wires with electrical tape on each connection.
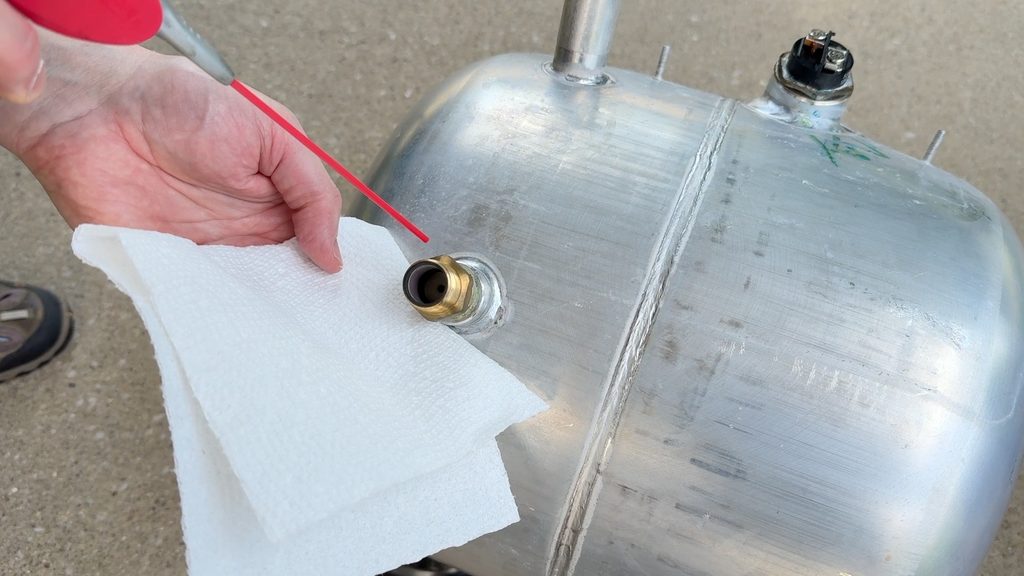
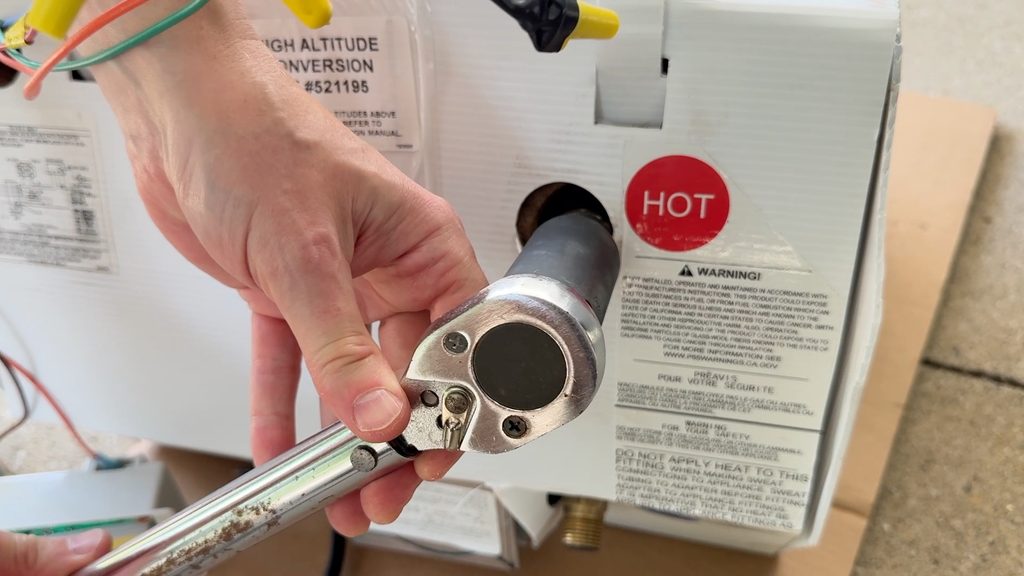
Next, remove the plumbing fitting from the existing water heater and install on the new one. Before installing the new water heater into the frame of the RV, you will need to remove the existing plumbing fittings from the old water heater and install them on the new one. The hot and cold side fittings were pretty much seized up on my 7-year-old water heater and needed a bit of WD-40 to soak before trying to loosen them.
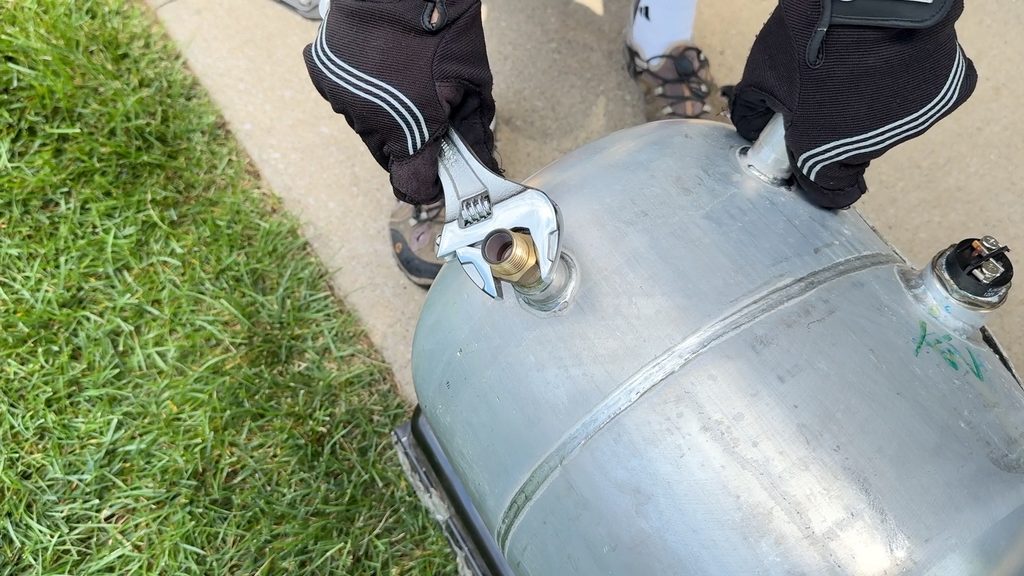
My first attempt at loosening the fittings using a crescent wrench were unsuccessful as I did not have the leverage required to move the fittings. Ultimately, I used a large socket and torque wrench to loosen the fittings, although a breaker bar, which I did not have, would have been a better choice. It was an easy task with the right leverage.
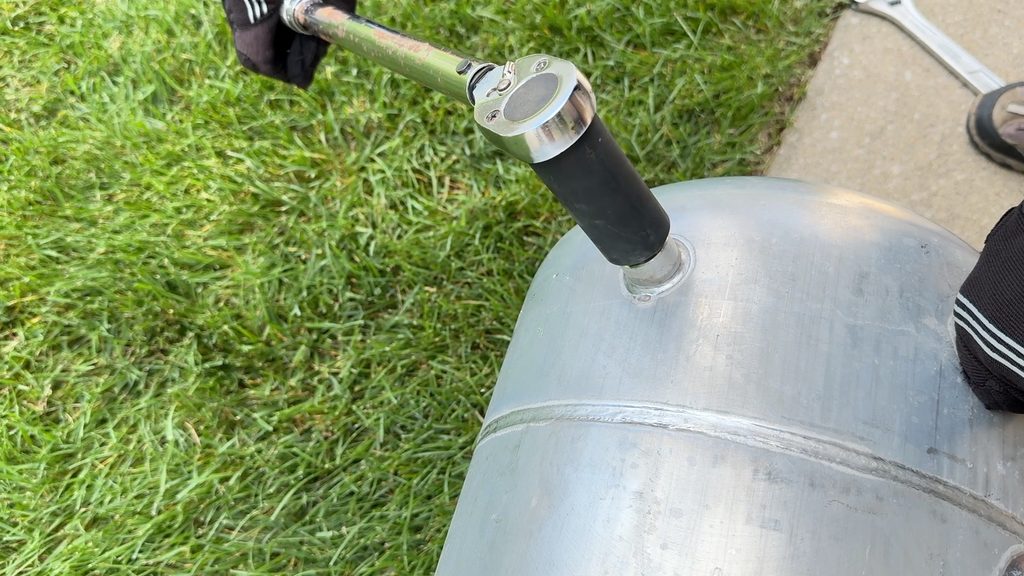
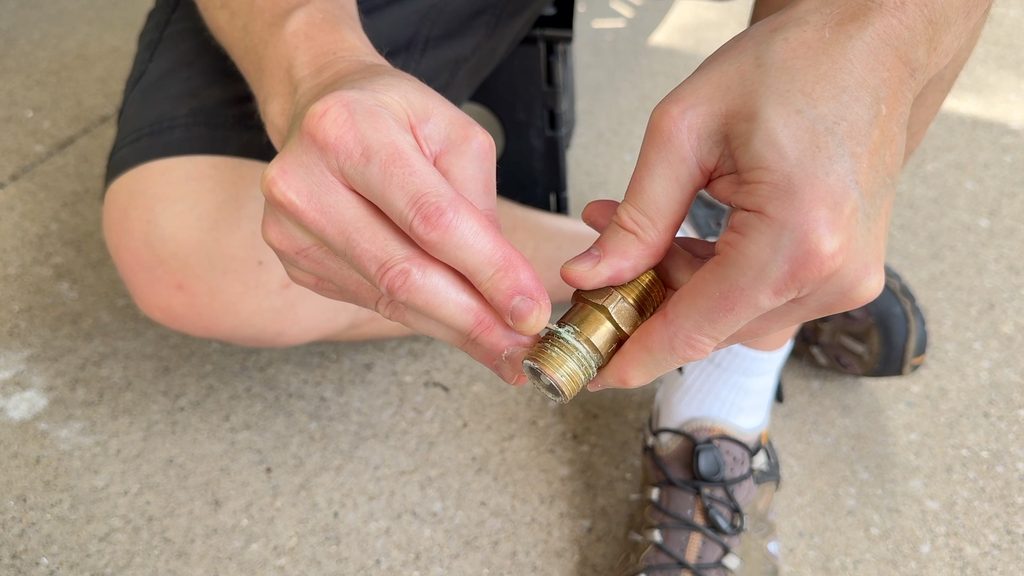
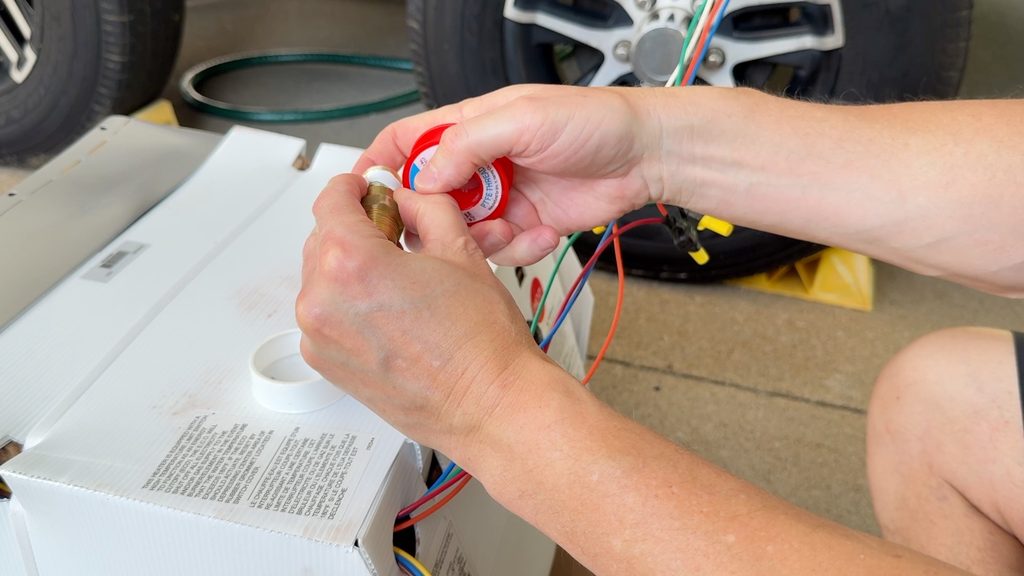
To install the fittings into the new unit, I cleaned them with a wire brush and a small screwdriver to remove the old tape then put some Teflon plumbing tape on the threads prior to inserting them into the new tank. Thread the fittings into the hot and cold inlets on the new tank and tighten fully by hand. Take the torque wrench and tighten the fittings. Now the tank is ready to be inserted into the RV’s frame cutout.
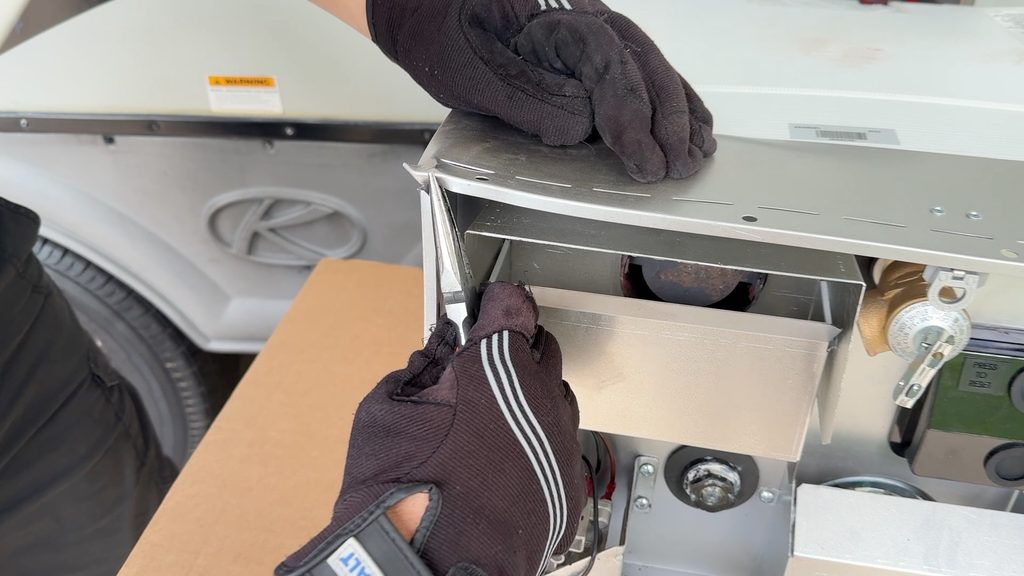
Next, add new butyl tape to the new water heater frame. The 1” butyl tape, which was purchase separately, needs to be applied around the outer frame of the new water heater so that when the unit is inserted into the cutout, you can fold the units frame onto the fiberglass of the RV. As you can see from this clip, I needed to use some needle nose pliers to fix some of the metal corners on the new unit that had slight issues from shipping. You may need to do this so that the frame can bend properly.
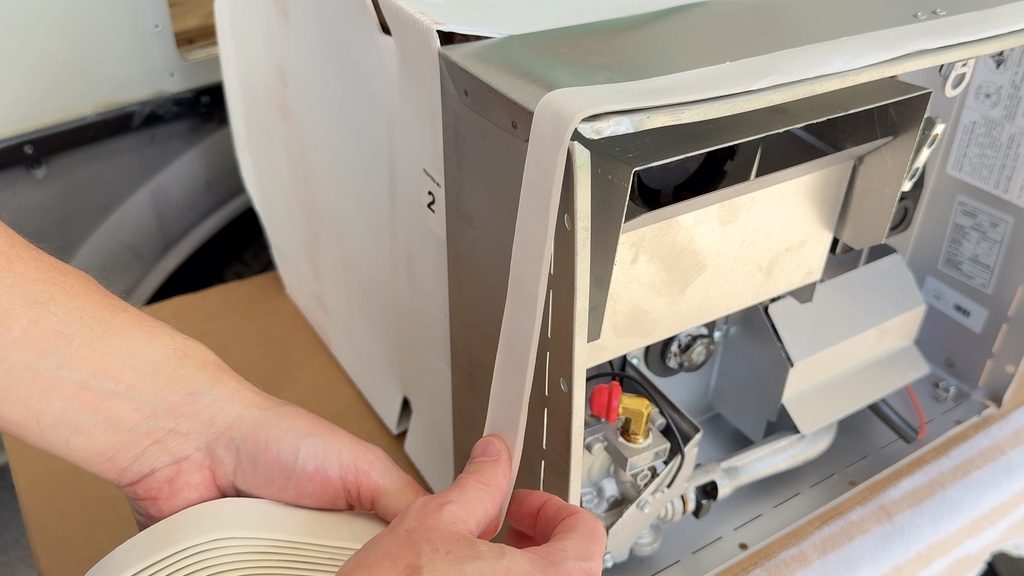
Evenly apply the butyl tape to the frame by carefully adhering it around the frame. This may take some time to do it properly. Have the new unit on a table and sitting slightly over the edge of the table so you can wind the butyl tape all the way around the unit’s frame.
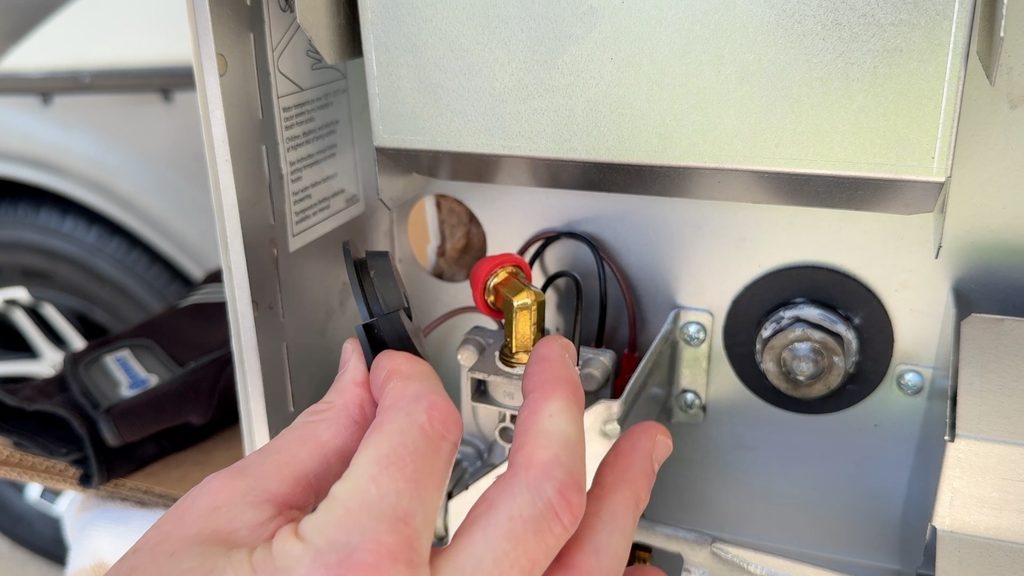
Next, remove the propane line gasket from the new unit. The propane line gasket will need to be removed so the existing propane line can be slid through the new unit. Place the gasket somewhere close by to reinstall shortly.
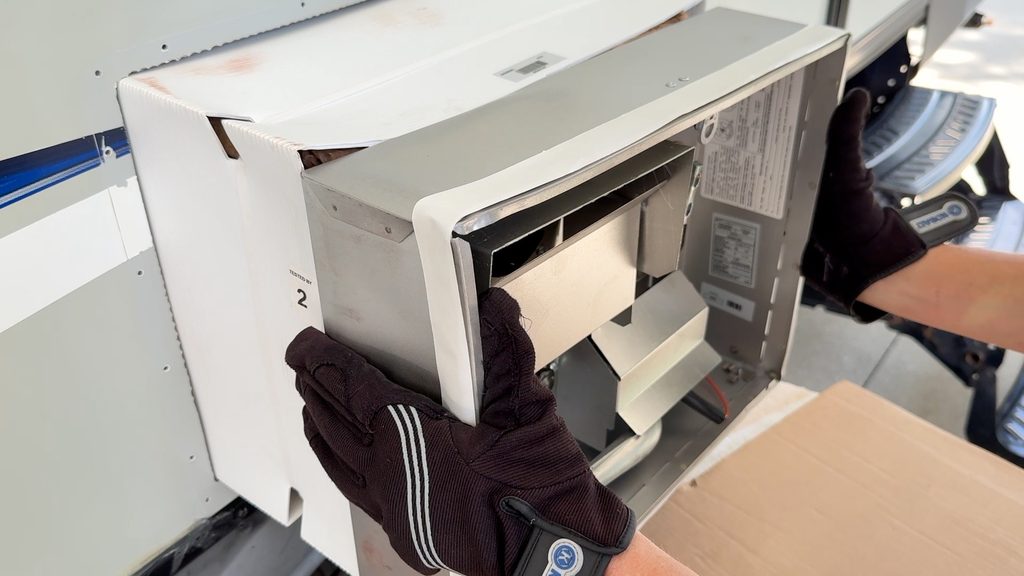
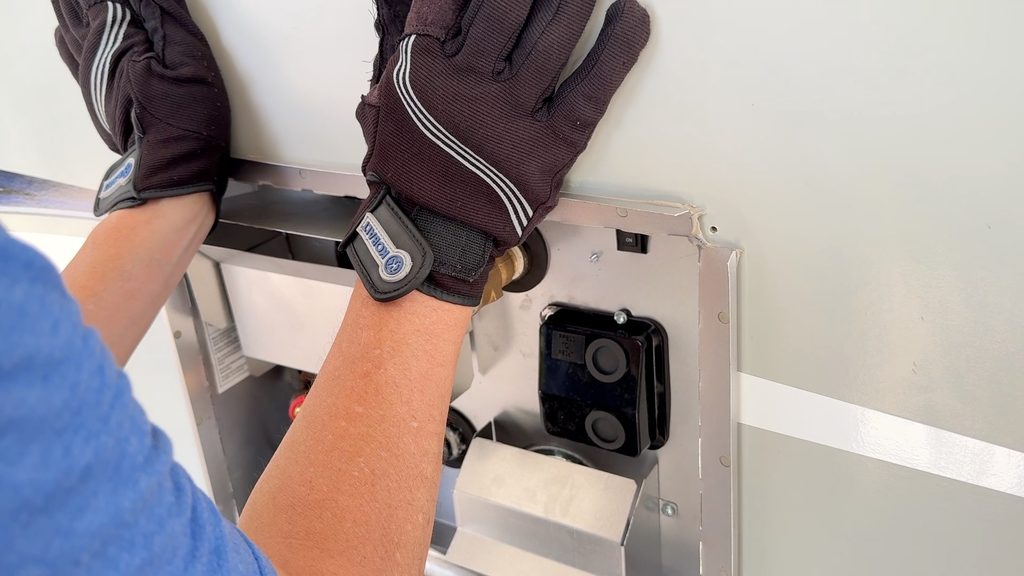
Next, lift the new unit into the RV’s cutout and carefully push it into place. Given the sharp metal on the unit, gloves are recommended when picking the unit up. Ensure the unit’s wiring is pushed into the RV and pick the unit up and place it into the cutout. When the unit is 2/3 to 3/4 the way in (far enough so it won’t fall back out), go inside and ensure the wiring is out of the way of the unit. The outside frame flange of the new unit and new butyl tape should sit right at the opening of the cutout.
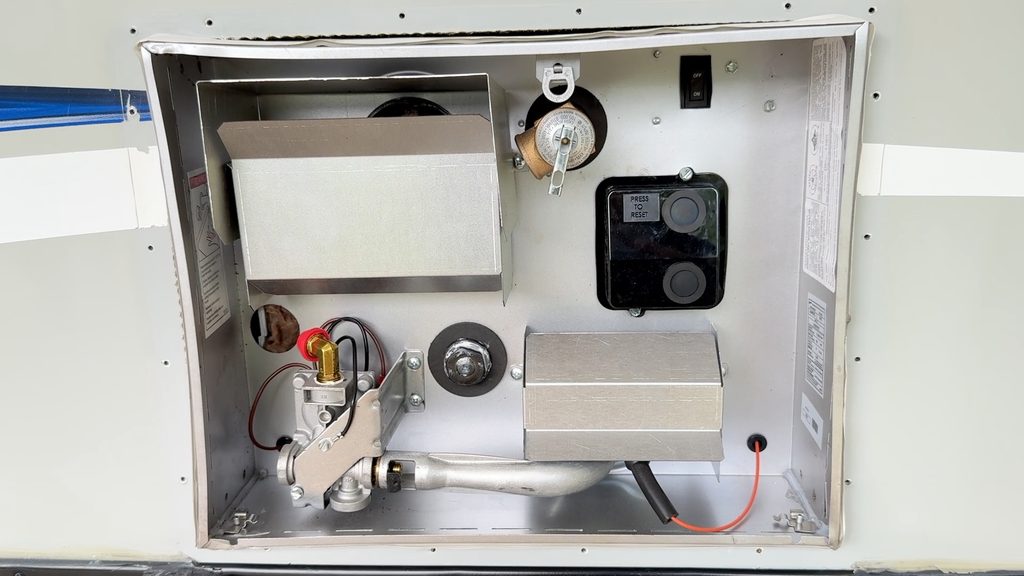
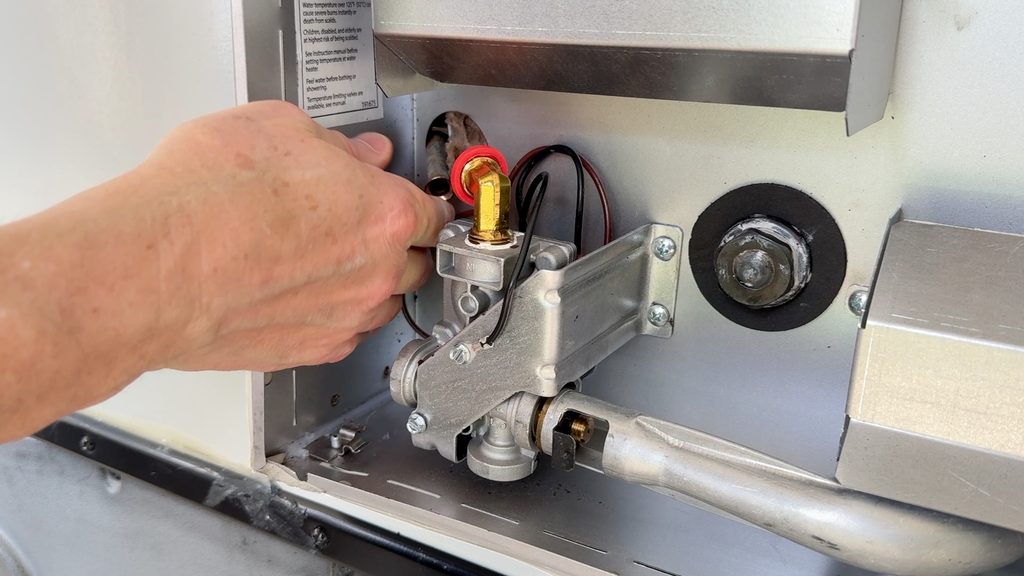
Next, carefully feed the propane line from the RV through the opening. I had to remove gloves to do this right near very sharp metal, so be careful when doing this.
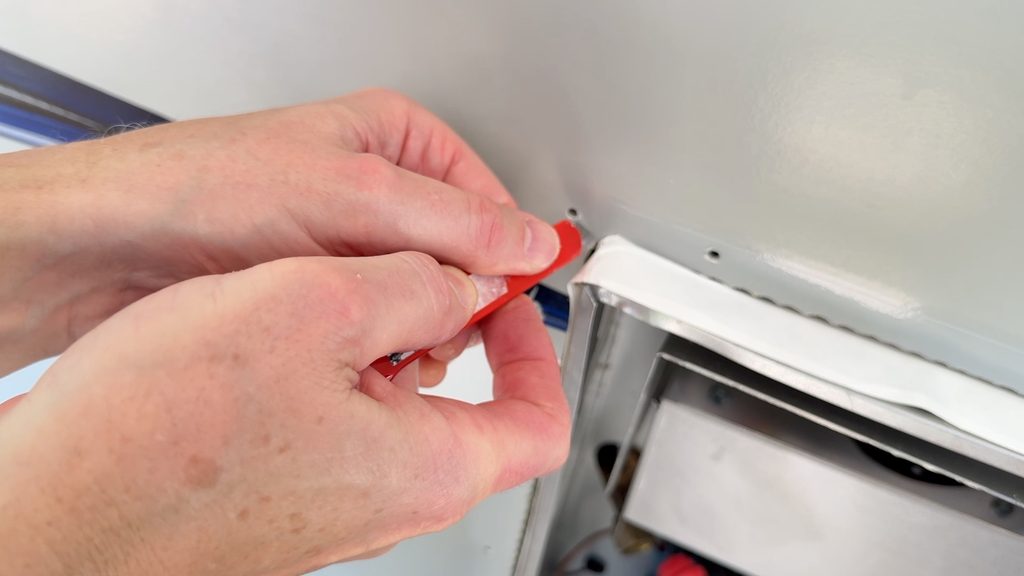
Next, cut the corners of the butyl tape with a utility knife. You will need to cut a slit of the tape out from each corner so that it will fold down when the frame is folded onto the fiberglass opening. In hindsight, it probably would have been easier to cut strips to length before attaching them to the unit vs. this method.
Next, remove the outer skin of the butyl tape and fold the frame and butyl tape down 90 degrees onto the fiberglass of the RV. Use heavy duty gloves to fold down the metal frame and butyl tape onto the fiberglass cutout. Apply decent pressure until the frame sits on the fiberglass. The butyl tape should begin adhering to the fiberglass immediately and assist in keeping the frame in place.
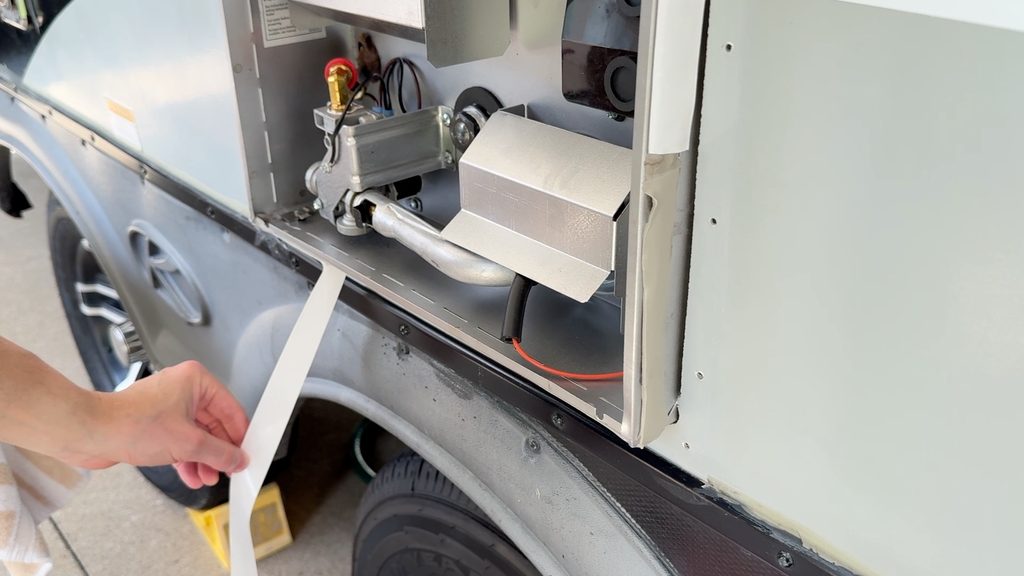
Next, add butyl tape pieces to each corner on the fiberglass. Cut small square pieces of butyl tape to place at each corner of the water heater’s outer frame that was just bent. These corner gaps were created when the frame was bent 90 degrees to meet the fiberglass.
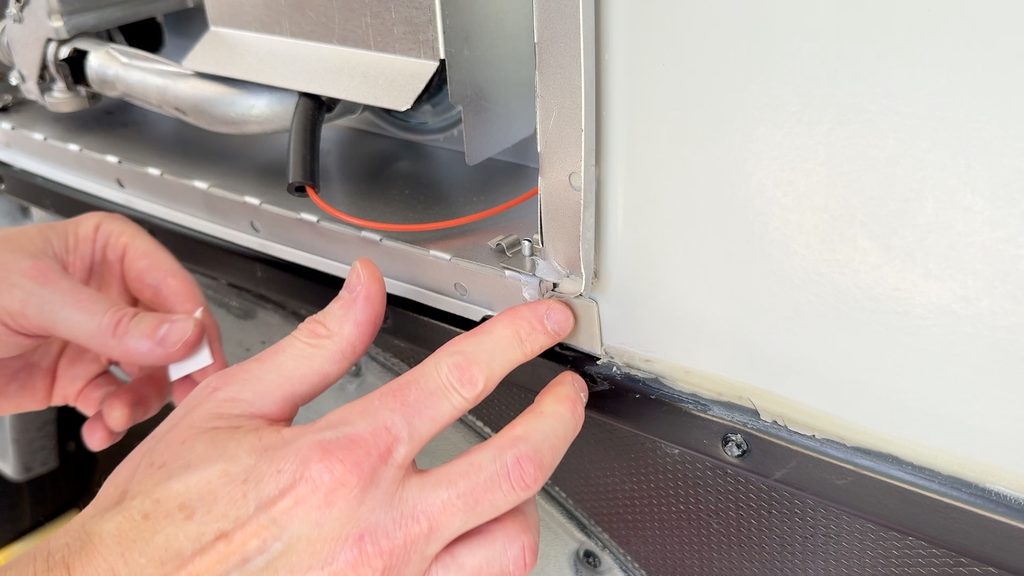
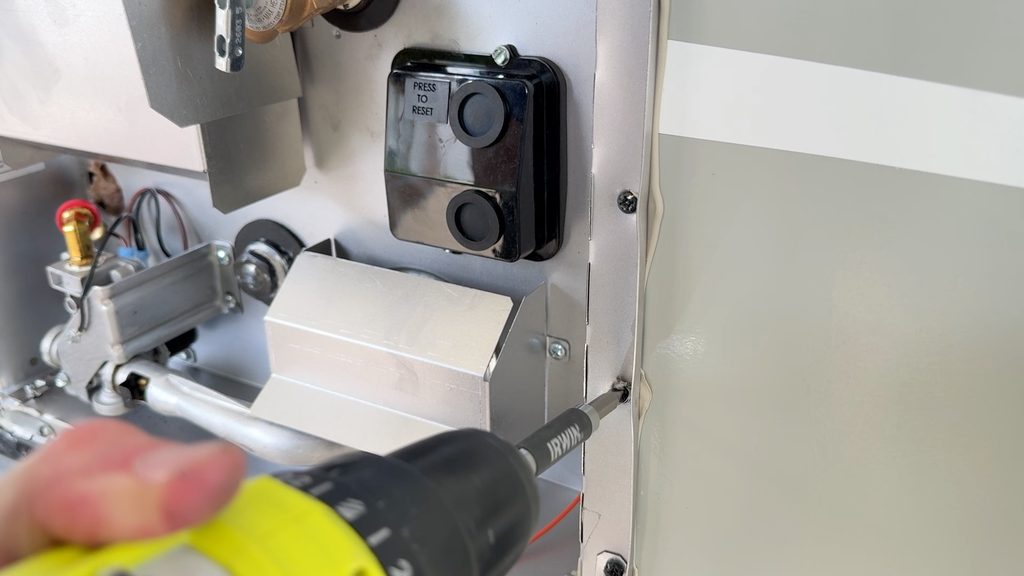
Next, attach the four corner brackets to the frame and screw them into the fiberglass. Using a Philips screwdriver, and the screws removed earlier in the process, set each corner bracket to the frame and screw the brackets to the outer fiberglass wall of the RV. Go slowly when driving the screws, and set, but do not overtighten the screws. You may begin to see the butyl tape start to ooze from the bracket, which is normal.
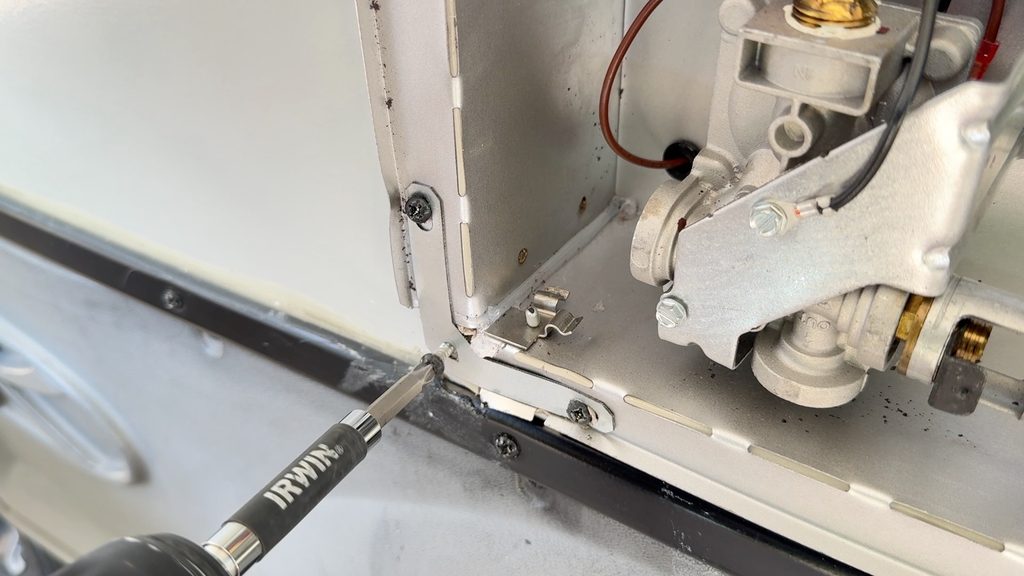
Next, set the screws for the remainder of the water heater frame bracket. Using a Philips screwdriver, and the screws removed earlier in the process, set the remaining bracket screws to adhere the bracket to the outer fiberglass wall of the RV. Again, go slowly when driving the screws, and do not overtighten the screws. As these screws are tightened, you should now see significant butyl tape oozing from the bracket and around each screw head.
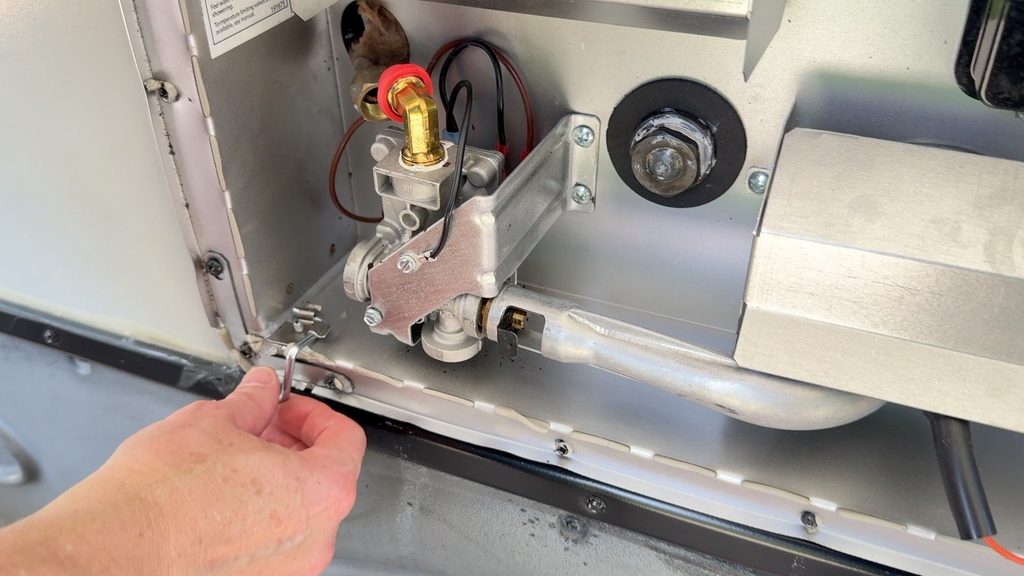
Next, attach the door hinges to the water heater. The small hinge pins should have come with the new unit and need to be inserted and clipped into each side of the exterior of the water heater frame. With the hinge pins in place, you can see how the new unit sits on the opening and where the pins are and how the butyl tape is fully covering the exterior perimeter of the unit.
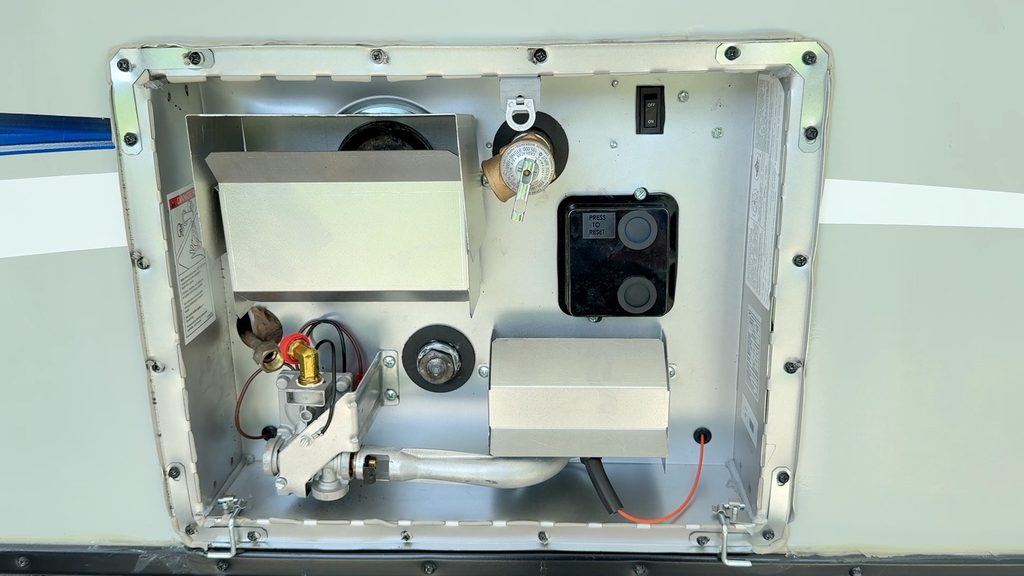
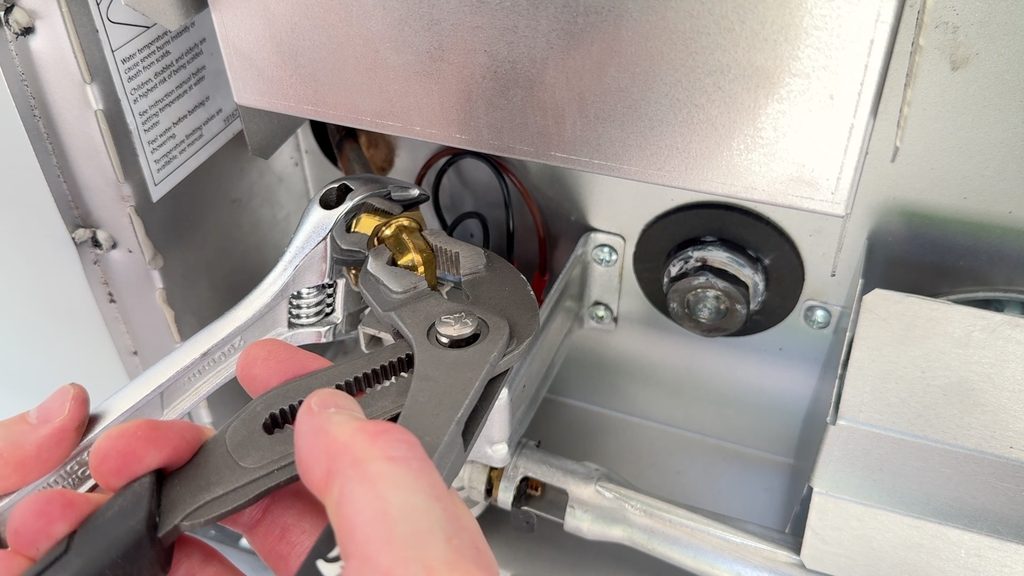
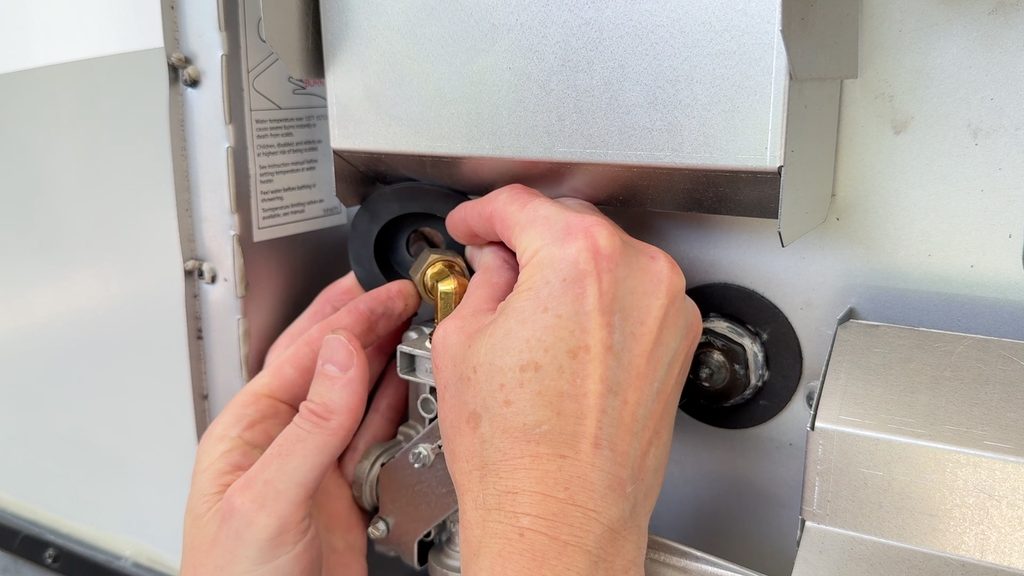
Next, attach the propane line to the new water heater propane inlet. With the propane line from the RV now visible in the new unit, remove the cover of the propane inlet and hand tighten the propane line to the inlet on the heater. You do not need to apply Teflon plumbing tape to the threads. After it is fully hand-tightened, use a crescent wrench or open-end wrench and channel locks to tighten the propane line nut onto the inlet. Use the crescent or open-end wrench to tighten the nut while holding the inlet still with the channel locks to protect against torque.
Next, install the propane line gasket around the propane line and onto the heater frame. You will likely need to use bare hands to install this gasket, which can be dicey as there are many sharp metal edges around this area, so exercise caution. This wasn’t a perfect fit as the propane line was not perfectly centered in the hole. So, I did have to play with the gasket a bit to get it to a good location around the propane line.
The final steps are connecting the plumbing lines and testing plumbing connections, the propane, and electrical systems
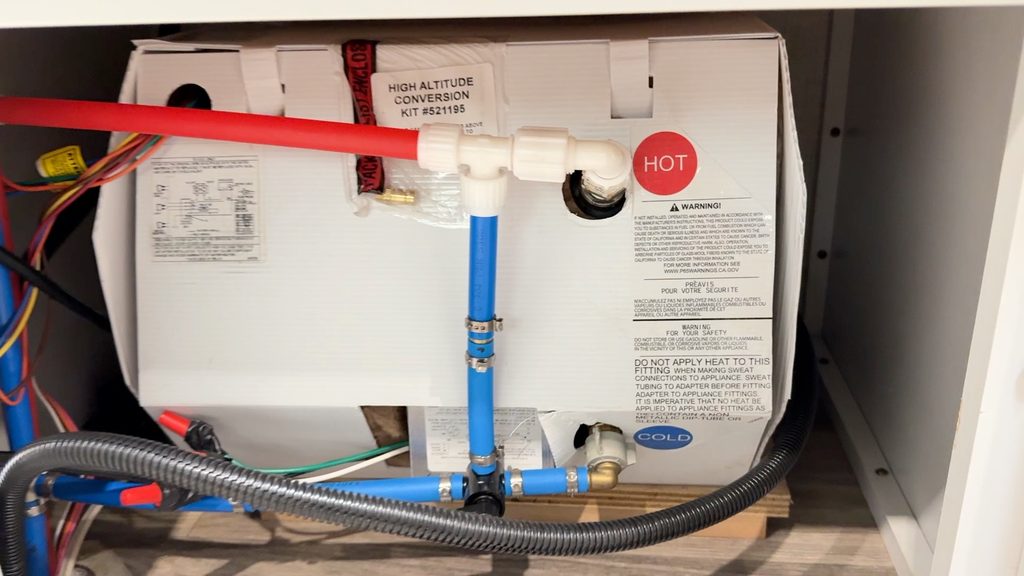
Even though the new Suburban unit was touted as a direct replacement for my Dometic, and it did fit perfectly in the RV’s cutout, one of the plumbing lines inside the unit did NOT matchup properly to the valve. So, the PEX line needed to be cut and adjusted to make this align properly. I will not cover changing the PEX lines here. There is a video on the channel that covers changing PEX pipes at the water heater.
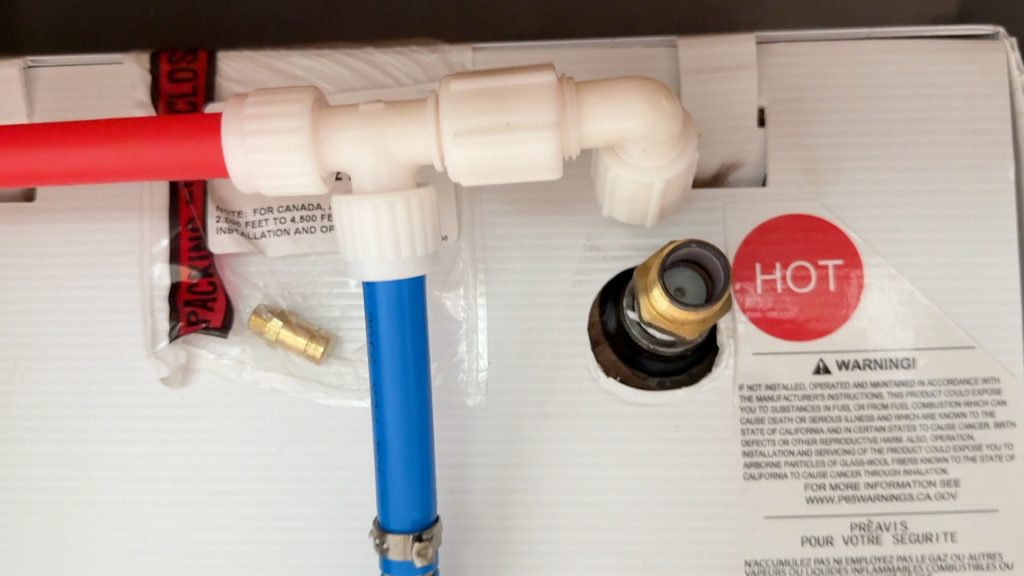
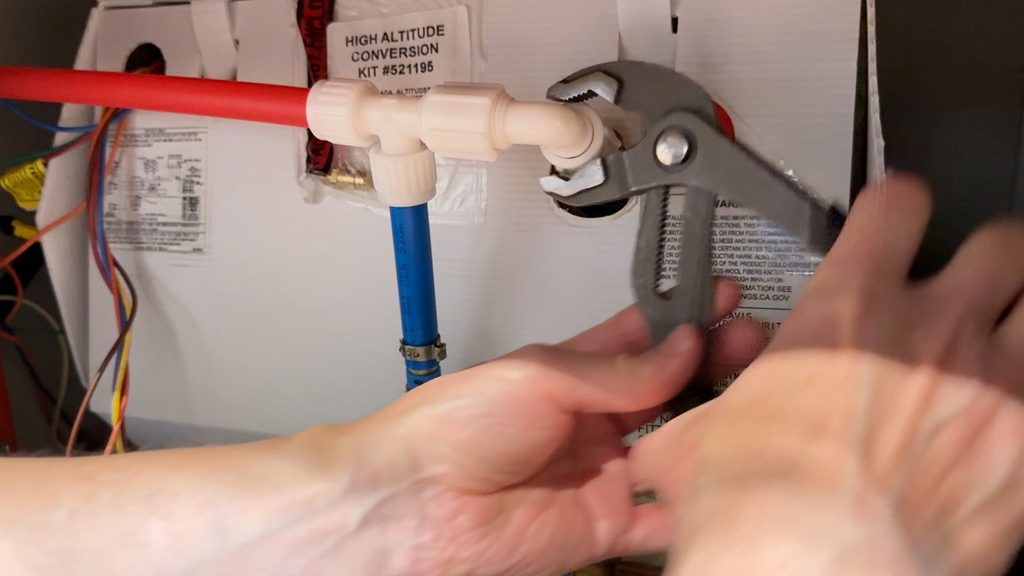
First, tighten both water line connections to the tank using channel locks. Here I used a medium set of channel locks to carefully tighten the upper and lower connections to the tank valves. Take very small turns with the channel locks and tighten firmly, but don’t overtighten the connection. The bottom connection was a bit more difficult getting the channel locks at the right angle to tighten the connection.
Next, check the plumbing lines for leaks. Open the bypass valve (if closed) to the new water tank and turn on the city water to the RV or water pump to pressurize water to the new unit. You should take a close look at the plumbing connections as the tank fills with water. You may be able to hear water go into the tank as it fills. If filling the tank with the water pump, the pump will turn off when the tank is filled, and the plumbing lines are fully pressurized. Check closely for water leaks at any of the fittings to the new water heater once the lines are pressurized.
Next, check the propane connection for leaks. Turn on the propane at the tanks of your RV. Use a propane leak tester at the new water heater’s propane connection outside on the unit. If you do have a leak as indicated by the tester, immediately turn off the propane at the tanks. Since Teflon plumbing tape is not required for this fitting, you will likely need to retighten this connection to ensure the seal is closed. Once this is done, re-test the connection while the propane is pressurized.
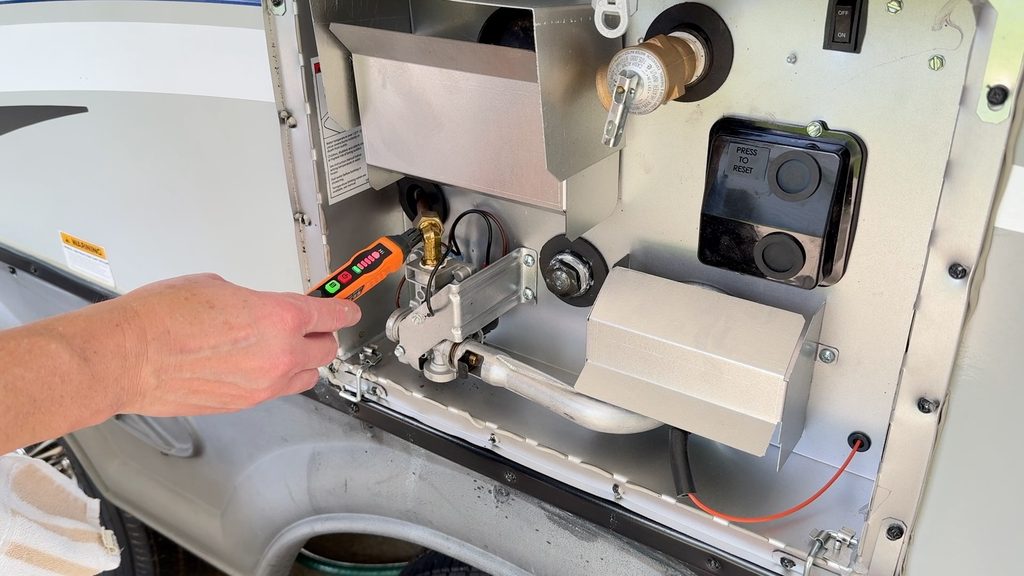
Next, turn on power to the unit. Flip the 120V breaker to the unit at the electrical panel and replace any 12V fuse that was removed at the start of the process. If you disconnected the battery, reconnect it at this point. Power should now be available for the unit to operate.
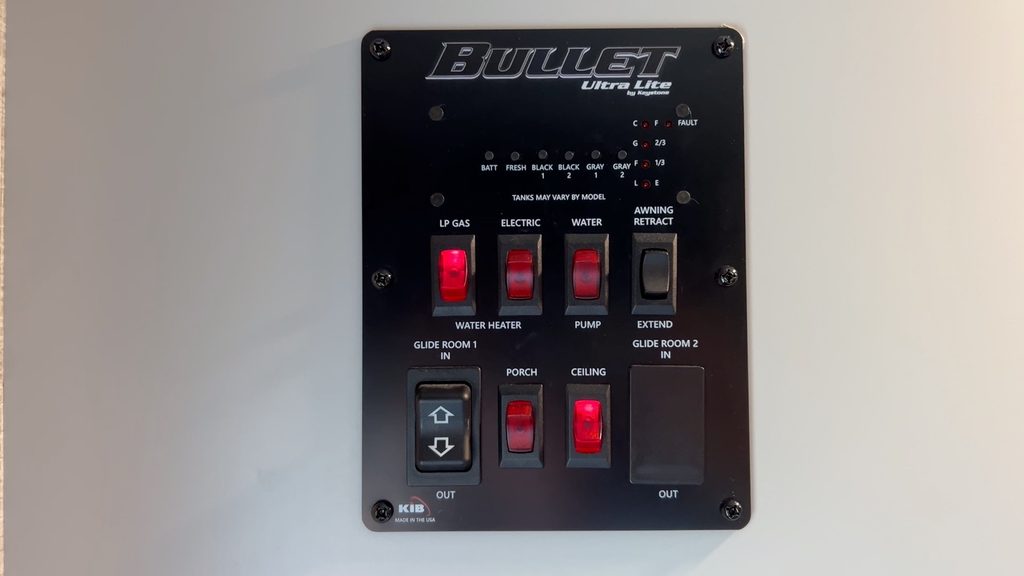
Next, test the propane firing at the new unit. Go to the control center of the RV and turn on the Propane switch to the water heater, then go outside to the new unit. You should hear the unit clicking to try to ignite the propane. The ignitor clicking is normal and will attempt three separate times before stopping. Also, if there is a clicking sound at the ignitor, it tells you that your wiring was installed properly. My unit fired up almost immediately and kept running without issue. Turn off the propane switch after 30 seconds to a minute of operation.
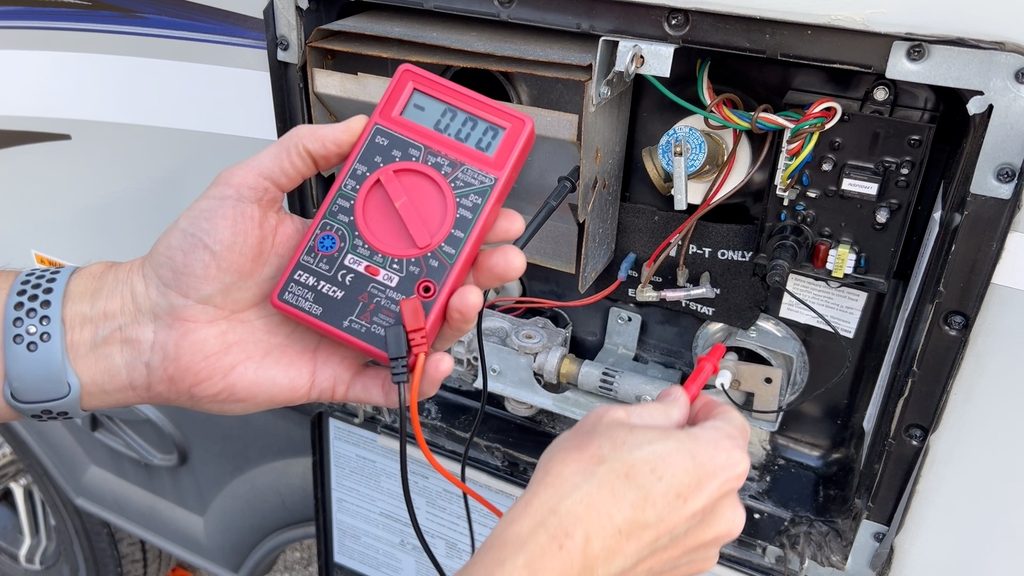
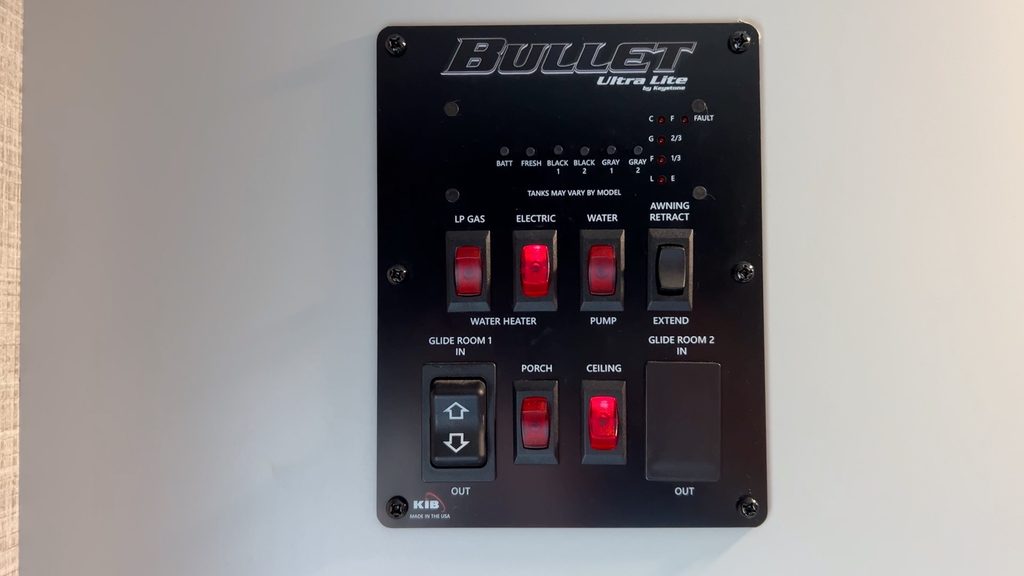
Next, test that the electrical element is working. Once you are confident the propane side is working properly, turn off the propane switch and turn on the electrical switch to the water heater. You can test that the electrical element has 120V with a multimeter at the connections at the unit, however, it may be easier to simply turn the electrical switch on and wait for 20+ minutes then turn the hot water on at a faucet nearest to the water heater. NEVER test the electrical element unless the tank is full of water as you can quickly burn out the element. You should in short order get very hot water at the faucet. I will not go into trouble shooting issues here, but we do have a complete RV Water Heater Troubleshooting video on the channel.
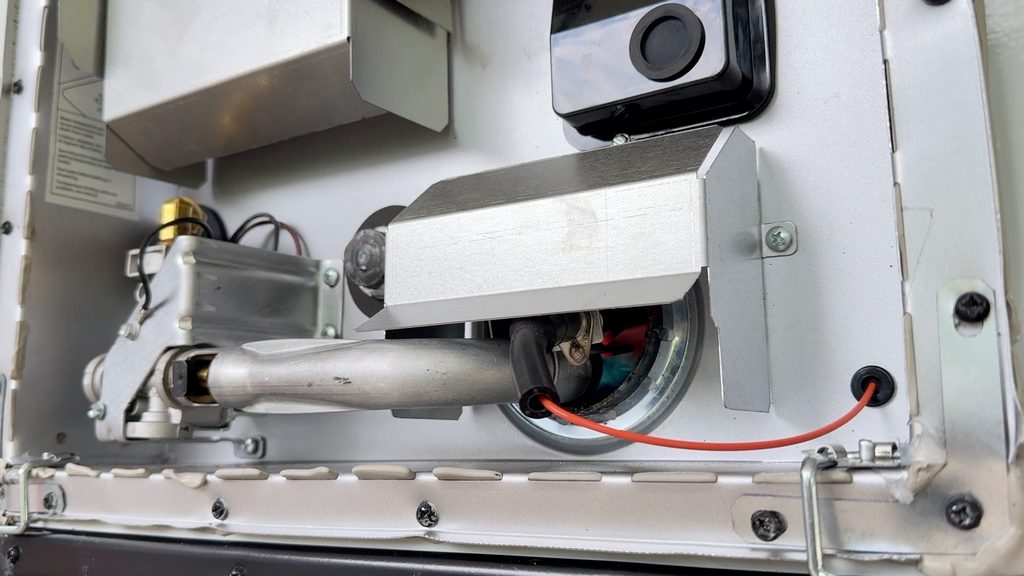
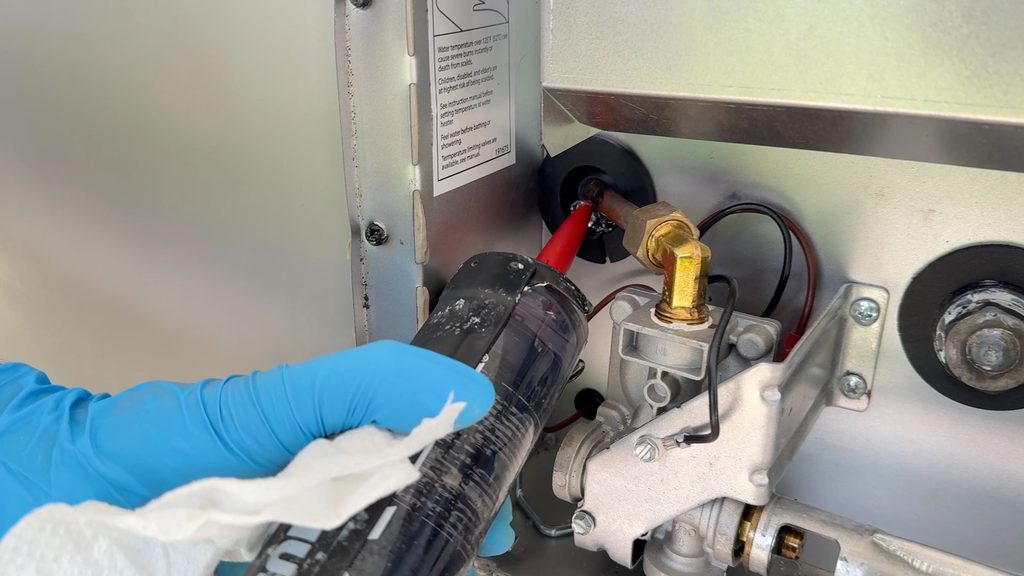
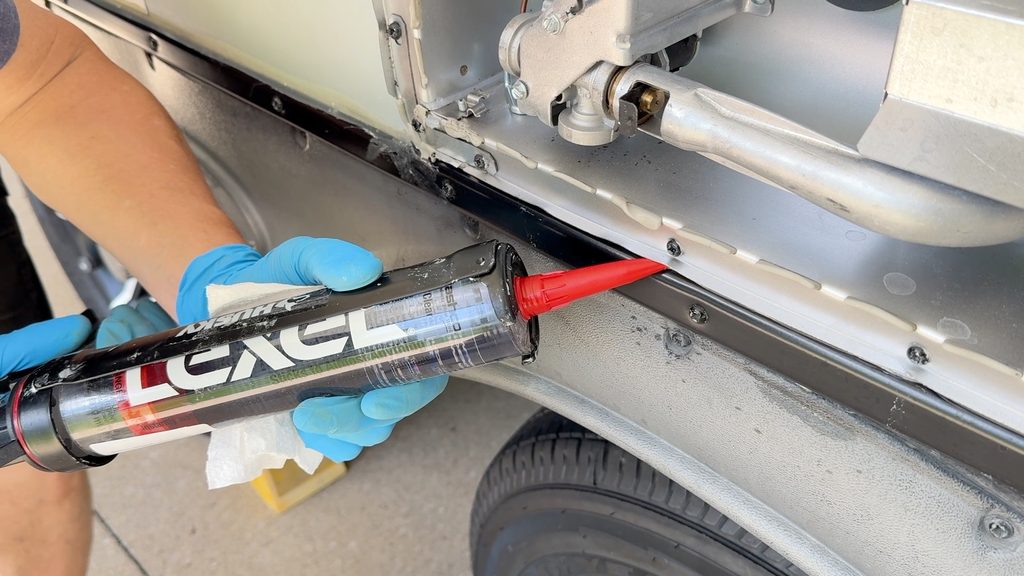
Next, caulk the rubber propane line gasket. I used clear Lexel Adhesive Caulk to fill in any gaps at the propane seal. I also used the same caulk to seal along the bottom of the unit.
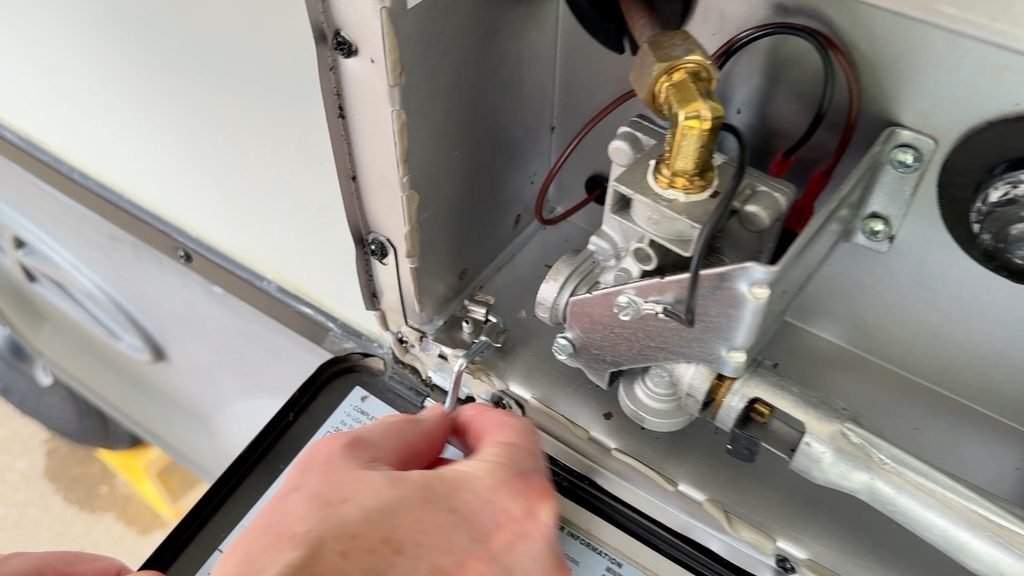
Finally, put the outside door on from the old unit. Slip the hinge pins in the outer door slits and fold the door closed, latching it with the spring-loaded clip.
I hope this process is helpful for you to decide if this is something you’d like to tackle on your own or get professional help with. Remember, you are dealing with propane and electricity, so please be very careful if you decide to do this type of work yourself. This process is what I did to solve my issue and is not an expert opinion or certified training video.
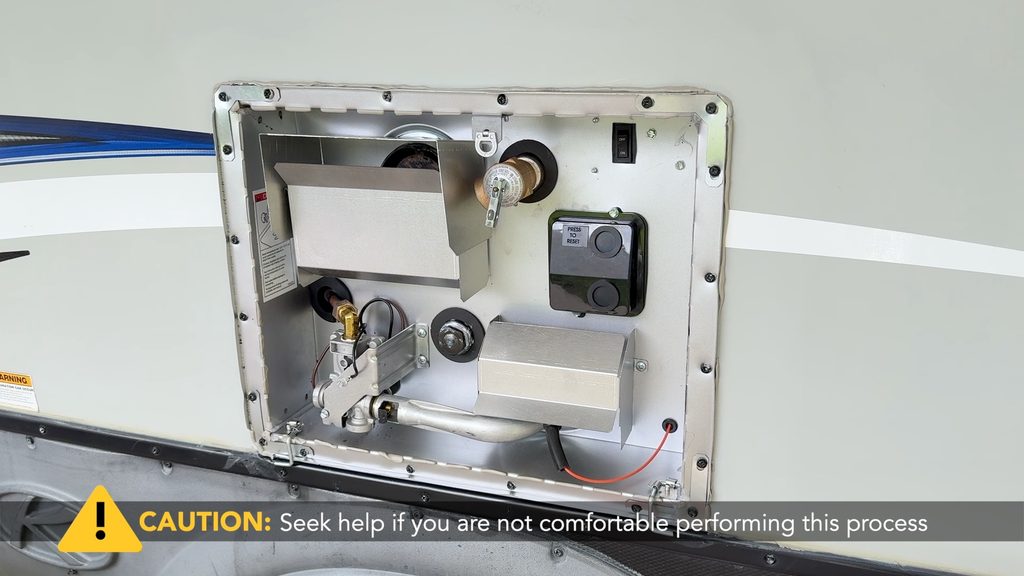
That should do it. All the best in your camping adventures!
As always, thanks to our fans who support our efforts by starting their shopping from our Amazon Storefront and their generous financial support by using the THANKS feature located under each YouTube video ($ within the Heart icon). Your support is greatly appreciated!